Author: admin

  • 09/11/25 – Happy Birthday, Mark!

    09/11/25 – Happy Birthday, Mark!

    Hello everyone, and welcome to another Quorn update. We start off wishing Mark a happy birthday. To celebrate, Alison with help from Dan made a Test Car 2 cake for us to share, which was very tasty!

    Charlie and I began by looking at the two welders collected last week, starting with an inspection. Firstly we noticed that the input cable on both sets were perished so these were removed. A new cable was made for the smaller set, and a bit more research is required for the larger set so these won’t be used for a little while

    Dave continued the push on 3606, signwriting the “Esso Petroleum Company Limited” wording on the West side.

    Nick and Ernie manufactured some more Esso plate brackets for 3689, bending then marking and drilling the holes and matching the bracket up into sets for each side of the tank.

    Charlie was able to use the smaller of the two new welding sets to practise welding on a very rotten spark guard from 3689. While we aren’t focusing on that tank, the opportunity to try out the welder was valuable

    Once the 3854 had been dried off, Mark, Oliver, Tom and I started the final sanding of the barrel aiming to get some red oxide primer applied.

    Dave and Dan continued with the signwriting on 3606 with Dan taking care of the OLE warning flashes, and Dave the lettering on the west side solebar.

    The signwriting on 3606 is pretty much complete aside from part of the west side OLE flash, picking out the SKF on the bearing end caps and of course the big Esso plates.

    Most of the team ended up with a brush of primer in their hand for 3854, getting the west side of the barrel and the two ends into red oxide, prepared for the next stage.

    We also noticed that the OLE flash mounting plate on the east side of 3854 was also positioned over the Esso Petroleum text, so Nick removed it. As we are before paint, this will likely be welded back to the tank on the other side of the ladder.

    That’s where we wrap up this update. Thanks for reading, and join us again next weekend! Cheers, Ross

  • Insight 12/08/25 – Large Logo Application

    Insight 12/08/25 – Large Logo Application

    Hi all, we’ve had a few queries about how we go about applying the large logos or numbers to wagons such as the running numbers or Shell and BP logos on tank 1919; so here’s a brief insight of how we go about it.

    1 – No, we don’t use vinyl’s or stickers !….

    2 – we draw up templates on the computer (full size) then print them out full size; larger templates have to be printed in parts and pieced together to form the full size paper template.

    3 – Once ready, the template has chalk rubbed to the back, rubbing over with fingers to ensure even application, then shake off any excess. White chalk is used for a black background, and red or blue coloured chalk for lighter areas.

    4 – Where necessary the wagon is prepared, such as for multi-colour logos where the background area is undercoated and the base colour applied.

    5 – The template is then positioned onto the wagon and taped to hold it in position and ensure it’s flat to the surface.

    6 – A pencil is then used to carefully trace around the outline of the logo or numbering

    7 – The template is then removed to reveal an chalked outline of the numbering or logo on the wagon. It may be easy to see on the black, but not so clear on the yellow background !

    8 – It’s then time to get out the paint and brushes. Normally starting at the lower left corner so as to reduce the risk of resting the mahl stick in any wet paint. The chalk outline is used as a guide for painting the numbers or logo.

    9 – For the larger logos the outlines are painted first using a signwriting brush, then the main areas painted with a larger brush.

    10 – The completed logos are left to dry thoroughly, then a coat of varnish is applied to help them last a bit longer and deter fading.

    Thanks for reading, all the best from the Quorn Wagon & Wagon team.

  • 01/06/2025 – Grey Tank

    01/06/2025 – Grey Tank

    As we move into June, we get the spraying equipment out to give tank 1919 its undercoat.

    On Saturday the final parts of the underframe were scraped and needle gunned.

    A few areas had some red-oxide primer applied, which dried quickly in the sunshine.

    During the week a replacement for a missing 4″ tank top cap was created by 3d printing, this was sealed to the adaptor and will be fitted to the tank in due course.

    Whilst the 1940s weekend was getting into full swing in the yard, we got the BBQ equipment out to celebrate Ross’s birthday, as a much enjoyed change to a birthday cake. The salvaged and repaired picnic tables being put to good use.
    HAPPY BIRTHDAY Ross ! Thanks for the BBQ 🙂

    After lunch Edward the compressor was topped up with diesel and we got prepared to start applying the undercoat. The spray gun was set-up, the paint was mixed and thinned; once we had the right consistency this was poured through a filter into the paint sprayer can.

    Over the next few hours Ross and myself sprayed the tank barrel, with a little help from Dan and Harry who also tried their hand with the spray gun.

    Once the barrel was covered, we continued with the west side underframe.

    On Sunday the last few areas of the east side suspension were given a coat of red-oxide, which thanks to the sunshine dried quite quickly.

    The headstocks, buffers and east side solebar were hand brushed with undercoat. These areas were not easy to get to with the spray gun due to the wagon being in the dock. The ladders were also undercoated.

    Another lorry curtain side sheet obtained from a lorry breakers was prepared ready to be used for van roof coverings. After cleaning and removal of the shackles and straps the sheet was measured up; luckily it’s just big enough to be able to get two 12T van roof coverings out of. Once Charlie had cut the sheets they were folded and stored.

    My attention turned to making a jig that will help us with positioning of the Esso logo plates on tank 3621. Unfortunately the Esso plate brackets were removed at some point in the tanks life. The jig will allow us to position the brackets correctly for welding into place. Having tank 3606 alongside with brackets still in-tact made creating the jig much easier. Two ply sheets were clamped to the two upper and lower sets of brackets on 3606.

    The ply were cut to shape to allow access to the brackets for welding. Holes were then drilled and the ply was bolted to the brackets.

    Timber was then used to create a frame down to the solebar for positioning vertically, and a separate timber up against the handbrake rack to position longitudinally. Frame parts were then made to join the upper and lower ply sections together. Once I was happy with the fit, all parts were drilled and bolted together.

    The finished jig was then un-bolted from 3606s brackets.

    Once we have made the new Esso plate brackets for 3621 these will then be bolted to the back of the jig, and the frame positioned onto 3621 so the brackets can be welded into the correct place.

    So a very productive (and enjoyable) weekend for the team, join us again next week, all the best, Dave

  • 11/05/2025 – All Hands to the Tank

    11/05/2025 – All Hands to the Tank

    Hello and welcome to a sunny weekend update from Quorn; we’ve continued with getting tank 1919 ready for paint and completed a small repair to part of the brake rigging on the Lowfit.

    Lowfit wagon B452718 is due to go to Rothley at some point for underframe repairs, in the meantime we need to progress other jobs which include a repair to a broken part of the brake rigging. One of the twin operating arms has a fractured spacer and a missing spacer. To make the repair easier, on Saturday the arm was removed from the wagon.

    The spacer attachment areas were cleaned up and a new spacer cut from a piece of tubing.

    The arm assembly was then clamped together and welded up.

    The rigging arm was then treated to a coat of red oxide primer, followed by a coat of gloss black.

    Dan continued with his work on the A-Type container, cleaning up more of the metalwork and applying red-oxide primer.

    The main focus for the weekend has been needle gunning, sanding and scraping of tank 1919 to progress closer to being able to apply paint.

    Where bare metal was revealed, red oxide primer was applied and when dry the north end headstock panel had grey undercoat.

    On Sunday the sanding and scraping continued on tank 1919, also a couple of areas on tanks 3621 and 3606 were attended to.

    Again any bare metal areas on all 3 tanks were treated to some red oxide primer.

    The repaired brake rigging arm was re-fitted to the Lowfit after straightening the locating pins.

    The sticker glue residue was removed from the west side of tank 1919.

    Next week with most of the team away, we’ll be taking a break from reporting any activity until we’re back for the Bank Holiday bumper weekend at the end of the month.

    Cheers for now, Dave

  • 27/04/2025 – A weekend for the Diesels

    27/04/2025 – A weekend for the Diesels

    Hello and welcome to a Diesel Gala weekend update from the team at Quorn. We’ve again had Test Car 2 open to visitors, and we’re pleased to announce the arrival of our NEW updated Pocket Stockbooks which give full details of all the vehicles in our fleet.

    We took the opportunity to have our sales stand out alongside the booking-on point for the Drive a Shunter event that proved very popular.

    Although the shunter movements restricted our working area, we did manage to progress work on the splash guards from 3621. The badly corroded areas of the last splash guard were ground out by Ross and fresh plate welded in.

    New mounting holes were drilled in all four splash guards, then a coat of red-oxide primer applied. Three were then re-fitted to tank 3621.

    A new lawnmower was acquired from the car-boot sale that will help keep our working areas of the yard tidy through the summer. Charlie soon got it working, then stripped it down to clean up and paint; whilst Ernie modified an old fire extinguisher to make a moneybox to go on the sales stand.

    The Test Car was steadily busy throughout the weekend. Thank you to all the many interested visitors who took time to listen to my ramblings and find out about the history of the coach and what it was used for by British Rail.

    We made progress with getting some old test equipment working, including the tachometer and distance 1/8 mile pulse output, the accelerometer (that was used for measuring wagon stability) and the thermal paper chart recorder.

    A fabulous weekend for the diesels thundering past the Test Car too.

    Join us again next week when we’ll be fully focussed on the wagons.

    I’ll leave you with another diesel….

    All the best, Dave

  • 02/03/2025 – Just the Chassis

    02/03/2025 – Just the Chassis

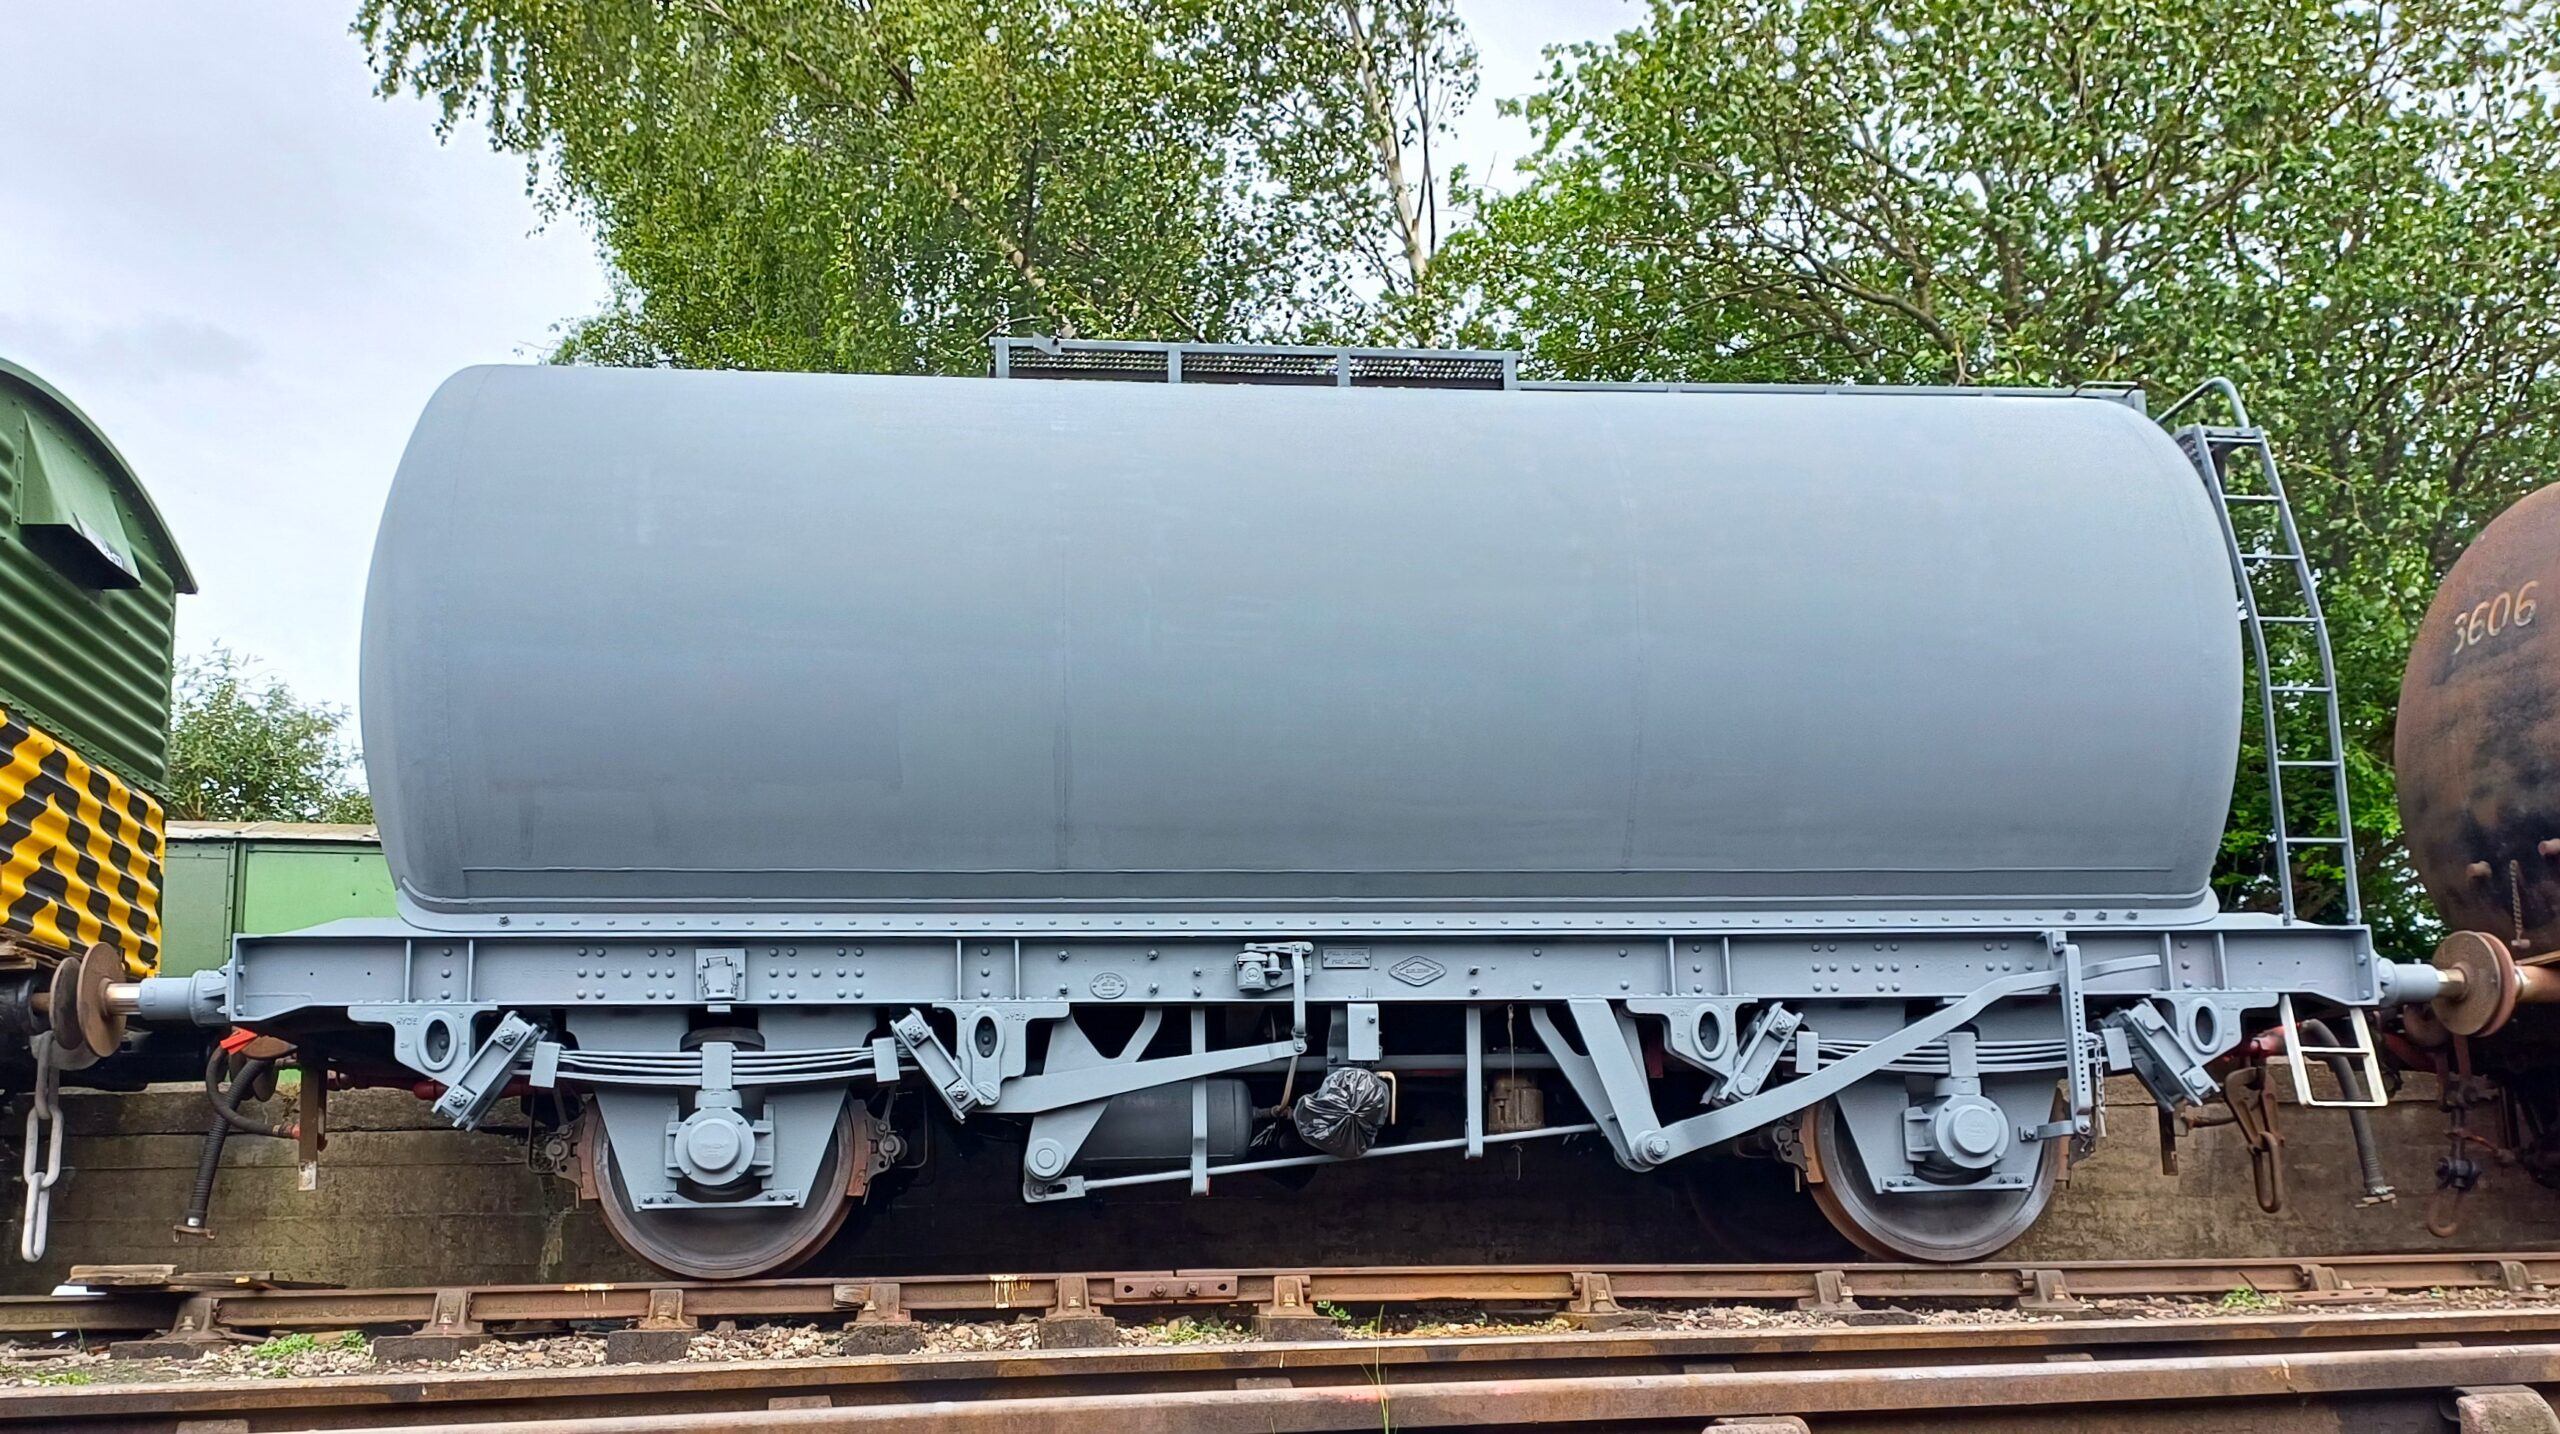
    Hello and welcome to the first March 2025 update from Quorn. This week we welcome another arrival, the chassis from an ex. Esso 35T tank, and we get to work freeing off the seized brake rigging.

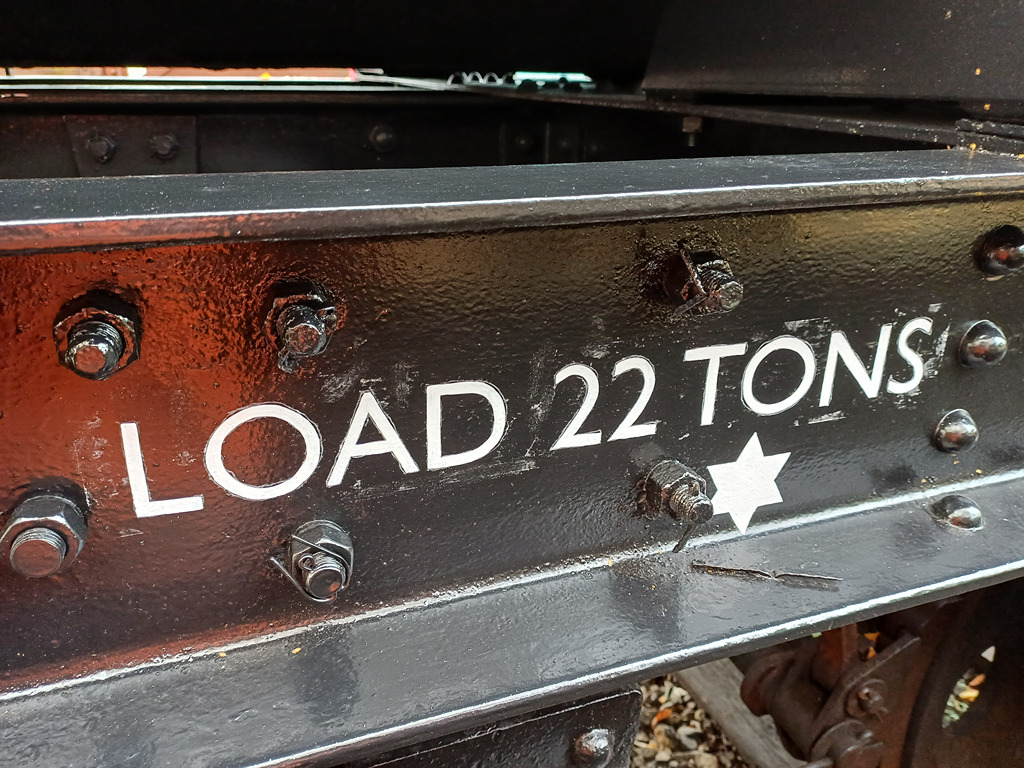
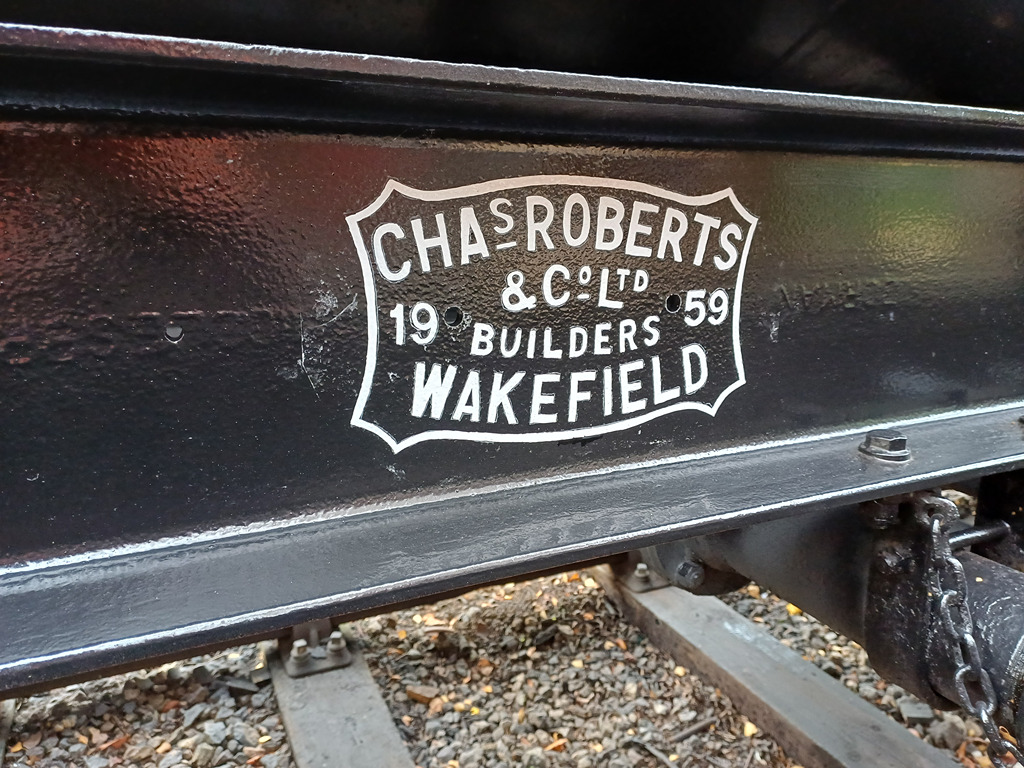
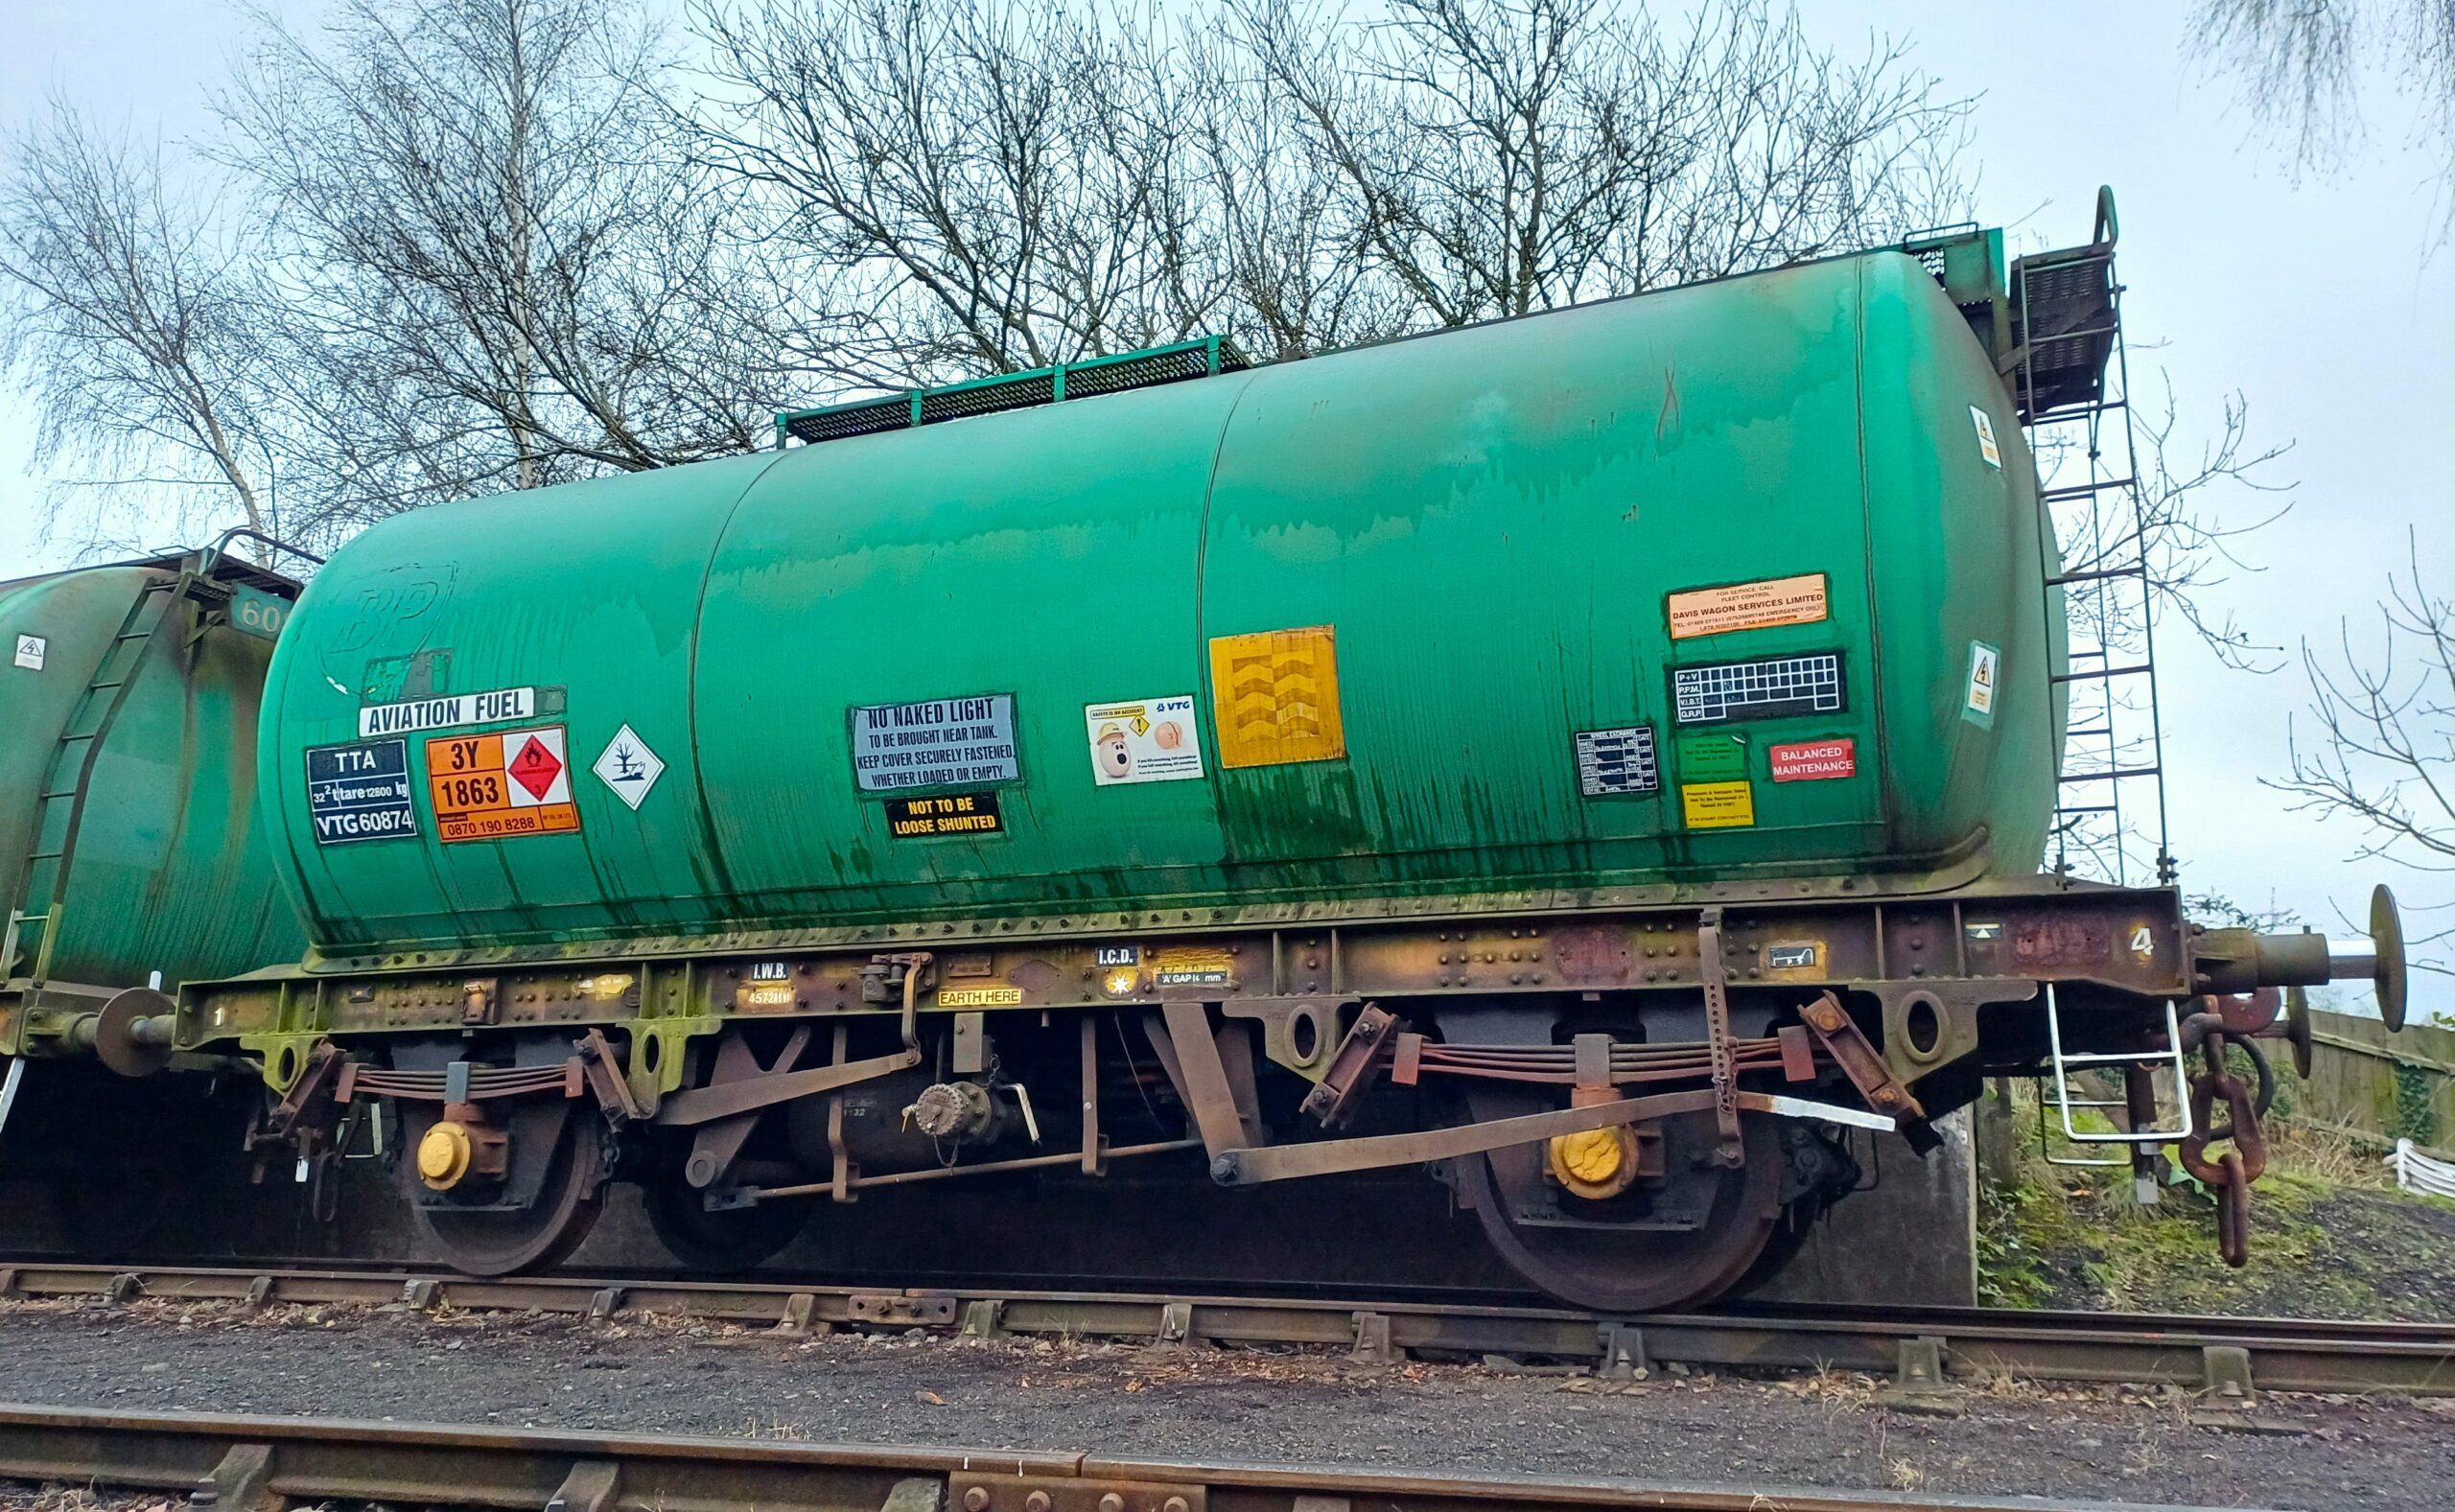
    The chassis was built in 1958 by Charles Roberts as a 35T tank for Esso. It passed to the CEGB at Meaford Power Station and was renumbered 48521. At some point the tank barrel was removed and it was preserved at the Foxfield Railway in 1991. As yet we have not established it’s original Esso identity.

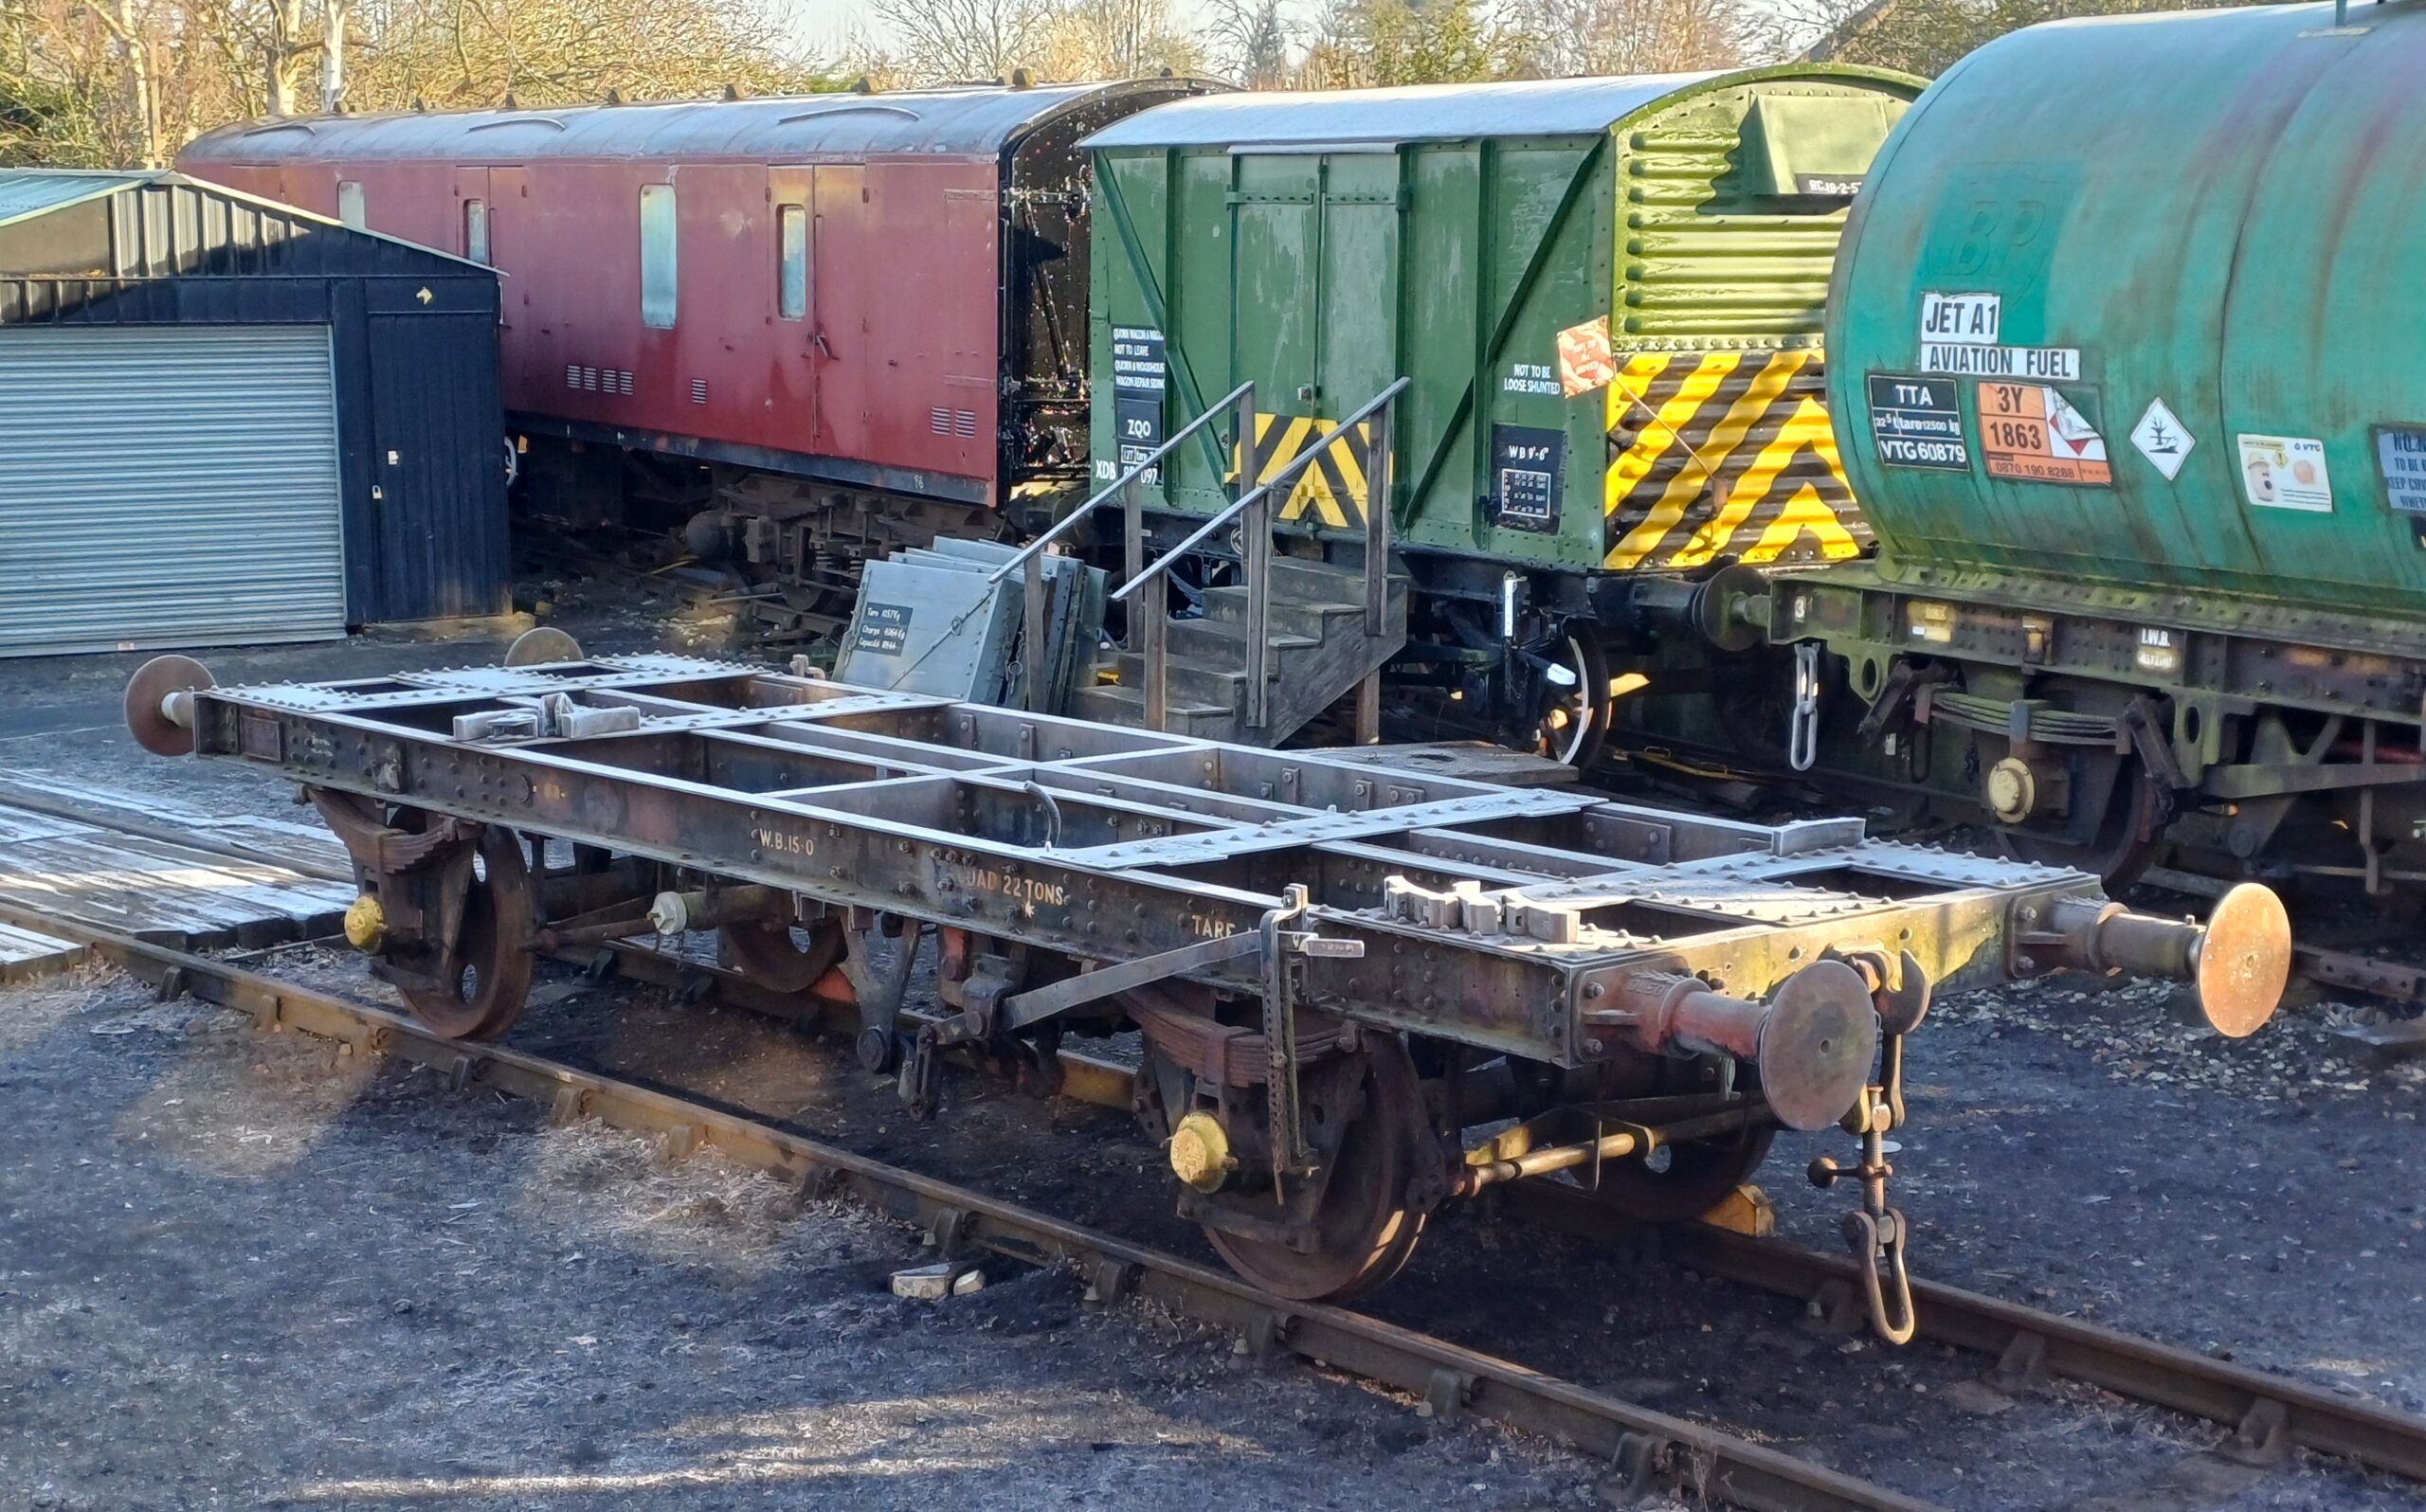
    The chassis had arrived with a number of old sleepers stored on top; the first job was to get these removed which Nick did on Friday.

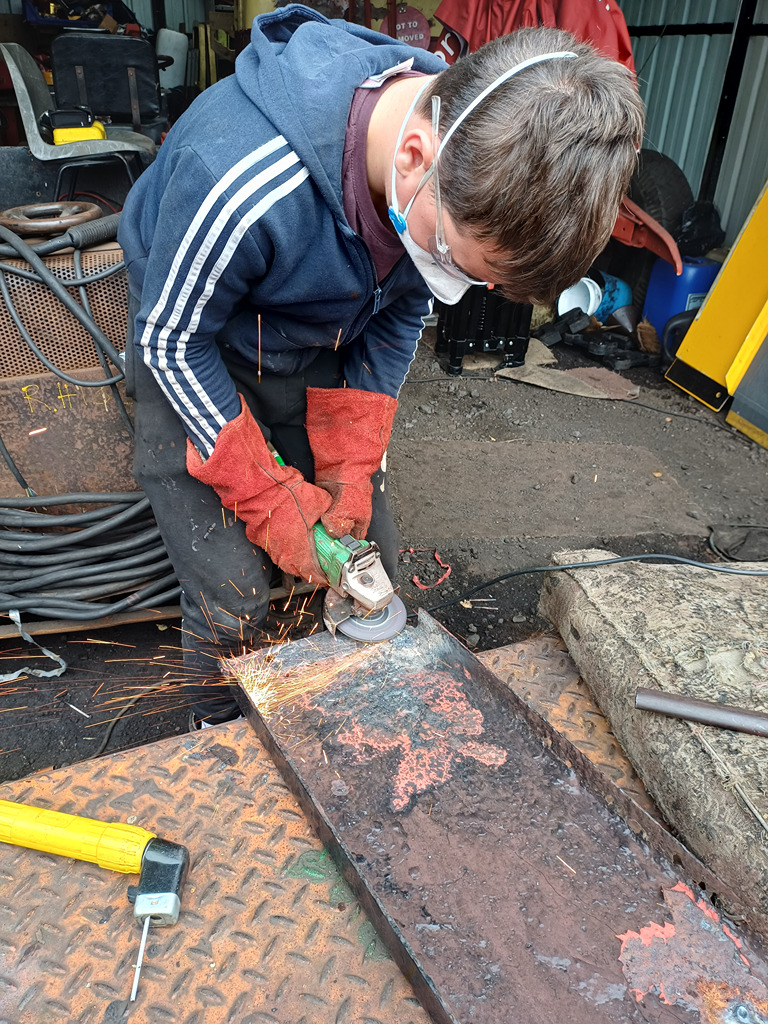
    With the chassis empty and looking very much like a part-built Airfix kit, we could give it a proper inspection. In general it’s structurally in very good order, although the brakes are completely seized on, the couplings are seized up and all the rubber hoses are perished. On Saturday with Nick, Ernie, Ross, Charlie, Harry and myself on-site we made a start trying to free up the brakes so the chassis could be moved. A couple of pins were removed from the brake rigging to separate the rigging into sections so we could tackle each end of the chassis separately.

    The seized brakes were however being really stubborn, so the Volvo was called upon to provide a little extra grunt to move the bow girders and subsequently get the brake blocks free from the wheels.

    This proved successful and allowed us to move the chassis from the yard into our working area. Once there we could get the power tools and heating equipment to the chassis. Ernie got to work removing the spark guard plates which Ross had numbered up. Some of the old tank barrel mounting rivets were also removed.

    The pressure washer was used to remove as much of the muck, debris and old grease from the brake rigging joints, whilst the remaining parts of the old barrel mountings were dealt with.

    The brake blocks and carriers were removed from the south end, a number of which required a little heat to release the pins; these were then cleaned up by Charlie and Harry.

    We worked our way back along the south end brake rigging joint by joint, heating where necessary to free up the pins and allowing each section of the rigging to move freely. The joints were then well oiled.

    Pins were removed from the vacuum brake cylinder piston rods, and heat was applied to the cross shaft, however despite this the centre section of the rigging and cross shaft parts were not wanting to move freely. All the joints were well oiled and left to soak.

    A start was made removing the brake blocks and carriers from the north end and the brake cylinder mounting trunnion bolts were freed off; whilst Nick and Ernie had a go at freeing of the south end coupling with a little heat.

    Sunday continued much the same with Nick, Ross, Ernie, Mark, Tom, Oliver, Dan, Charlie and myself on-site. Despite the oiling up yesterday our efforts to try and un-seize the cross shafts failed. We therefore decided that it would be easier to get the vacuum brake cylinders out of the way; they need to be removed anyway for overhaul. The piston rods and safety loops were removed from both cylinders, one release valve came away easily however the other was seized solid. Dan made a start refurbishing one release valve.

    Nick and Charlie continued with the north end brake gear dismantling and cleaning up whilst Ross, Ernie and myself got the vacuum cylinders ready for removal. The Volvo was used to lift the cylinders out of the top of the chassis, a much easier task without a tank barrel in the way, rather than having to drop them out underneath. In order to release each cylinder from their trunnions we did need to burn off the lower mounting bolt as these had been fitted the wrong way round.

    The second cylinder was removed in the same manner, with a bit of heat needing to be applied to the trunnions to release them.

    Making the most of the sunshine, Mark, Tom and Oliver got to work with some Black Gloss on the north end of the GUV.

    With the tank chassis vacuum brake cylinders out of the way we were able to dismantle the brake adjuster and apply some heat to release the cross shafts.

    We then moved along the chassis towards the north end heating and oiling to release the each of the seized brake rigging joints.

    The linkages between the north end bow girders needed dismantling to free them off.

    The brake rods, links and pins were all cleaned up.

    Then re-assembled with a good dose of grease in all joints.

    The final parts to be assembled were the brake adjuster; to do this span-set straps were fitted across the bow girders at both ends to bring the blocks up to the wheels. Then with 1/2″ spacers fitted between one block and the wheel at each end, the straps tightened. The adjustment pin was then fitted in the nearest aligning hole and the straps released. The handbrakes were then checked for operation at both ends.

    Although there is still much to do, we’re happy to report we now have a free rolling chassis with operational handbrakes.

    Join us again next week; all the best, Dave

  • 19/01/2025 – Tank Pipes

    19/01/2025 – Tank Pipes

    Hello and welcome to another cold weekend update from Quorn. We have reassembled a vacuum cylinder and started manufacturing the vacuum piping for the two TTA Tanks.

    On Saturday morning The Class 50 arrived to collect the van train from the yard in preparation for next weeks Winter Steam Gala.

    Ross fitted a replacement coil pack to the small petrol generator which was then successfully started up. This will be a useful addition to provide power for small tools etc. when we are working away from a mains supply in the yard for example.

    Ross and Ernie then got started selecting suitable pieces of vacuum pipe and modifying lengths and elbow joints to produce the main stepped section of pipe for the first TTA, some heat was necessary to release old joints; the pipe was trimmed to length and new threaded sections cut before assembling.

    The stepped pipe section was trial fitted to TTA 60874 along with the swan neck hose adaptor on the headstock.

    On the vacuum cylinder that had been started a couple of weeks ago, the release valve mounting threads were cleaned up using a die-nut. The piston rod gland was removed, studs cleaned to and the seal replaced with a new one.

    The cylinder was then re-assembled, firstly fitting the piston adaptor that allows a piston rod to be fitted from the top to aid lifting it into place. The rolling was carefully fitted to the upper edge of the piston then the piston was lowered into the cylinder, with a little jiggling to get it to go down evenly.

    The dome was then re-fitted with a new sealing ring and the securing nuts torqued up.

    A transport screw was fitted to the vac cylinder to keep the piston in place preventing damage to the rolling ring, this allowed the cylinder to be turned as necessary for scraping and wire brushing. It was then cleaned before being given a coat of Red Oxide primer.

    A second stepped vacuum pipe section was prepared for 60879.

    Sunday was very much a tidying up day, although some progress was made with cleaning up the final areas of the south end of the GUV, then applying Red Oxide primer to the metal parts.

    The inside of the Mess Coach and GUV were both given a good tidy up along with sorting out the taps and dies that had been recently donated.

    Once the Red Oxide had dried on the end of the GUV the wood areas were treated with wood primer.

    The two TTAs had their vacuum pipes removed when in main line service many years ago; along with the pipes some of the multi pipe brackets were cut back. It was therefore necessary to remove these brackets to allow us to make and re-fit the missing sections that will hold the new vacuum pipe. Some bolts un-did easily whilst others needed the grinder treatment.

    Using a piece of scrap plate of the right thickness, sections were cut, dressed and bent to form the vacuum pipe part for each bracket. These will subsequently be welded to the existing brackets at a later date.

    https://tickets.gcrailway.co.uk/events/91505That wraps up another cold but busy weekend for us; thanks for reading, join us again next week when the GCR will be running the Winter Steam Gala.

    More info here :- Winter Steam Gala 2025

  • 05/01/25 – Cool Tanks

    05/01/25 – Cool Tanks

    Hello and welcome to our first update for 2025. We have been painting the GUV when the weather has allowed, assessing parts for the tank wagon vacuum piping, and doing some housekeeping.

    Mark, Tom, Dan and Oliver took the opportunity of the good weather on New Years Eve to get the West side of the GUV painted in gloss. They also started work on the south end doors.

    On Saturday Nick, Ernie, Charlie and myself made a start collecting together and assessing what pipework we have that could be used for the vacuum through piping of the three tank wagons. The pipe route on the two TTA wagons is relatively straightforward as these two wagons were vac through pipe fitted when new. Some of the brackets still remain too.

    The TEA however has never had a vacuum pipe so sorting the best route and where to fit suitable mounting brackets is a little more complex.

    On Sunday Mark, Tom, Dan and Oliver continued with the housekeeping including erecting some much needed storage shelving in the Fish Van.

    It was great to see the tanks running throughout the weekend that were being operated as part of staff training exercises.

    Thanks for reading, join us again next week, best regards, Dave

  • 31/12/2024 – Happy New Year

    31/12/2024 – Happy New Year

    Thank you to everyone who has supported us throughout 2024; we’ve enjoyed the busy year and are very much looking forward to getting stuck in to some new projects during 2025.

    Here’s our end of year roundup in pictures.

    Happy New Year from the team at Quorn Wagon & Wagon

  • 15/12/24 – A Lowfit at last!

    15/12/24 – A Lowfit at last!

    Hello all and welcome to this week’s update; after many years waiting we finally welcome the arrival of our Lowfit wagon into the fleet.

    Lowfit B452718 was built at Shildon in 1957 in Lot No.2729, to Diagram 1/002.
    It was last used on the main network at Basingstoke as an internal user wagon numbered 083473 and entered preservation in 2007 at the Mid Hants Railway.  The wagon arrived at Quorn during the week loaded with a D-type open container that had been constructed during preservation. Although the floor of the container looked quite rotten in places, our initial thoughts were to try and lift the container off the wagon in readiness for some necessary underframe and floor repairs.

    The Volvo was positioned and we attached some straps to the lifting eyes; gently raising the forks however pulled two of the lifting eyes straight out of the framework; it was somewhat more rotten than we had realised.

    So onto plan B; we decided to dismantle the container in situ on the wagon. Whilst the floor and side framework was rotten and not saveable, the side panels, corner framework and doors were quite solid. With most of the team on-site on Saturday things happened quite quickly, the doors were removed, end panels unbolted from the sides and the parts lifted from the wagon onto the Volvo forks for moving to storage.

    The remainder of the rotten framework was swept off the wagon and disposed of with the help of Hector and his trailer.

    The south east corner door frame of the Lowfit, catch pin and loop had taken a bash at some point in its life.  Ernie got out the gas bottles and heated up the bent loop which was straightened with Nick’s favourite item from his toolbox. Once cooled the area was treated with re-oxide primer.

    With most of the team on-site Mark treated us to some fabulous turkey & duck Christmas baguettes for lunch, thanks Mark and the chefs helpers.

    Further progress was also made on Test Car 2s generator; Ross and myself drained the coolant out of the engine, removed the rocker shaft, the cylinder head, and finally got to the bottom of the poor starting and lumpy running. The cylinder head gasket had totally failed between cylinders 1 and 2.

    The cylinder head studs were removed from the block and surfaces cleaned, cylinder bores cleaned & hoovered out, checked for condition and the engine set to No.1  piston at TDC.

    On Sunday myself and Ross dismantled the cylinder head removing the cam followers and valves; the large pillar drill made an excellent valve spring compressor.

    The cylinder head was then soaked in a bath of warm degreaser solution and as much of the gunk removed as possible. Further cleaning up is planned for next week.

    The repaired corner on the Lowfit was given a coat of gloss Bauxite.

    The two Catfish wagons are planned to leave Quorn next week, in readiness we completed a vacuum brake test on both wagons, finding a slightly suspect vacuum cylinder branch pipe on DB983393 which was duly replaced.

    Thanks for reading, join us again next week, all the best, Dave