Hello everyone and welcome to another update from Quorn. We’re eager to get 1919 finished, but this weekend the wet weather has diverted us to other things.
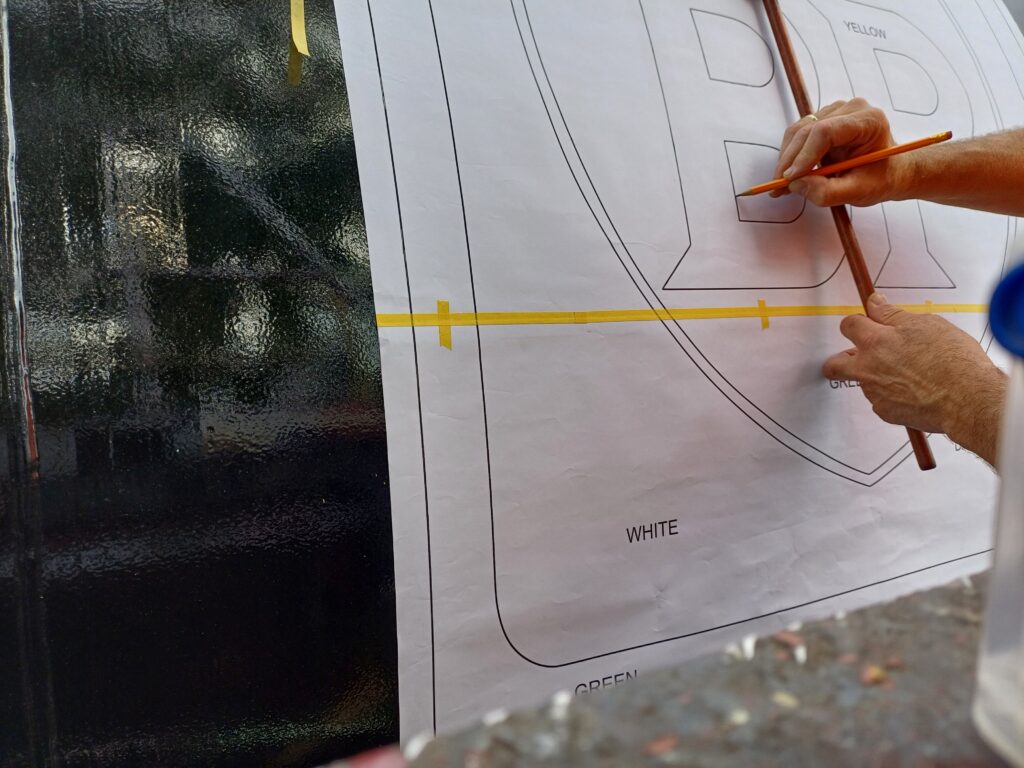
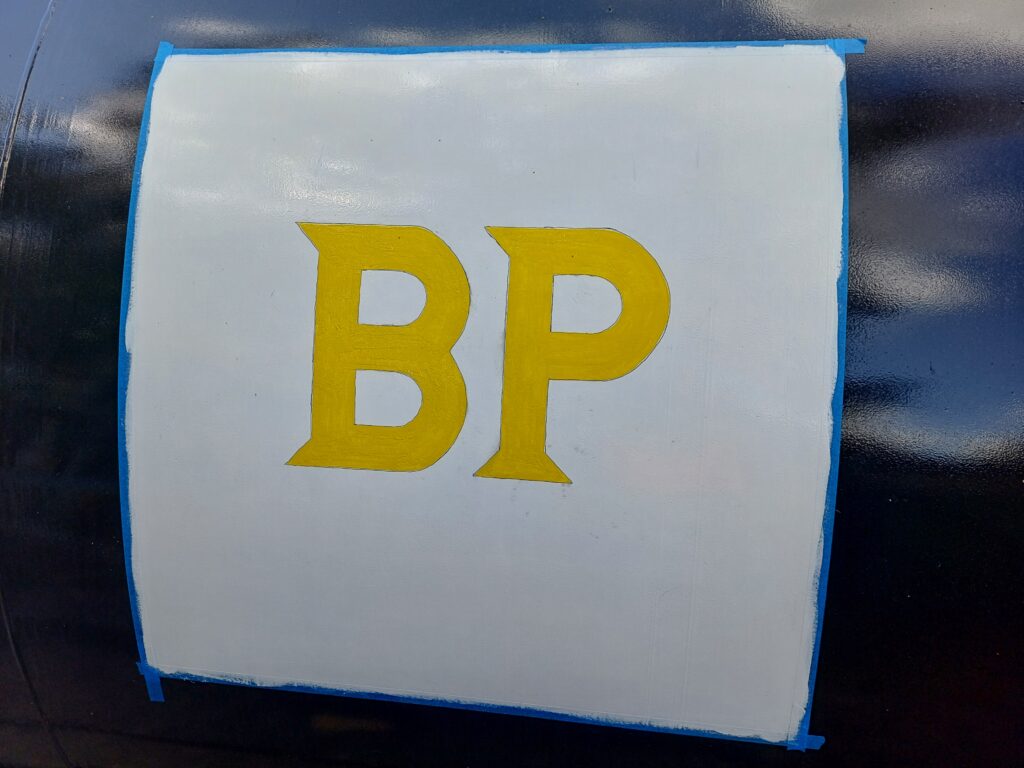
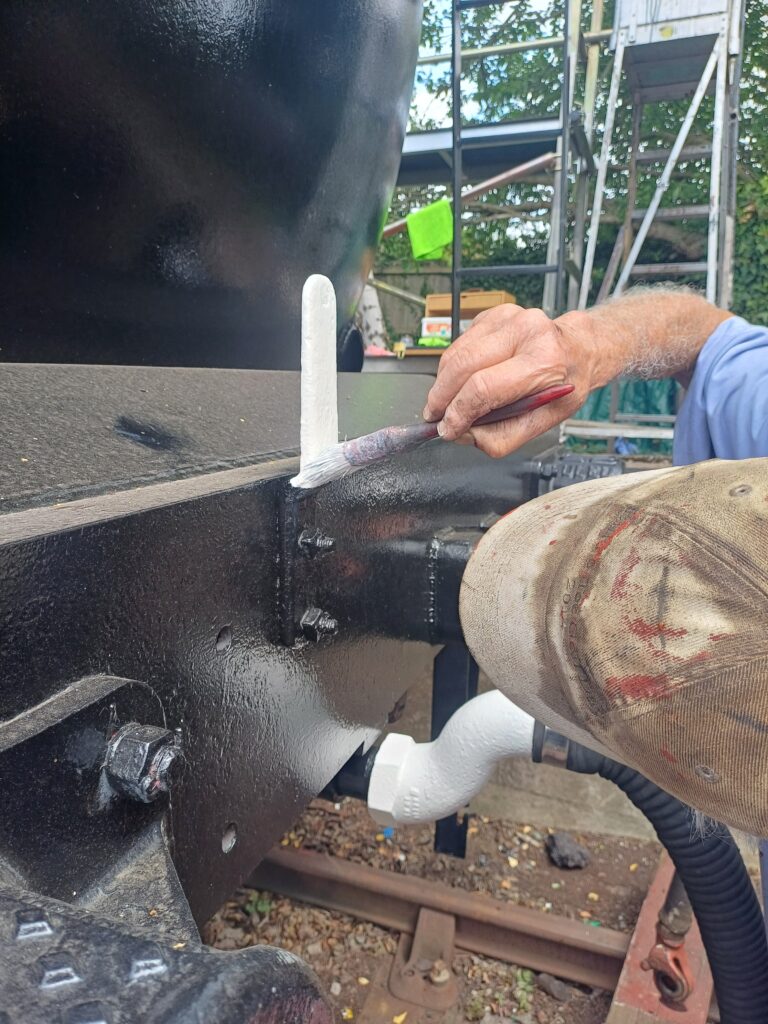
Dave popped in on Friday to get some more paint on 1919, concentrating on the yellow aspects, so the yellow Private Owner symbols and the BP on the east side of the barrel. He also got some red out and put a first coat on the air brake pipe cocks and pipe ends.
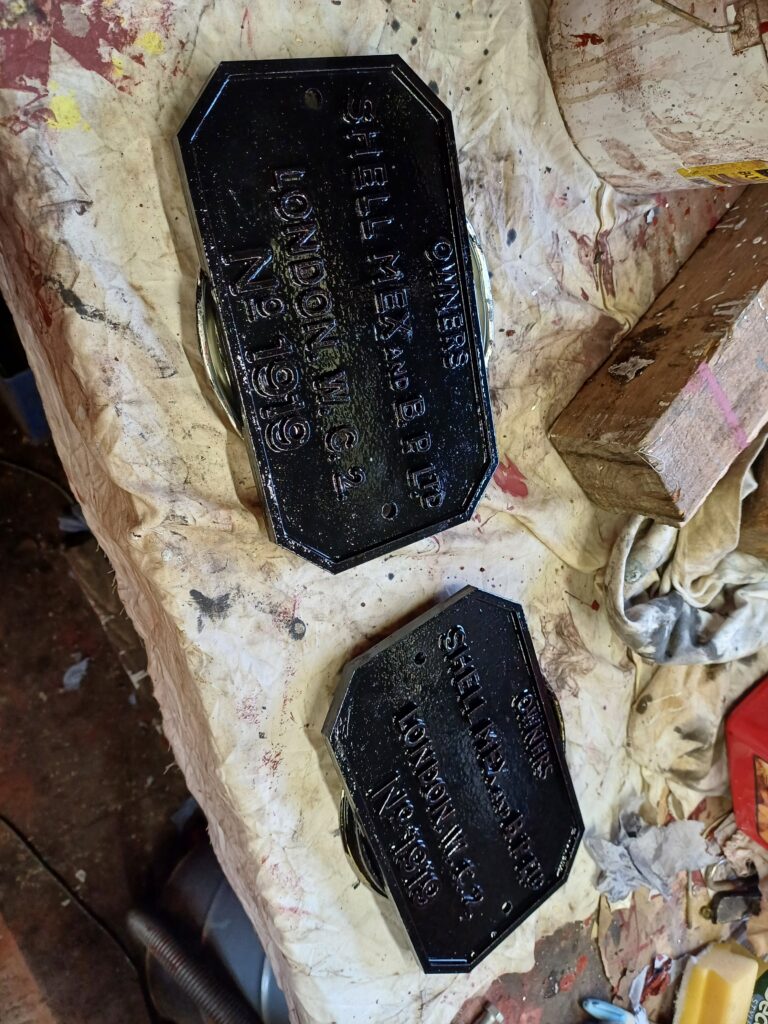
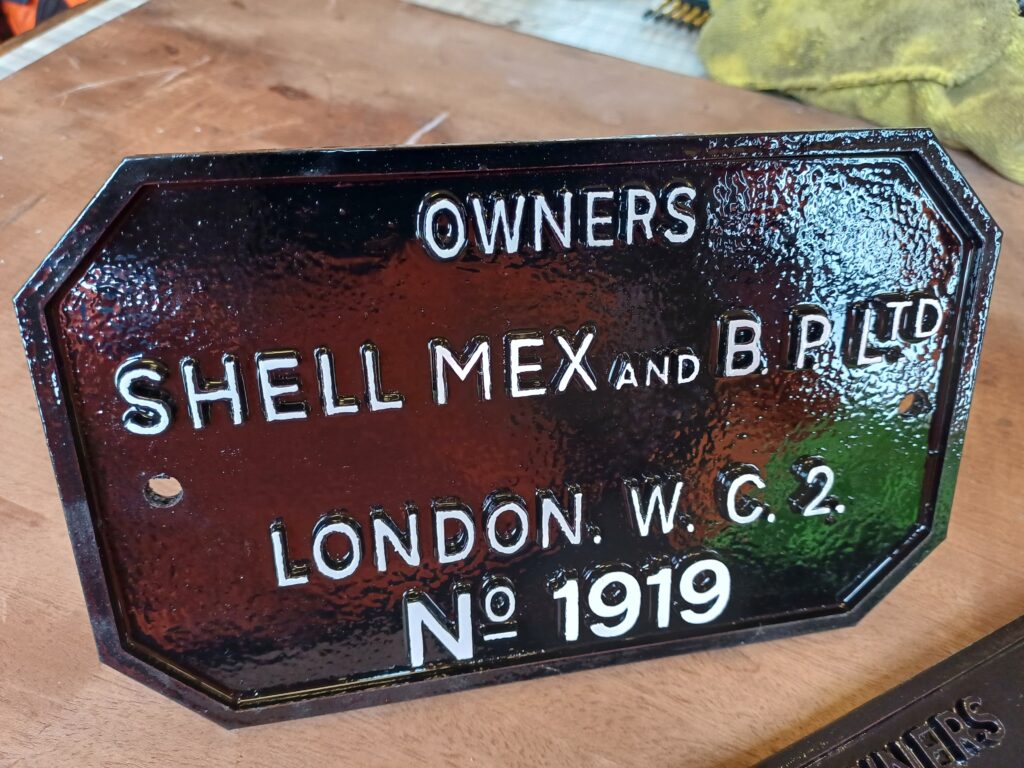
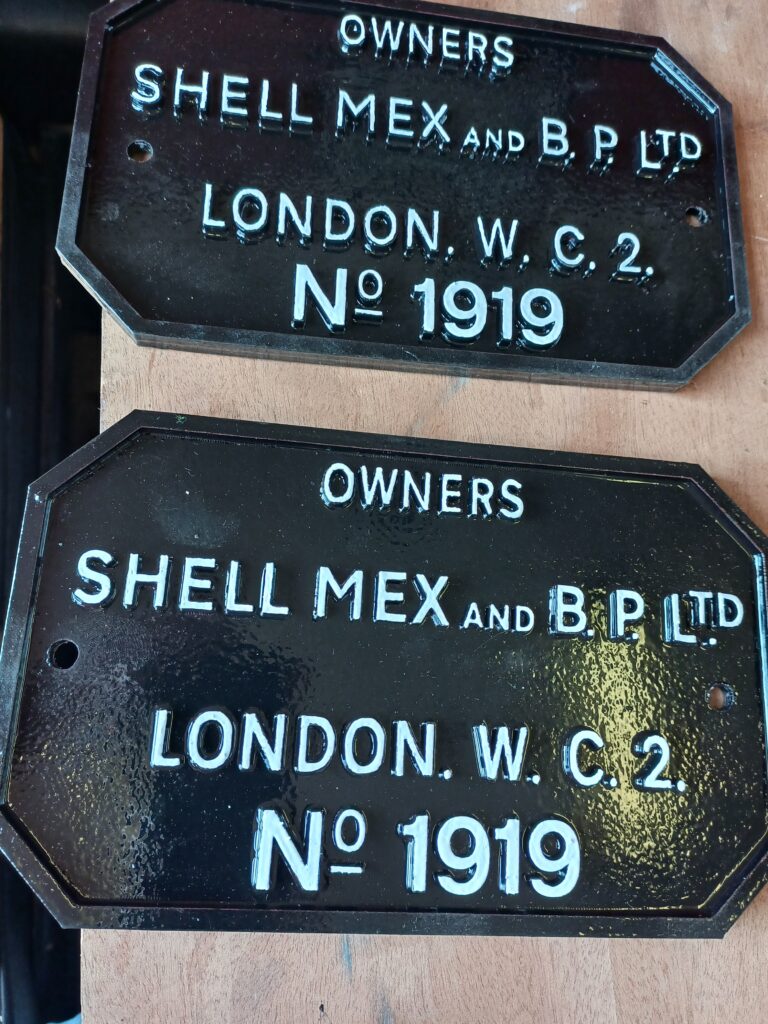
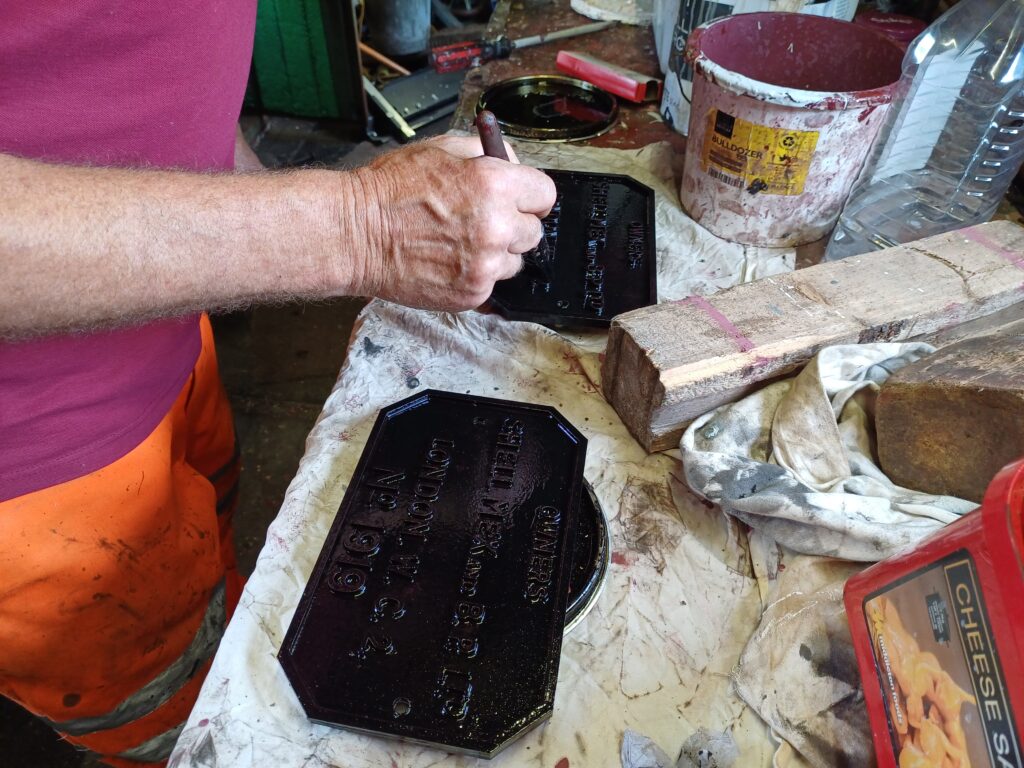
With the weather being as it was, we opted to do inside jobs. Dave started off picking out the letter on the Shell-Mex Ltd plates he’s 3D printed for 1919.
We’d recently picked up a few tyre profile gauges, which were well coat in surface rust and dirt, so Ernie very gently cleaned that up and applied a coat of oil to prevent them rusting again.
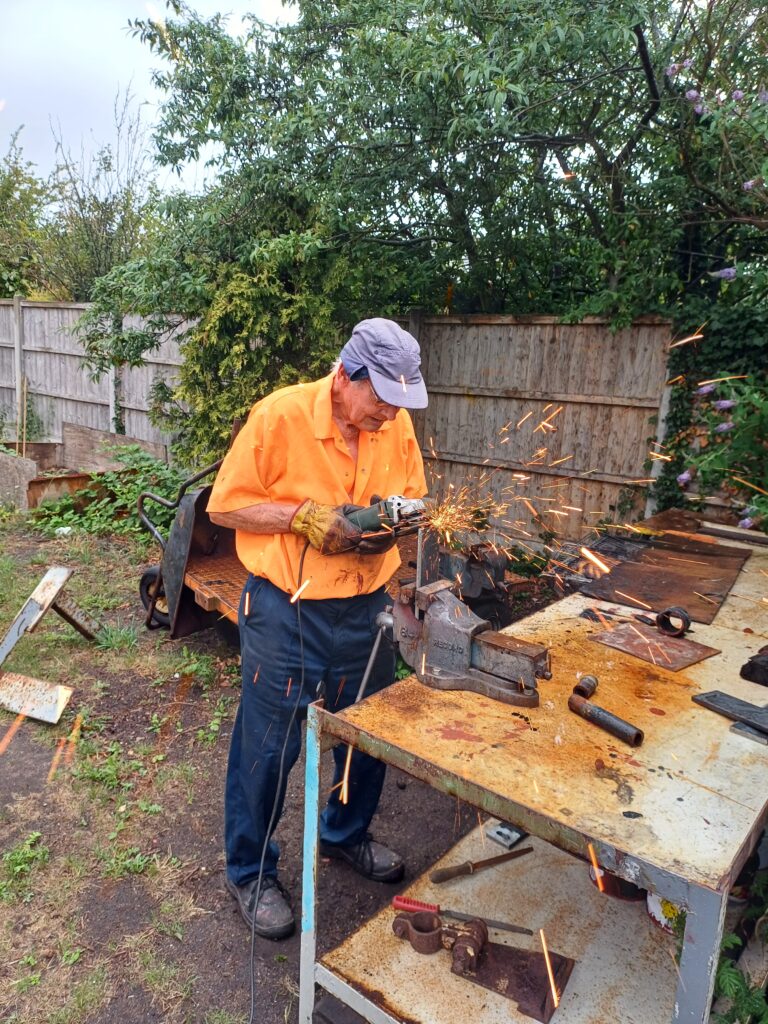
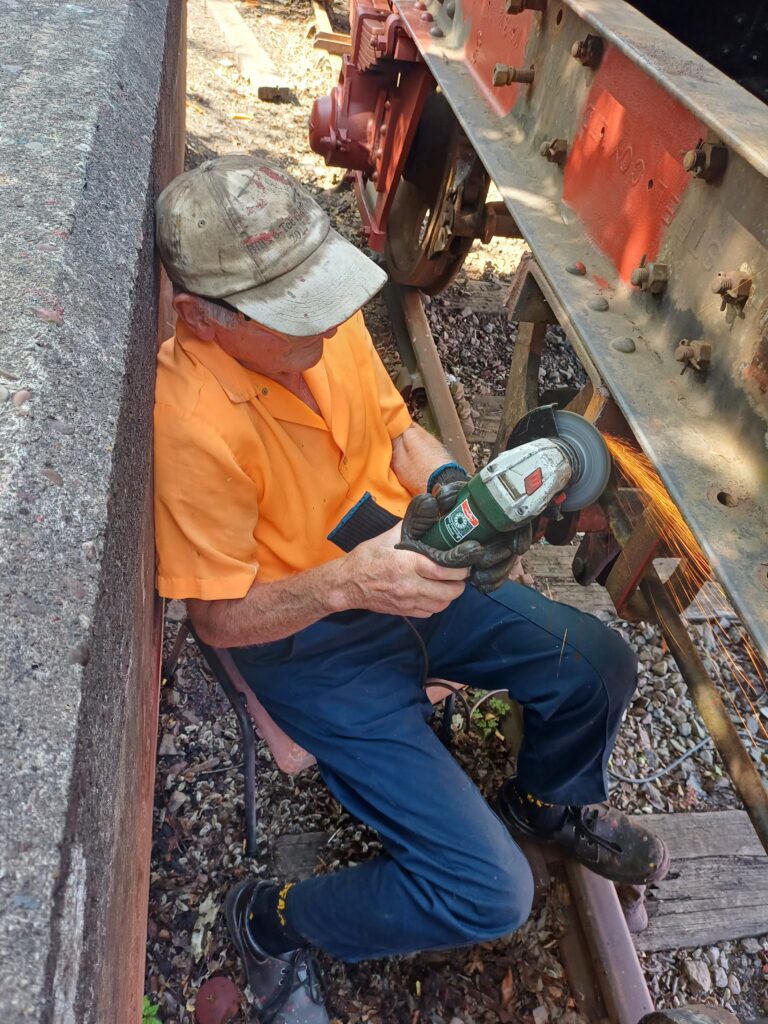
Once there was a gap in the weather, Ernie got the grinder out to prepare the ladder brackets he’d made and slotted during the week. These have now been chamfered ready to weld to the chassis.
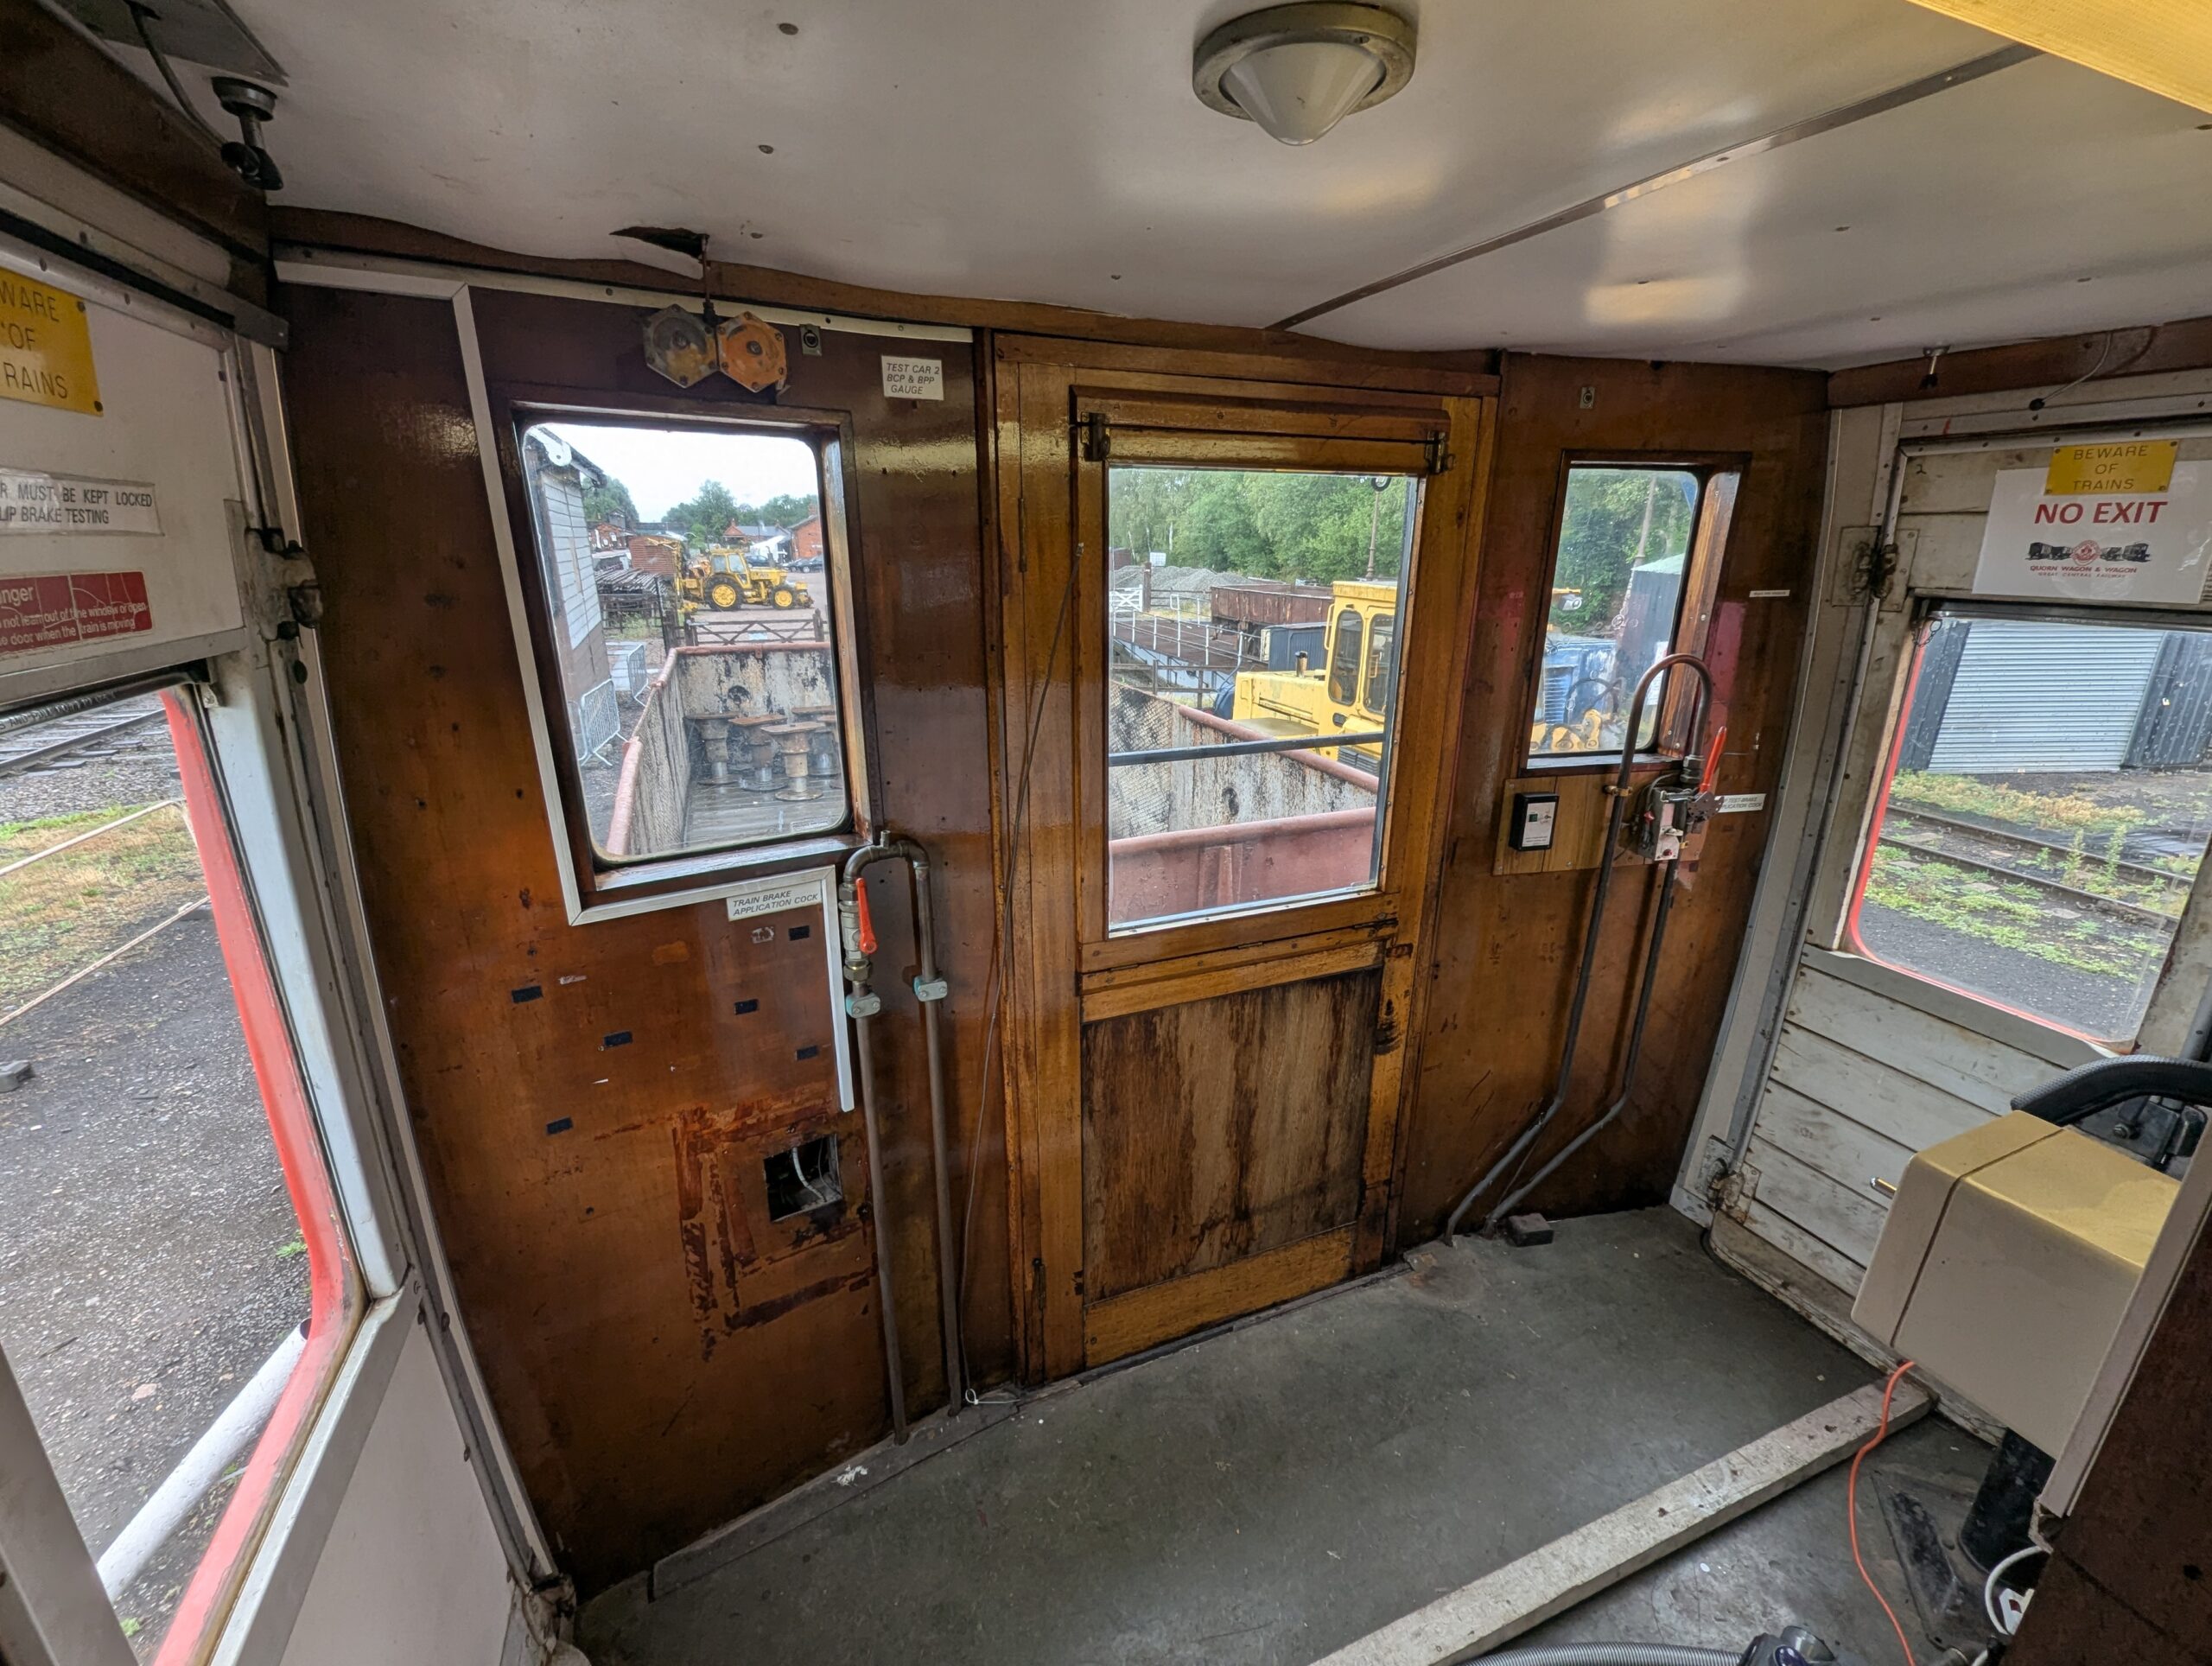
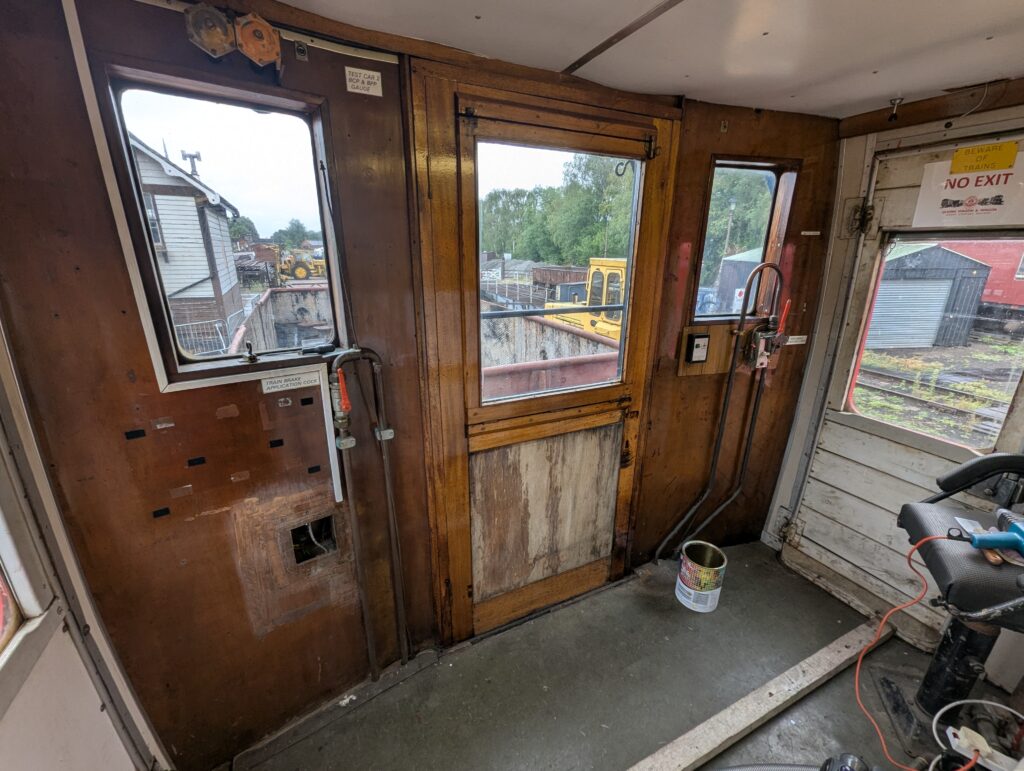
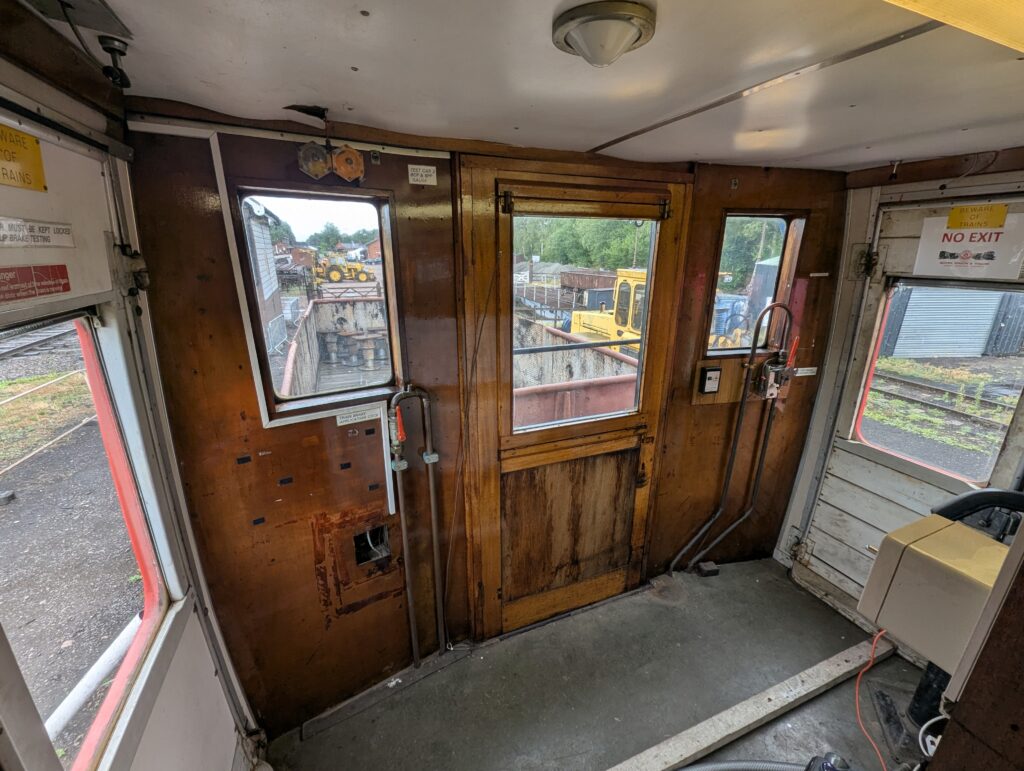
Dave and I went into the Test Car and starting sorting though the test area, and removing some of the less period appropriate signage. This led to the scouring pads coming out and some of the more tired wood work got scraped and scuffed, and whatever fittings that could be removed where.
Ernie cleaned a few more gauges, and also checked through the oil cans, throwing away those that don’t work and filling up those that do.
I went into the Test Car and applied varnish to the slip end paneling, the desk drawers and to the toilet door and door frame which looked a whole lot better for a coat of varnish.
Nick put up more shelving up in the fish van, which has made the fish van much tidier and will allow us to sort out some of the our collected stuff into more suitable locations.
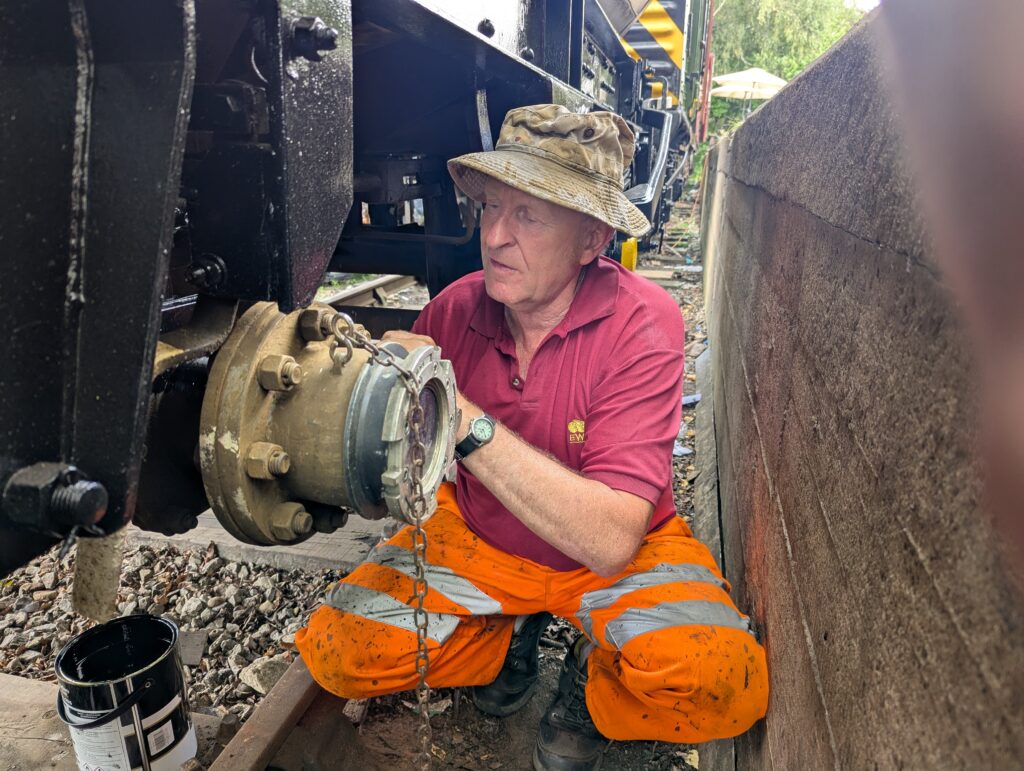
Using one of the new gauges, I measured the flange height and thicknesses on the two Esso tanks, plus two spares sat by the tool van.
Thanks for reading this week’s update. Next week there won’t be an update, so join us again in two weeks to find out what we’ve been up to.
Welcome to two-weeks worth of summer news from the team at Quorn. We have carried out axlebox maintenance on much of the fleet, supported the Rail200 event and continued to progress the tank wagon restorations.
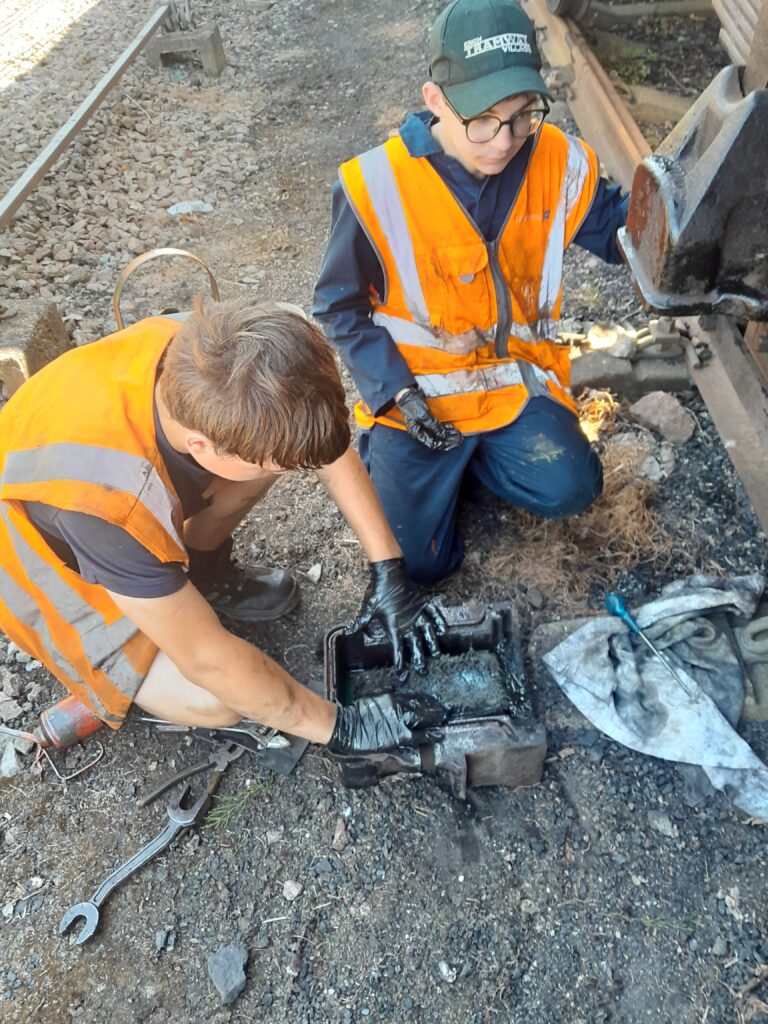
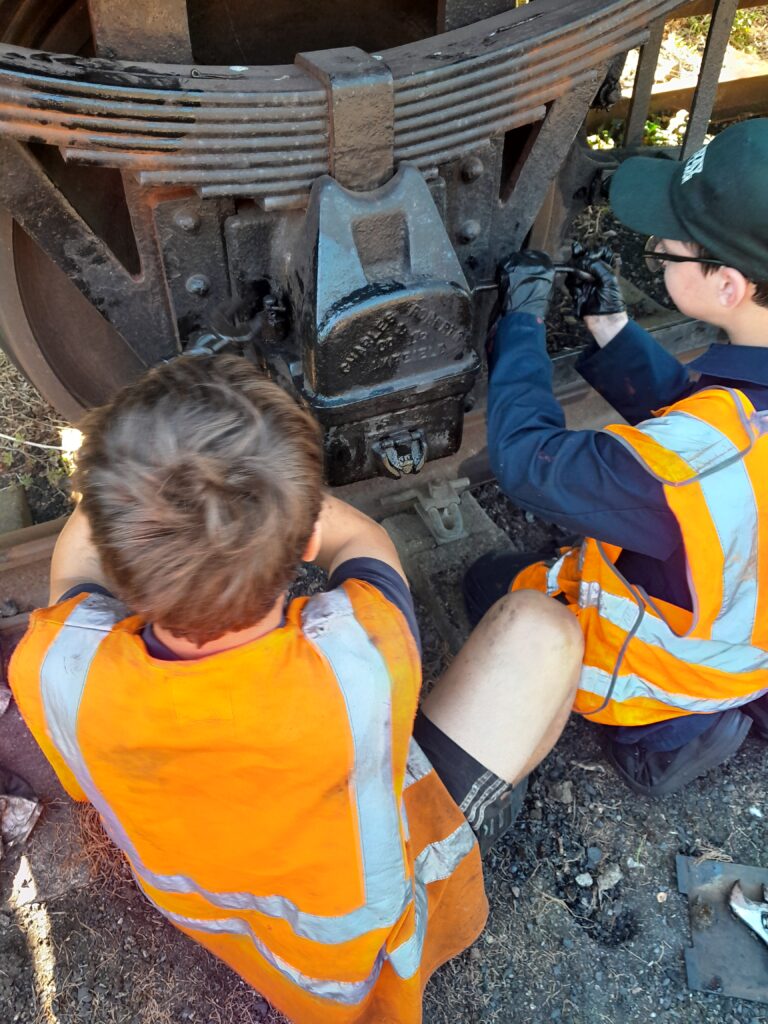
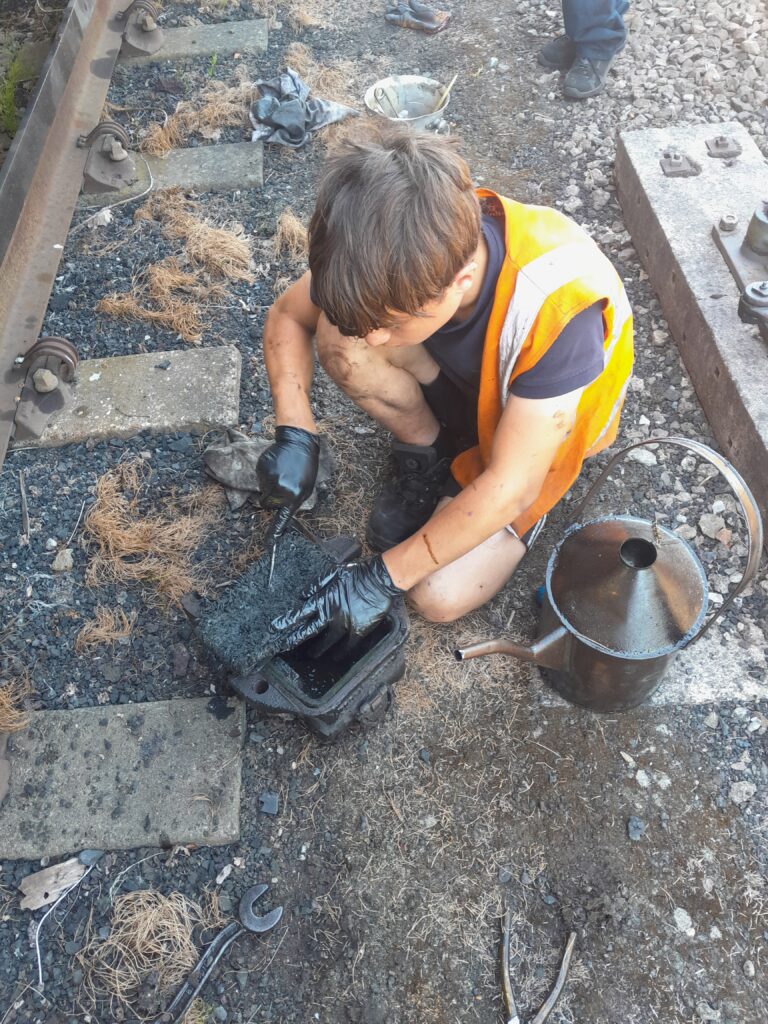
All wagons in the mixed goods rake and some in the van train were given their annual axlebox maintenance which involves checking for water ingress and removing any signs of water or emulsified oil, journal inspection, pad condition check, cleaning the pads, re-oiling the pads and topping up the reservoir with fresh oil. The axleboxes are then re-assembled with new split pins as necessary.
Tom, Oliver, Dan, Harry and Charlie all learning the process from Nick and doing much of the work on 35 wagons.
One of the spare corrugated wagon end sections was removed from it’s storage in B721587 and transported to Rothley where it will be used to affect repairs on the badly corroded end of Shock High Wagon B724570.
The brake gear on Brake Van B954268 was oiled up.
The bubbling paintwork on a few planks on the west side of Brake Van B954268 was sanded by Mark, Tom, Oliver & Dan, and the affected planks treated with undercoat.
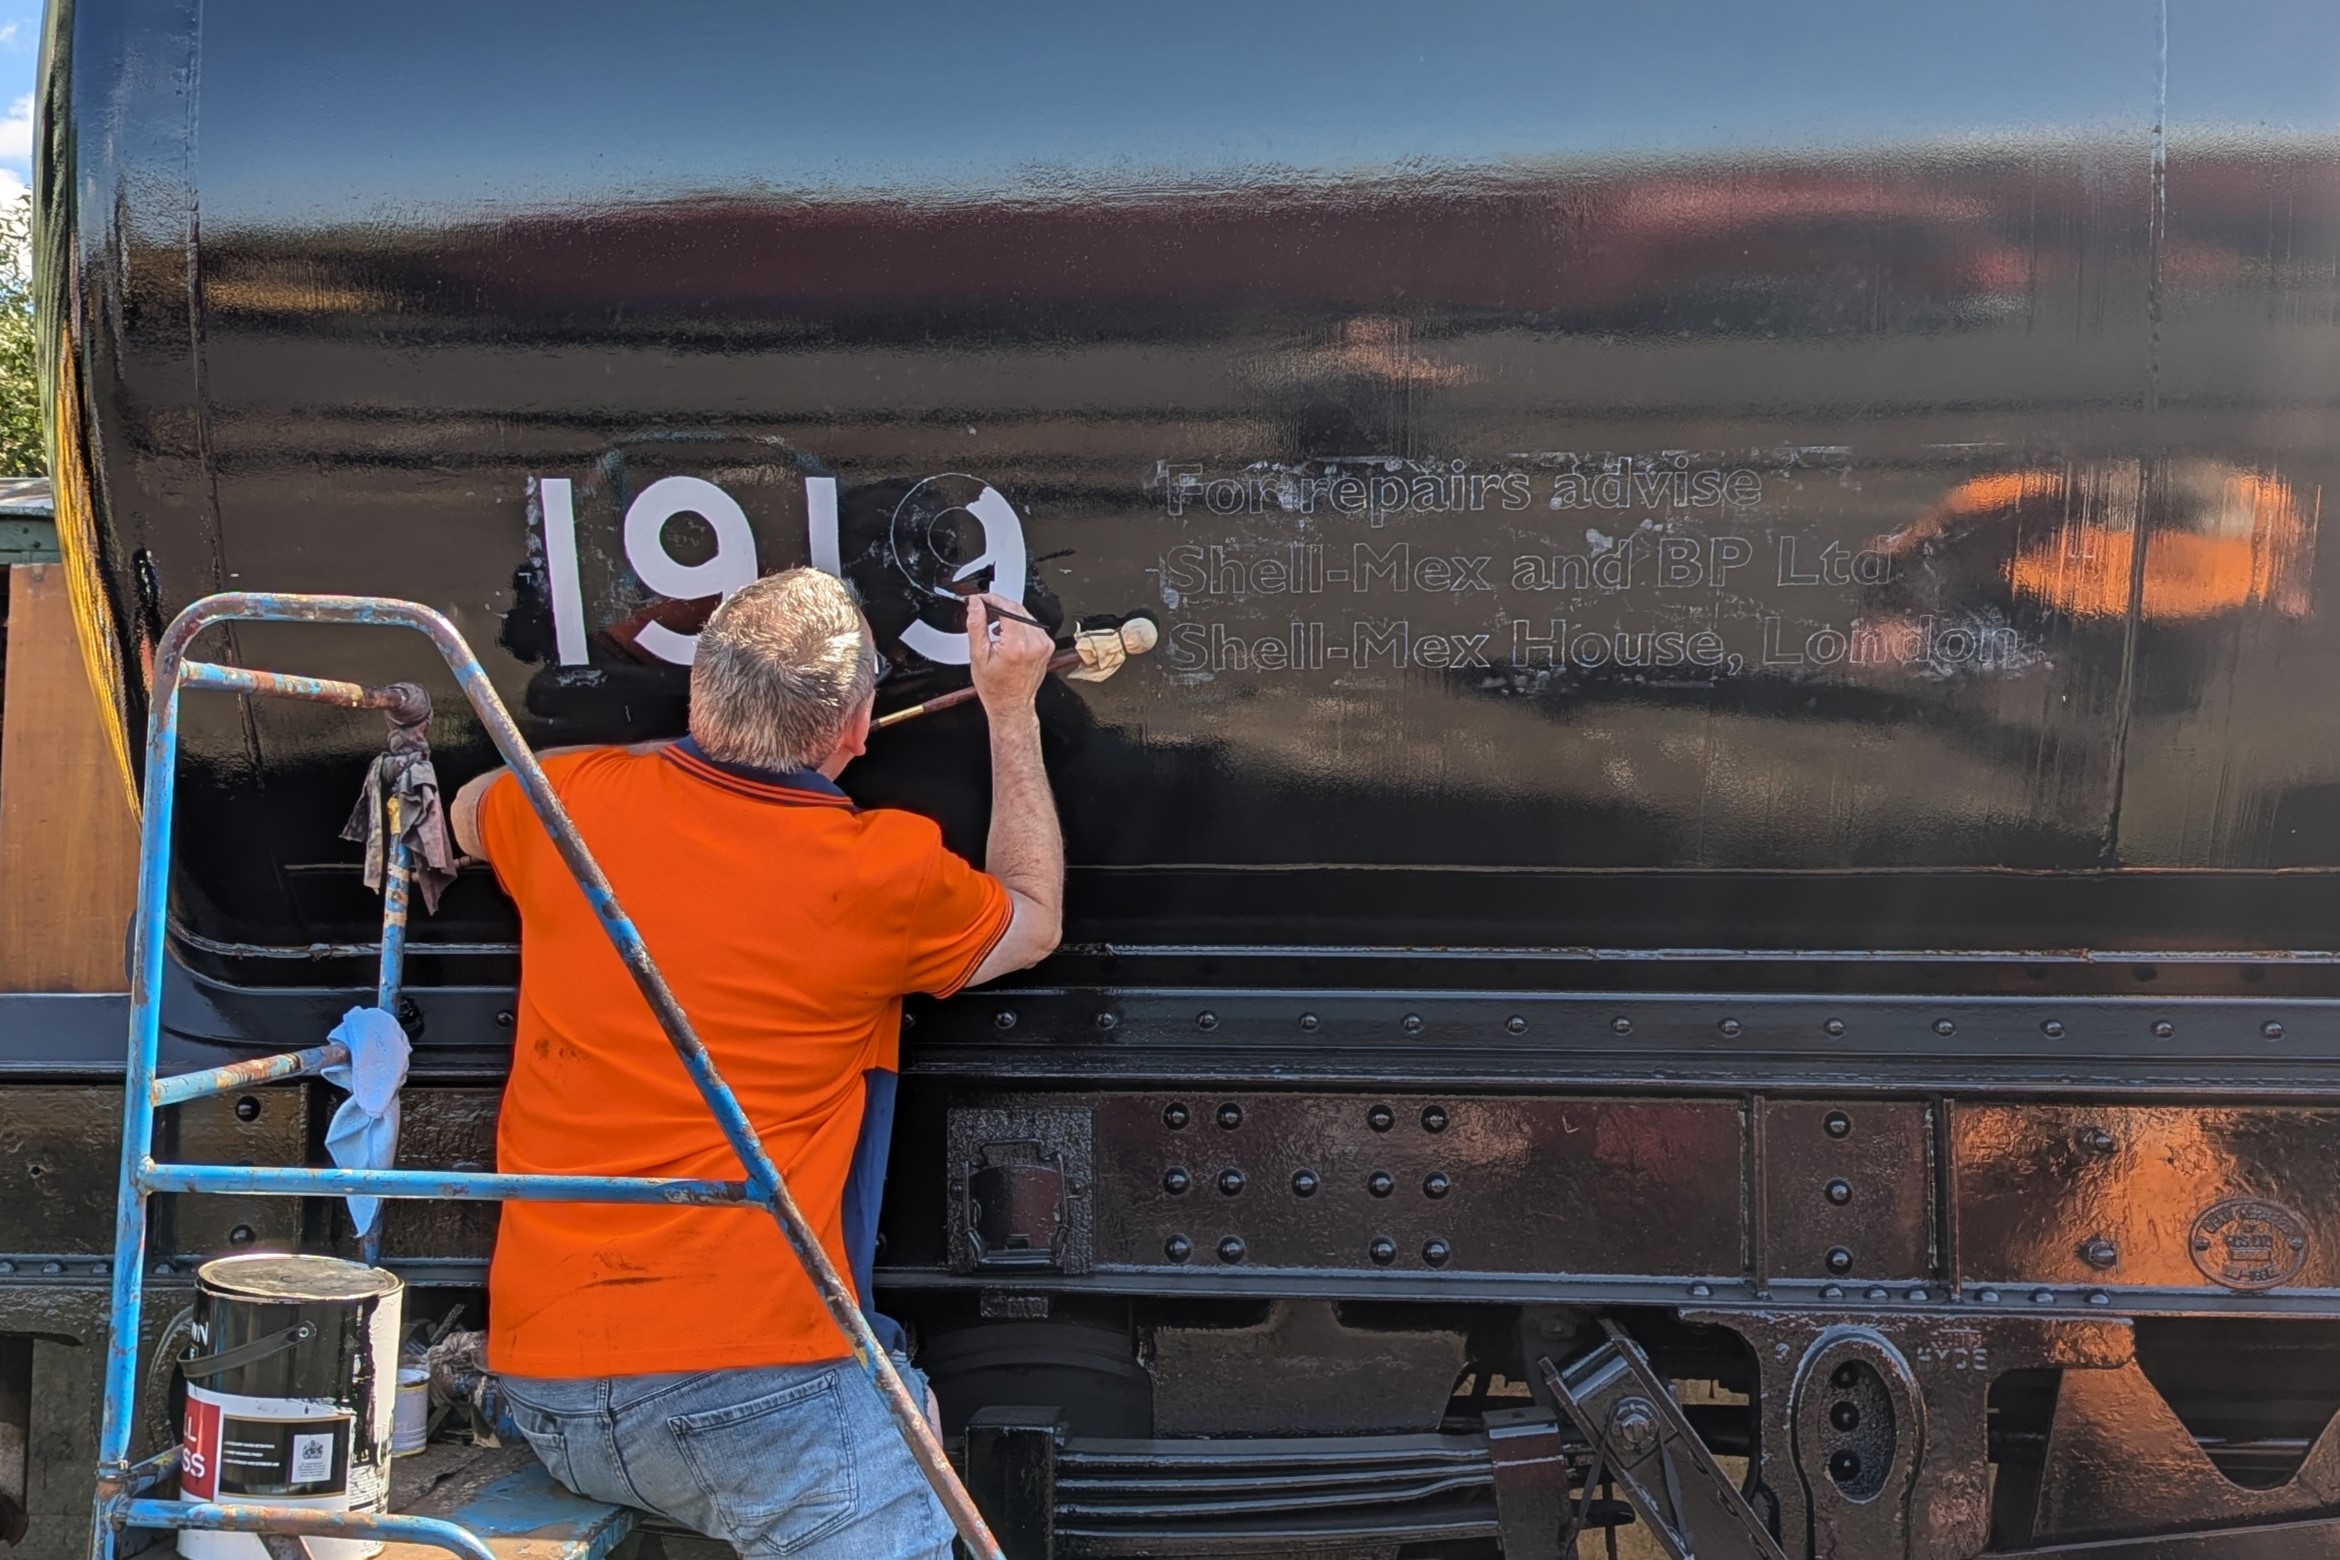
I continued with the lettering on the west side of tank 1919.
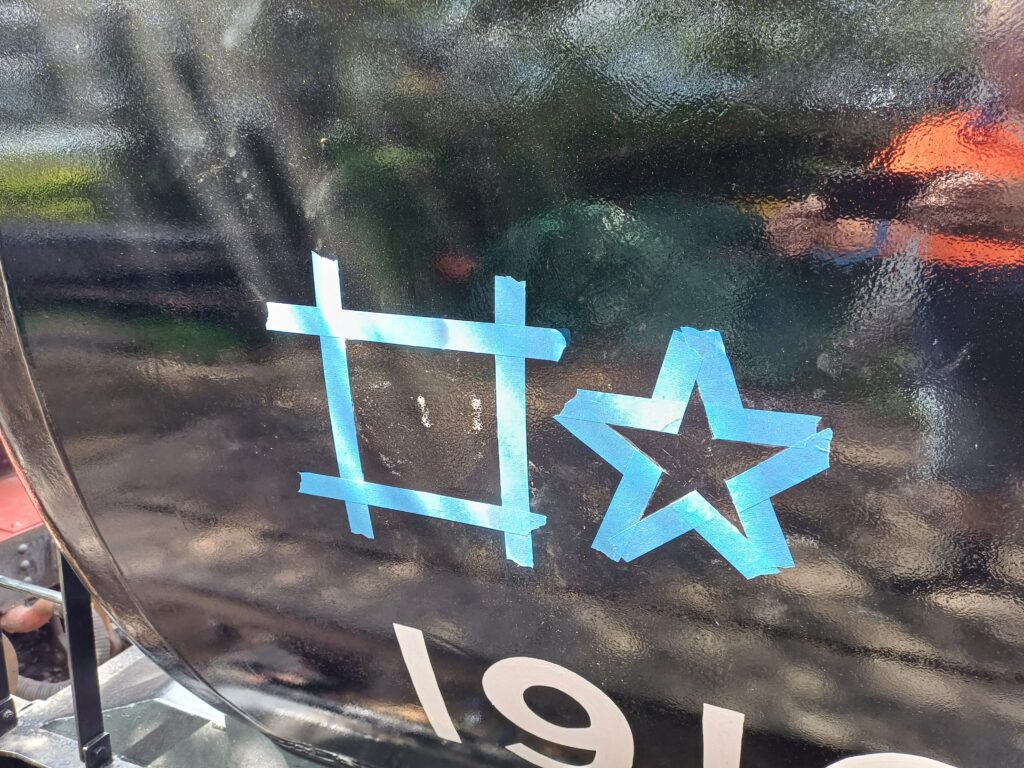
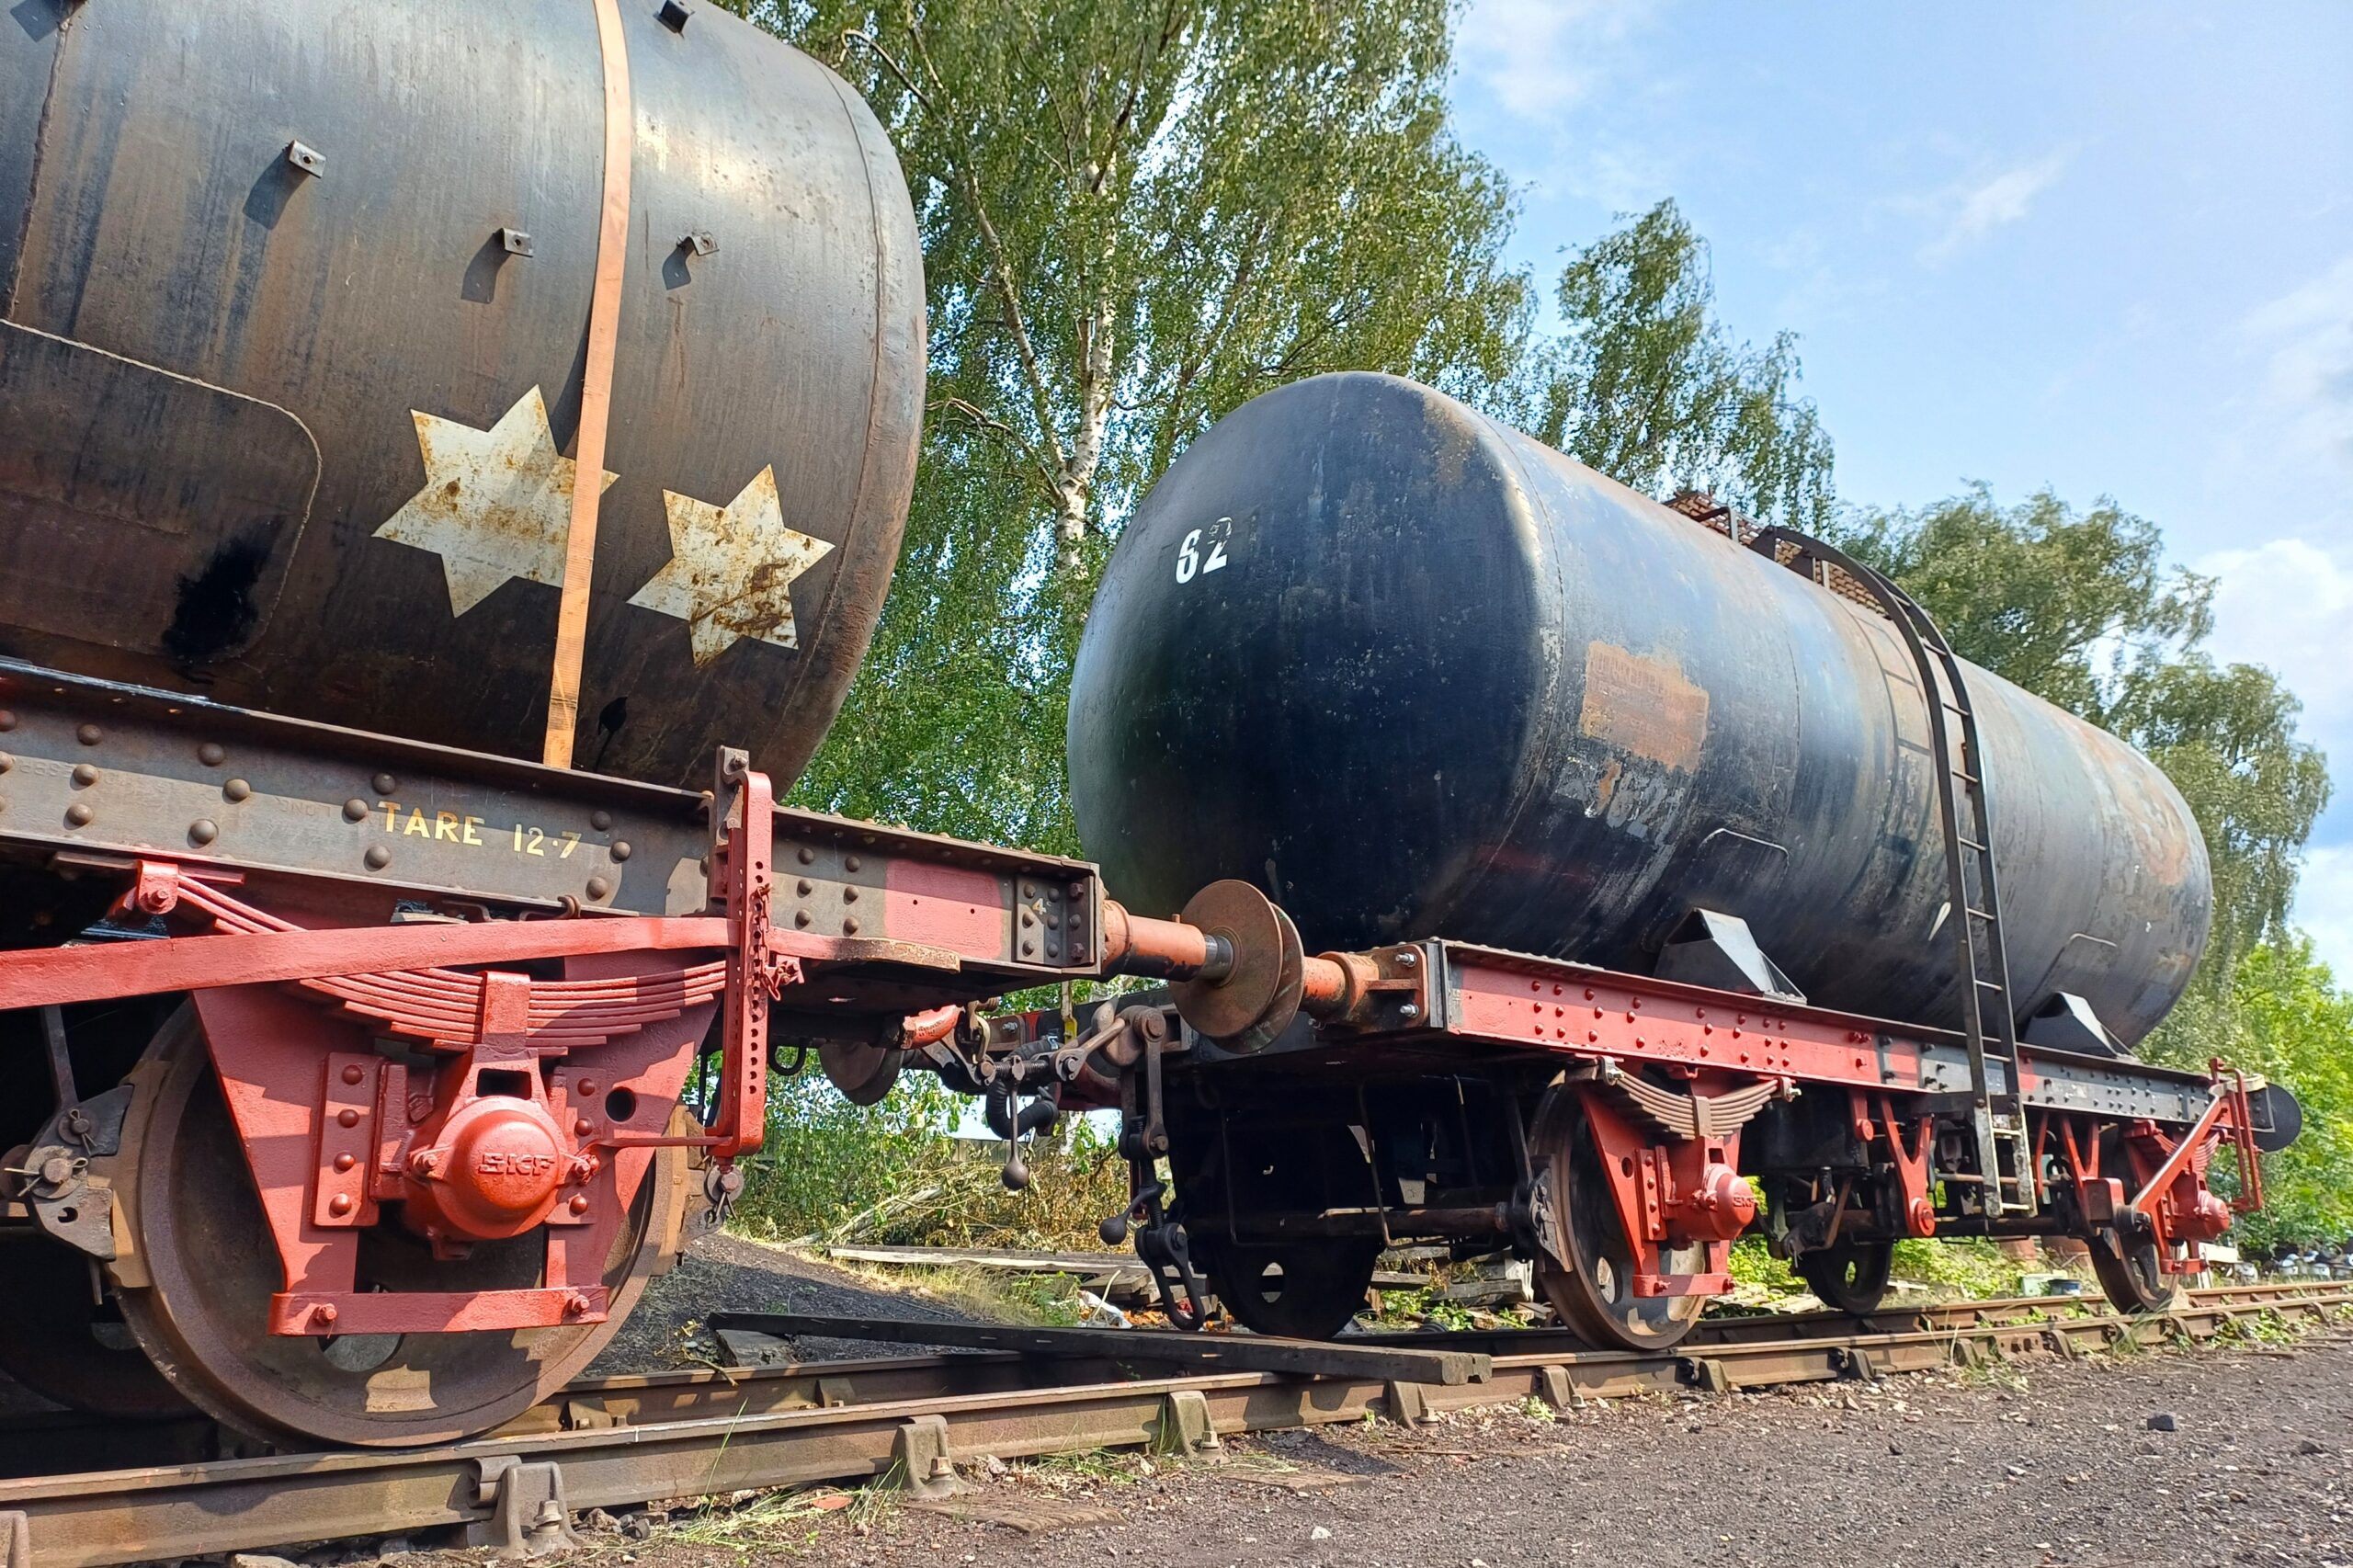
Then applied the operational speed rating stars. The two stars for wagons, authorised to run at higher speeds, i.e. above 35 miles/h, but not allowed to run in passenger trains.
Charlie helped fit the wagon information display boards to the mixed good rake in Quorn Yard for the Rail200 weekend.
We also welcomed visitors including some good friends into the Test Car during the weekend.
During the week, some more axleboxes in the van train were attended to by Nick, Tom and Oliver.
Onto to Saturday where Nick Charlie and Daniel finished off the axle boxes on the van train while trying to stay in the shade
Dave and I continued the push on with the sign writing on 1919, with Dave getting a good start on marking out in the cooler temperatures. I made a start with the fast traffic stars.
Ernie carried on with preparing the ladder brackets on 3606, ready for them to be welded back together in preparation for two new ladders.
Both Charlie and Ernie finished the day applying undercoat to the storage container on the dock.
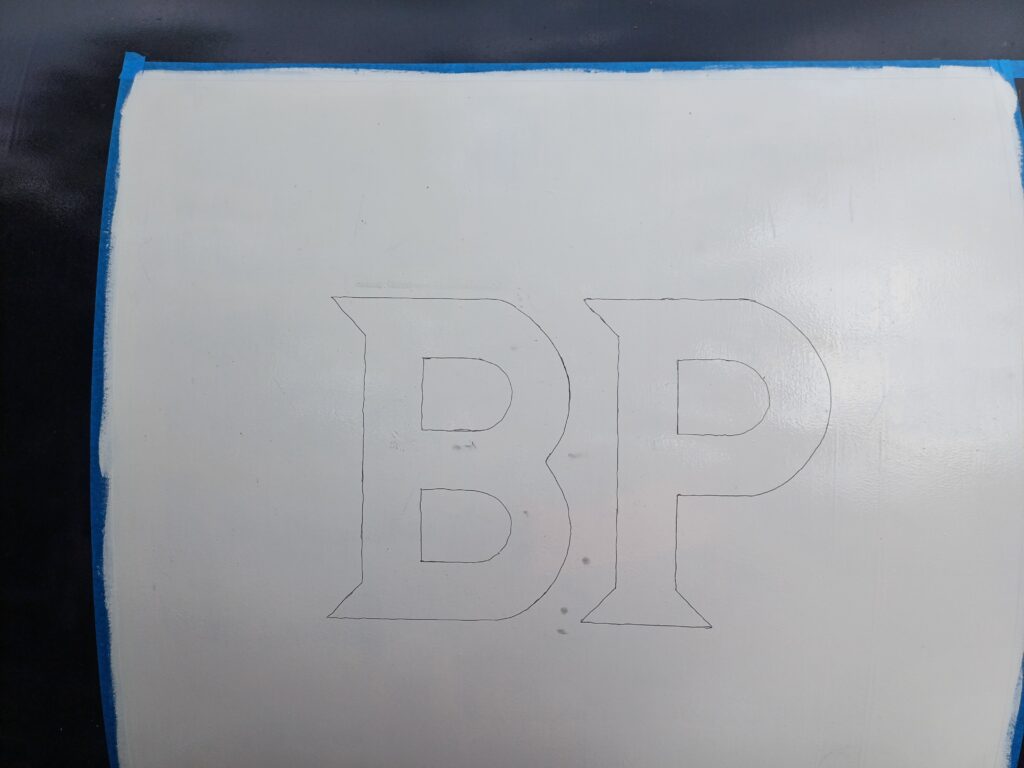
Dave and I started off Sunday by marking out the logo squares on the barrel on the West side of the tank, starting by measuring heights and central positions, then getting the template onto the wagon to trace its outline before applying masking tape.
This was followed by a quick scuff, readying the square for undercoating by Ernie.
While Ernie did this, Dave and I finished off the signwriting on the East side, with Dave finishing of the ‘repairs’ panel, and me the solebar lettering.
Ernie carried on with the white undercoat, undercoating the lamp brackets. Followed up with a dose of gloss black on the drawhooks, air pipe stowage brackets and steps.
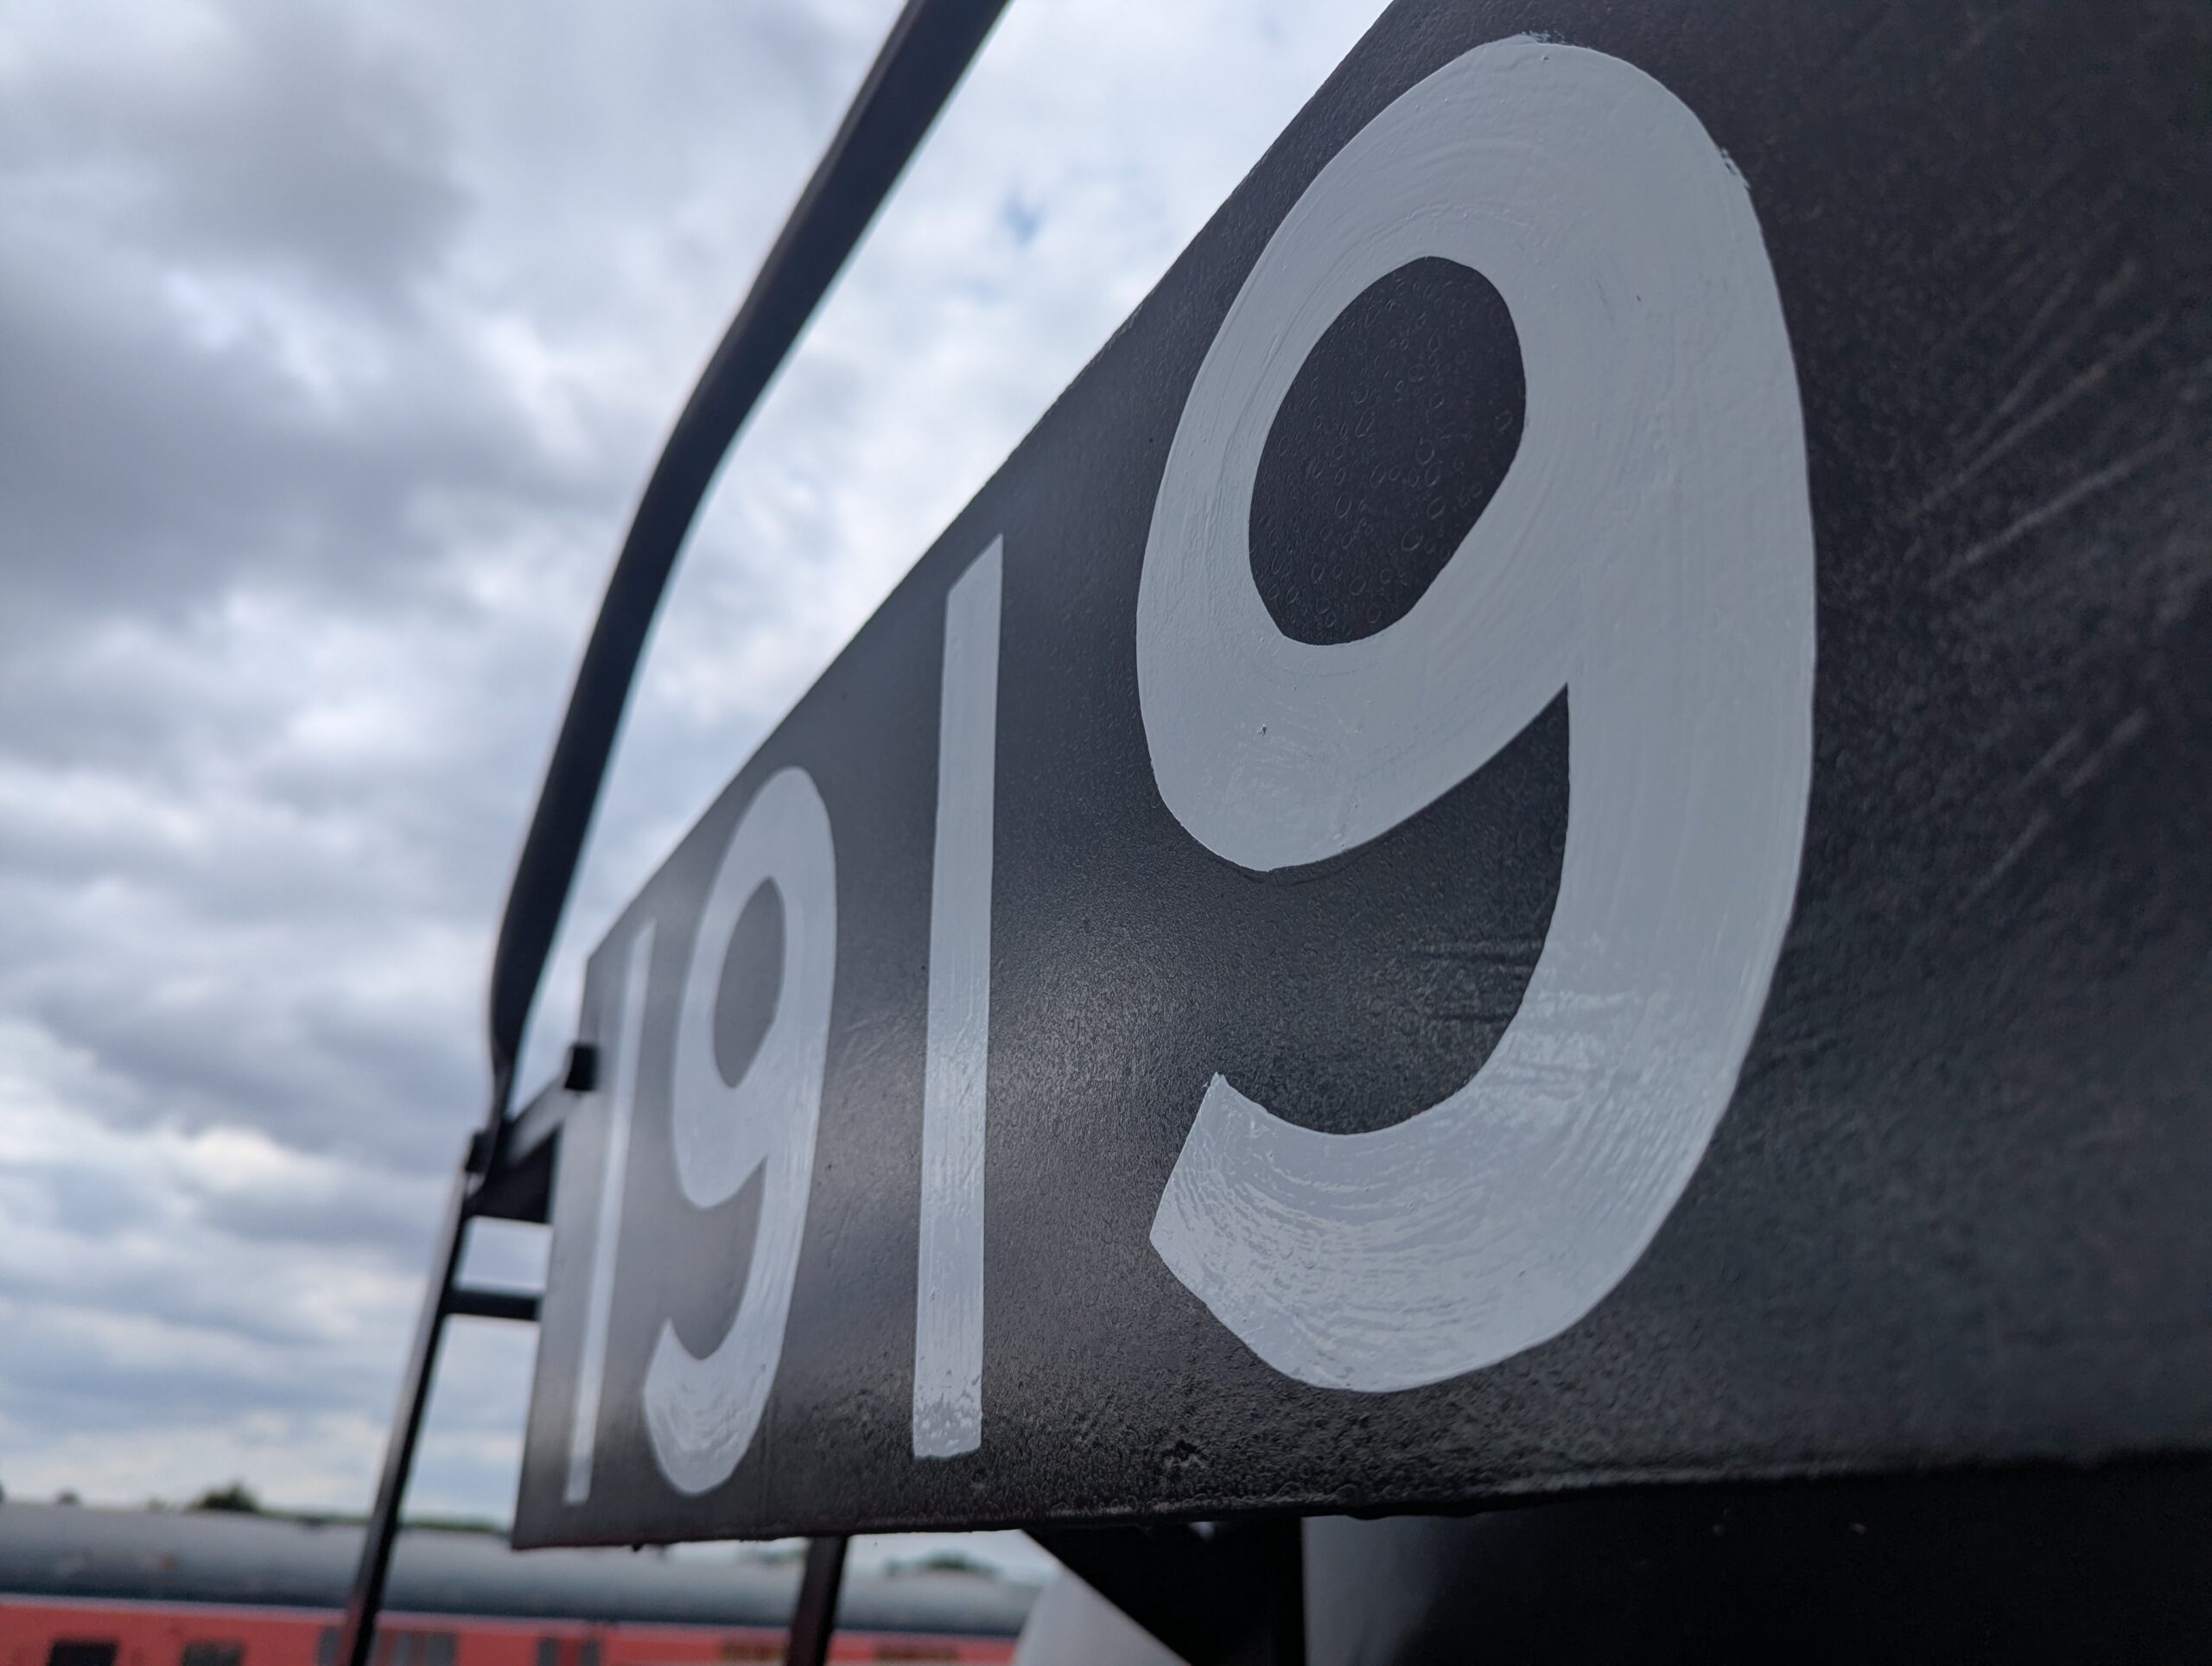
I made a start on one of the end numbers, choosing the nice easy flat plate!
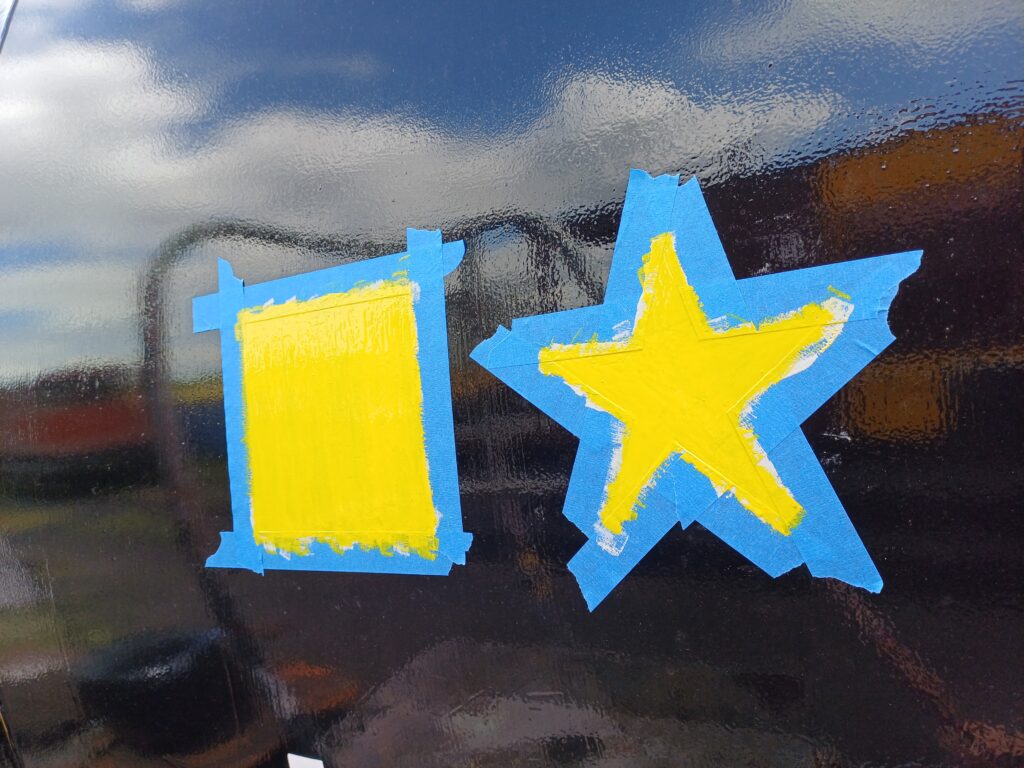
Dave painted all four logo squares in their respective colours; two white and two yellow. He also took the time to wipe off the chalk outline from the text with a damp cloth.
Nick used the gloss black to paint the discharge pipework and the replica Shell-Mex owner’s plates, ready to go on the wagon. The plates were drilled prior to being painted with the black paint.
Dave picked out the east side cast plates while Ernie floated around with the white gloss paint, painting the now dry lamp brackets, the foot valve levers and vacuum swan-necks.
Nick repaired an axlebox pad where the spring had failed, utilising a spring found on a life expired pad. This will re-enter stock after a bit of a soak.
That wraps up this update, thank you for reading. Next week will be more work on 1919, which is tantalisingly close to be completed, with one barrel number still to do plus the large Shell and BP logos. Join us then, in the hopefully cooler weather!
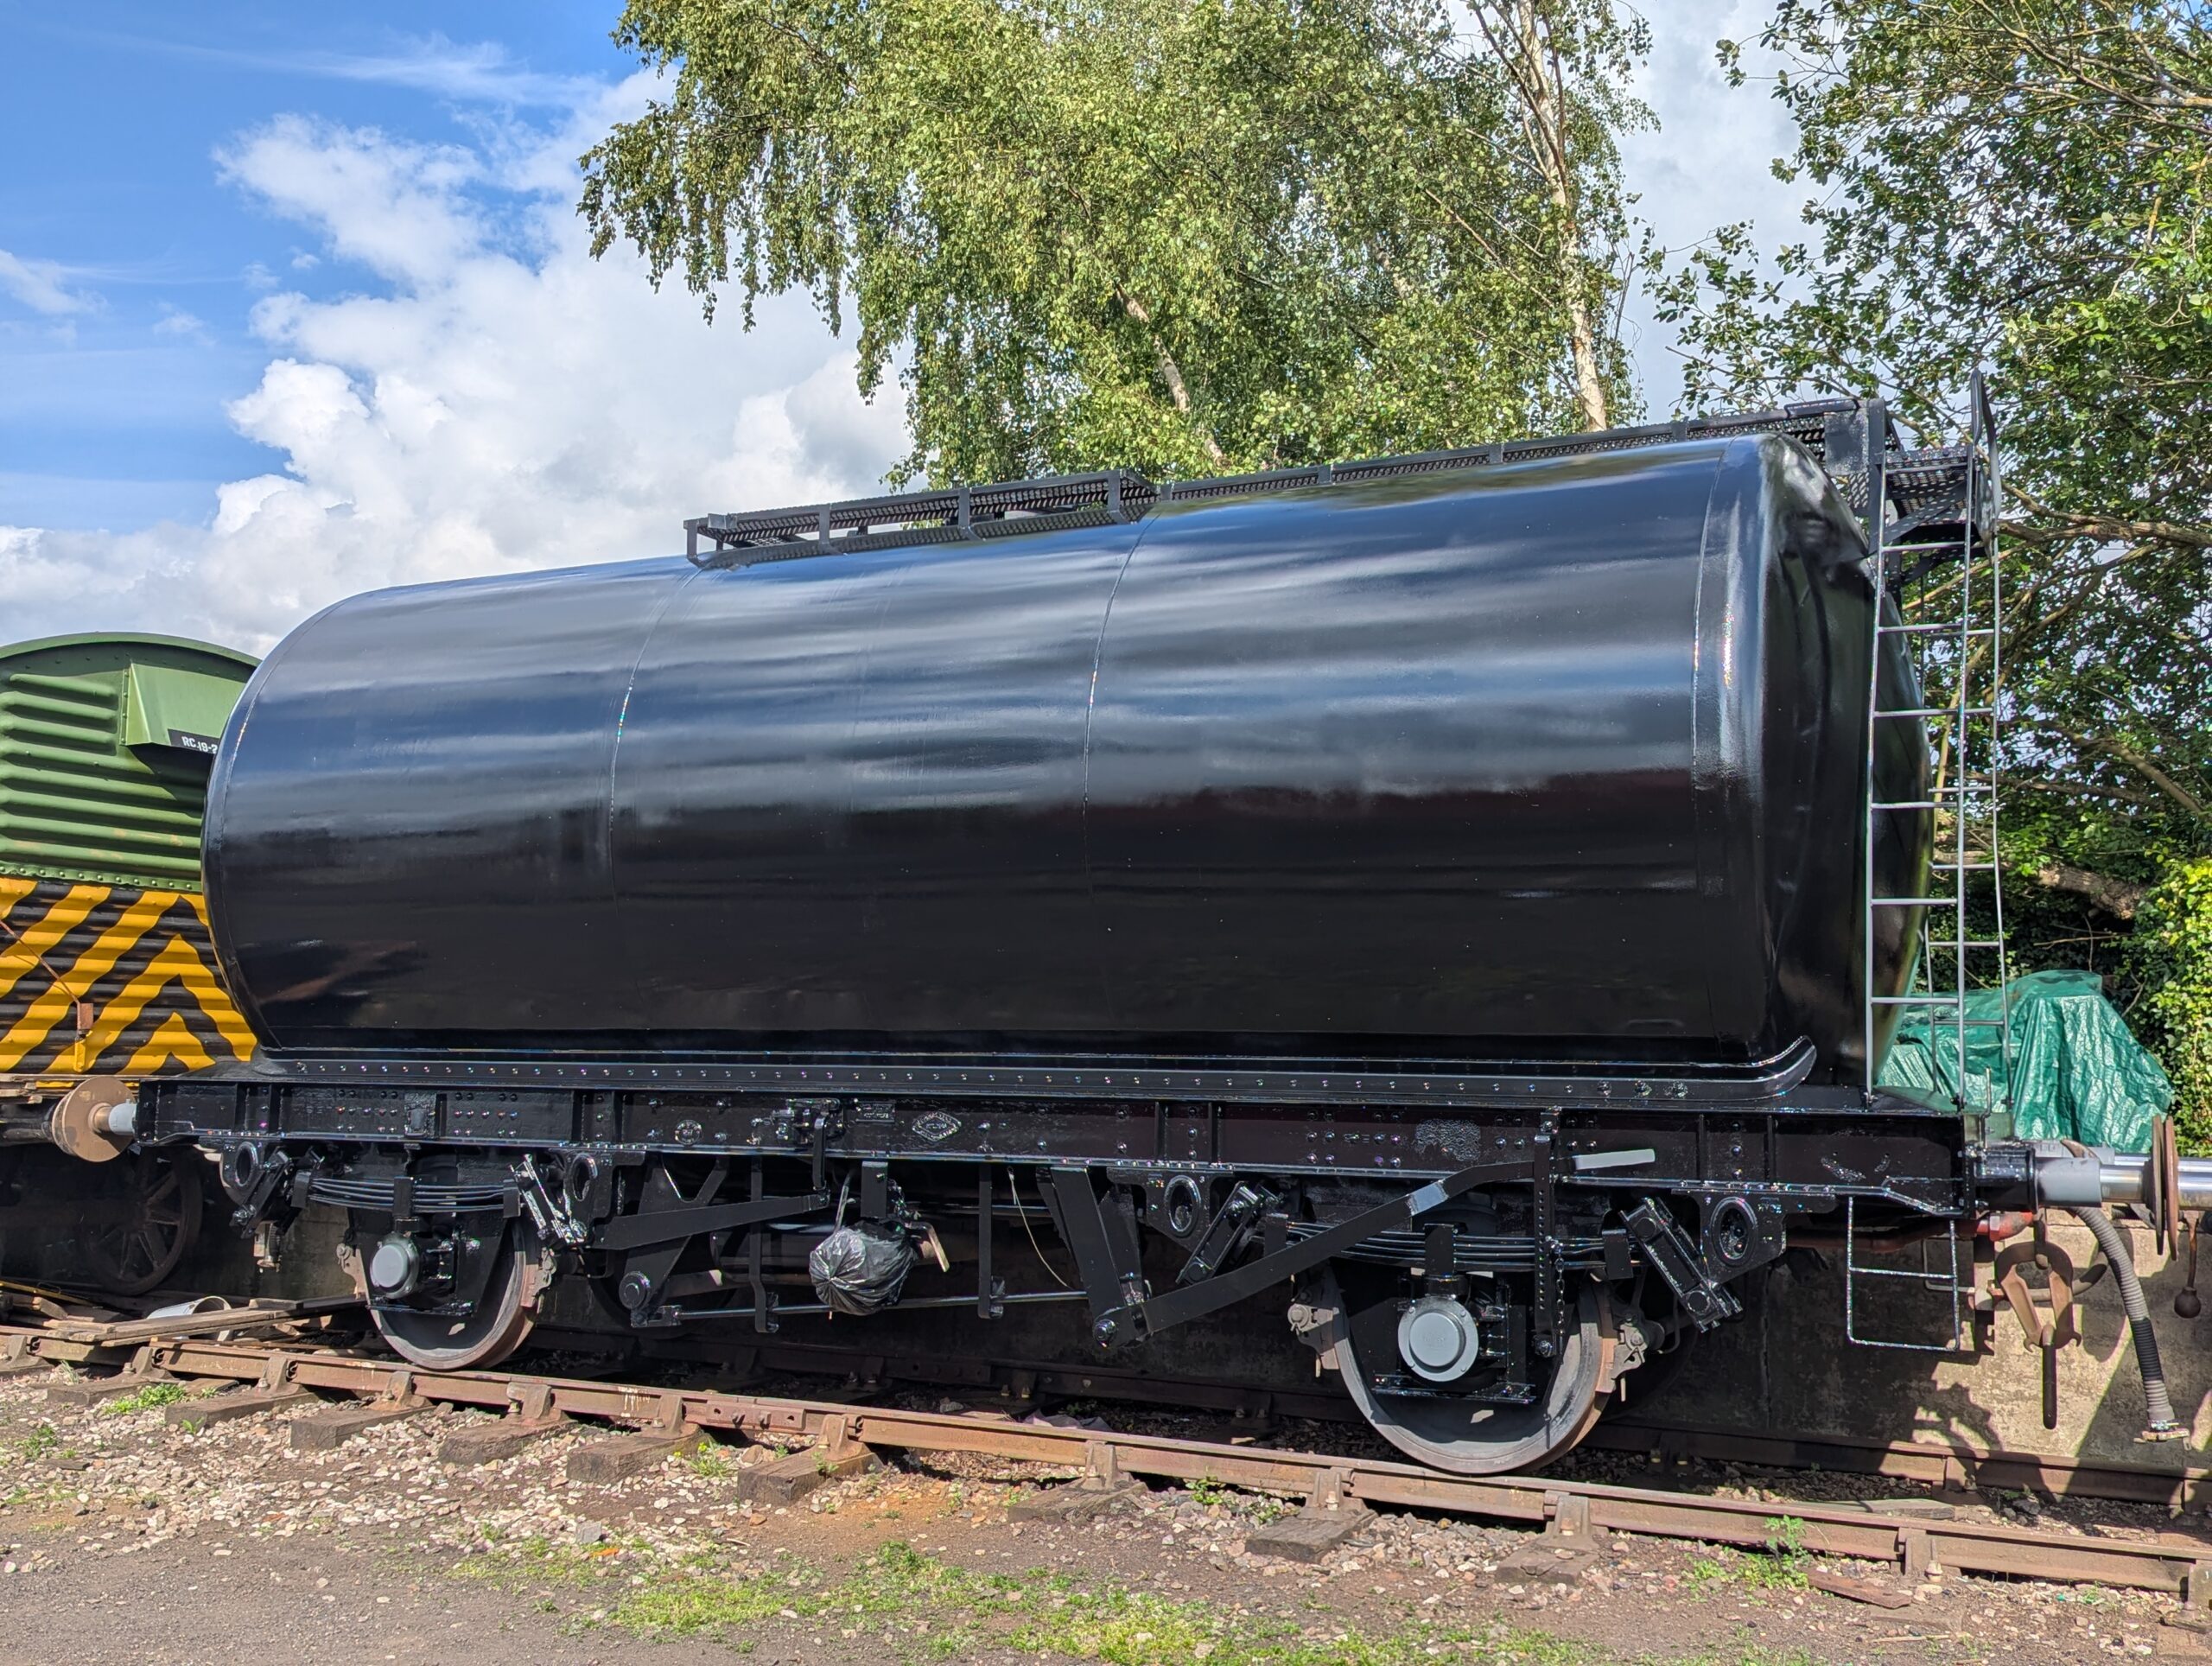
Hello and welcome to this weeks update from Quorn as tank 1919 gets its original 1966 as-built identity back.
The top coat of gloss had applied really well last week, therefore we were able to make a start with the lettering on 1919. Over the last few weeks the templates have been prepared and printed. These were carefully cut to size and assembled as necessary.
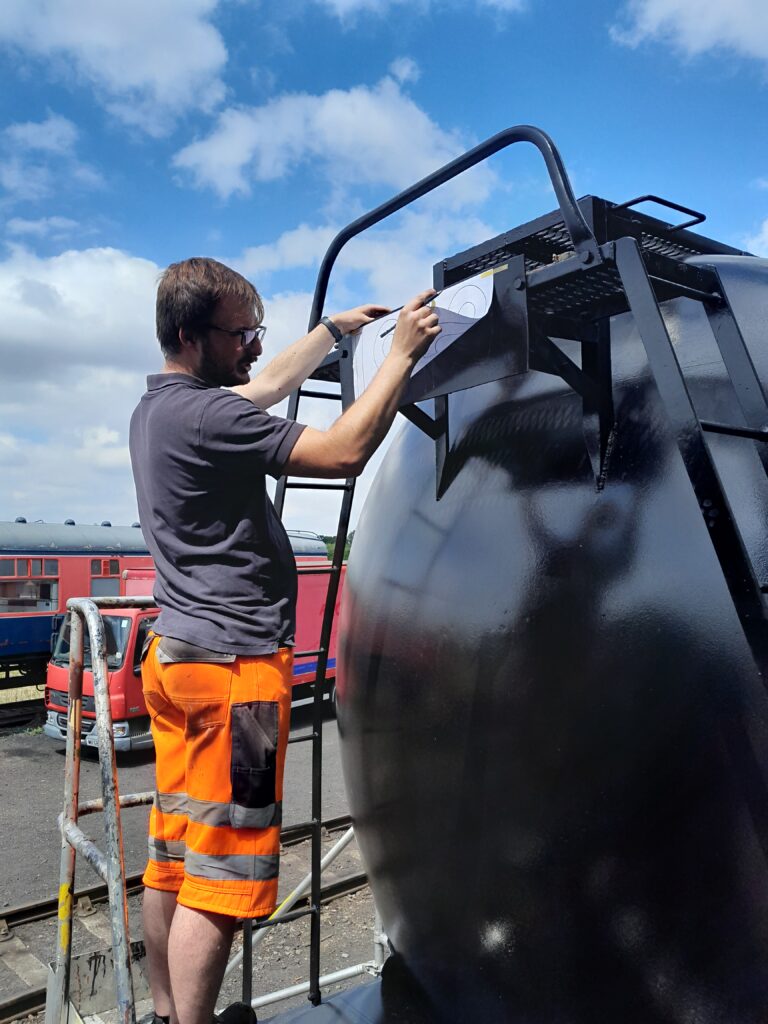
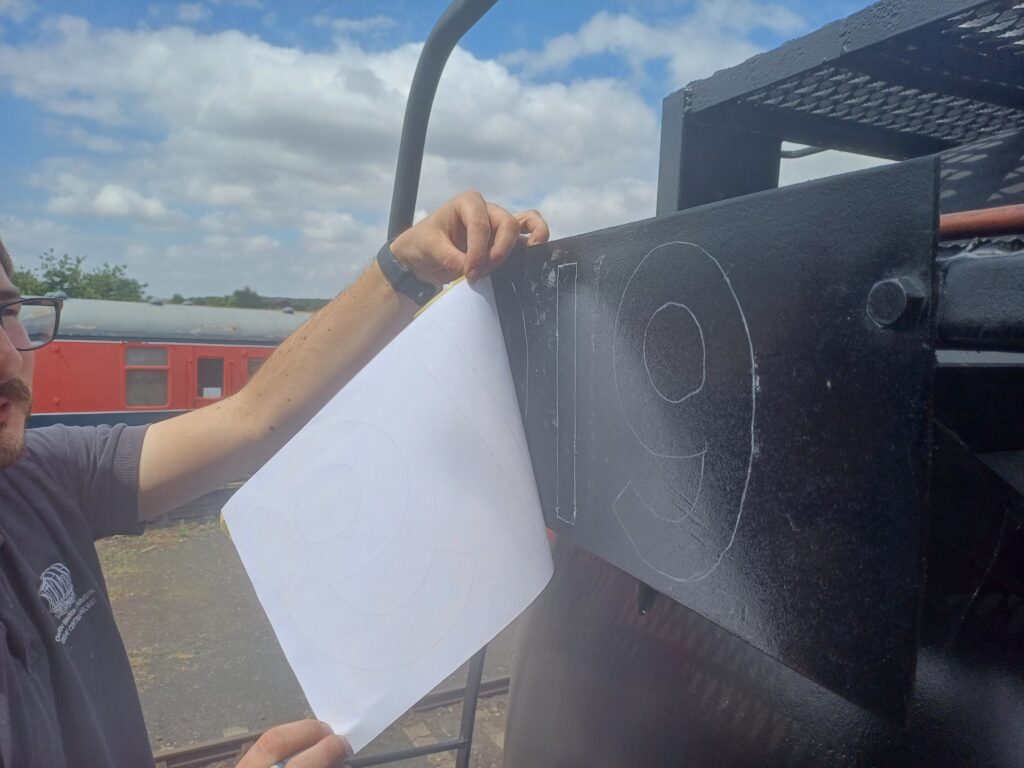
Working on the west side of 1919. the positions of the templates for the tank barrel and solebar lettering were marked onto the wagon, then templates chalked and attached in place.
The chalk was transferred to the wagon by tracing the lettering.
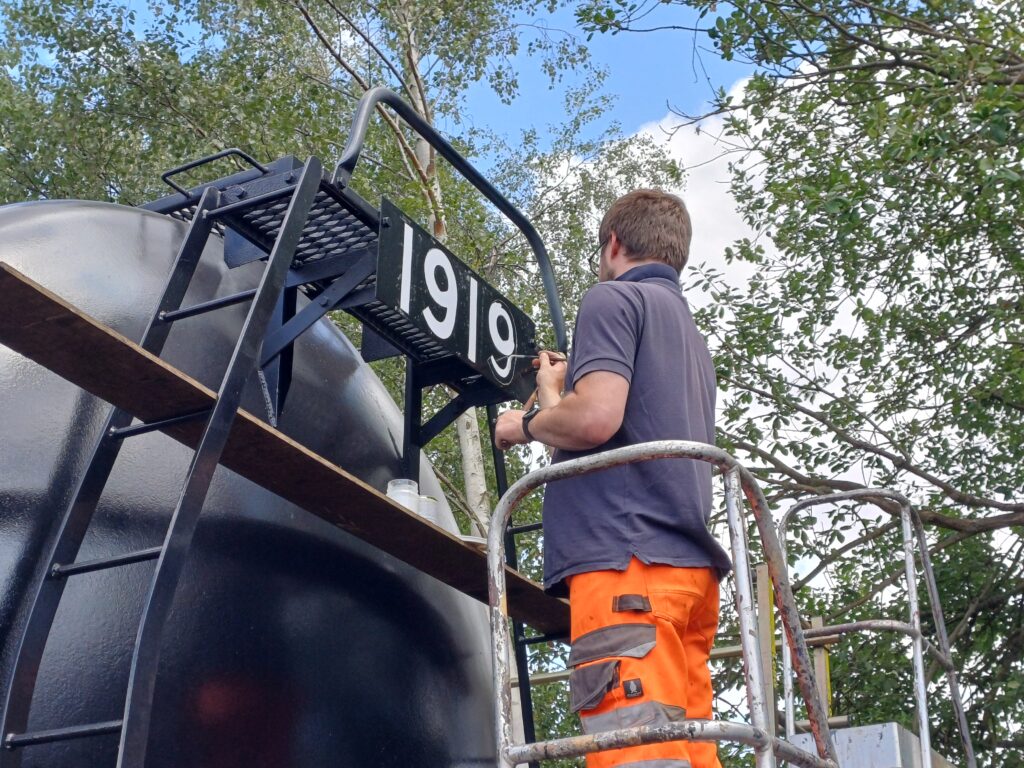
I then set to work painting the lettering, starting with the running number; thereby giving the wagon back its original 1966 identity of 1919.
Whilst I was busy with the signwriting, Ross and Nick removed one of the ladders from tank 3621 that will be used as a template to produce the two new ladders required for tank 3606.
Ernie cleaned up the ladder mounting brackets on 3606 in readiness for fitting the new ladders.
A stuck buffer on the Iron Ore Hopper wagon B439708 was attended to.
Mark, Tom, Oliver , Charlie, Dan and Daniel oiled and tested the operating wheels and brakes on the Dogfish and Herring engineers wagons.
After a short break out of the sunshine, they continued, oiling and testing the handbrakes on the mixed freight and van train.
I continued with the tank side lettering, using our gazebo for a bit of shelter from the sun.
Whilst Dan applied some white undercoat to the axlebox covers.
The solebar lettering for Wheelbase, Load and Tare weights were next.
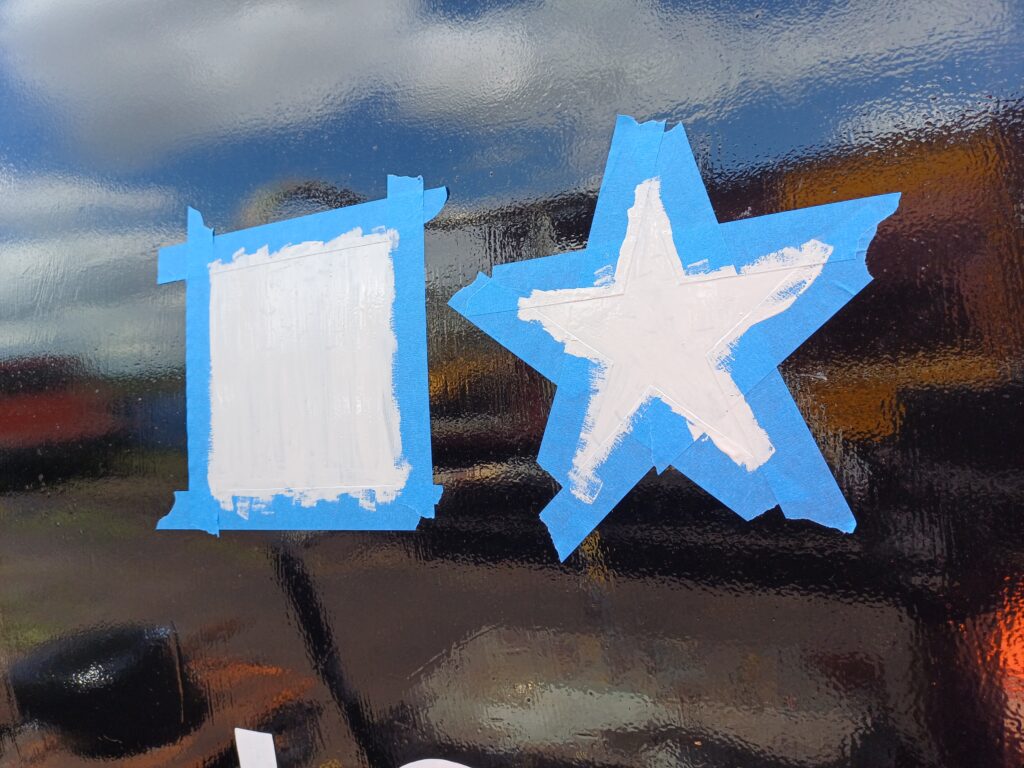
On the east side of the wagon Dan, Ernie and myself marked out the positions for the two Shell/BP logos. The templates were positioned and the outlines chalked onto the wagon, then tape applied to the outline.
The logo areas were keyed with a scotch bright pad then undercoat applied; light grey to the left hand box and white to the right one.
The axlebox covers were given a coat of yellow by Ernie whilst I picked out the west side builders plate and foot valve instruction plate.
Thanks for reading, join us again next week for the GCRs Rail200 event where we’ll have the Test Car open to visitors on the Saturday 5th July.
Welcome to this weeks update from the team at Quorn. We continue to progress work on the three tank wagons 1919, 3606 & 3621; and we help out RVP replacing the TPO equipment.
Tom, Oliver and Nick helped the RVP team.
It’s unusual to find spindle type buffers stuck compressed, however one was noted on Grampus 985884; this was dealt with swiftly by Nick.
The tank barrel on 1919 was keyed with scotch-bright pads ready for its second coat of gloss black.
Some of the underframe areas on tank 1919 that were not accessible with the spray gun, including the new vacuum pipe and the buffers were hand painted in gloss black.
The outer section of the heating coil pipe on 3606 was adjusted slightly to get it level; then the whole pipe was wire brushed and treated to a coat of red-oxide primer.
The new (but slightly over length) buffer mounting bolts and lamp bracket bolts on tank 3621 were trimmed to length and given a coat red oxide primer.
The spray equipment was prepared, a couple of the spray gun air pipe joints re-sealed. The gloss black paint was mixed then measured out for thinning.
Once the thinned paint was mixed thoroughly it was checked for the correct consistency then was filtered into the spray gun pot.
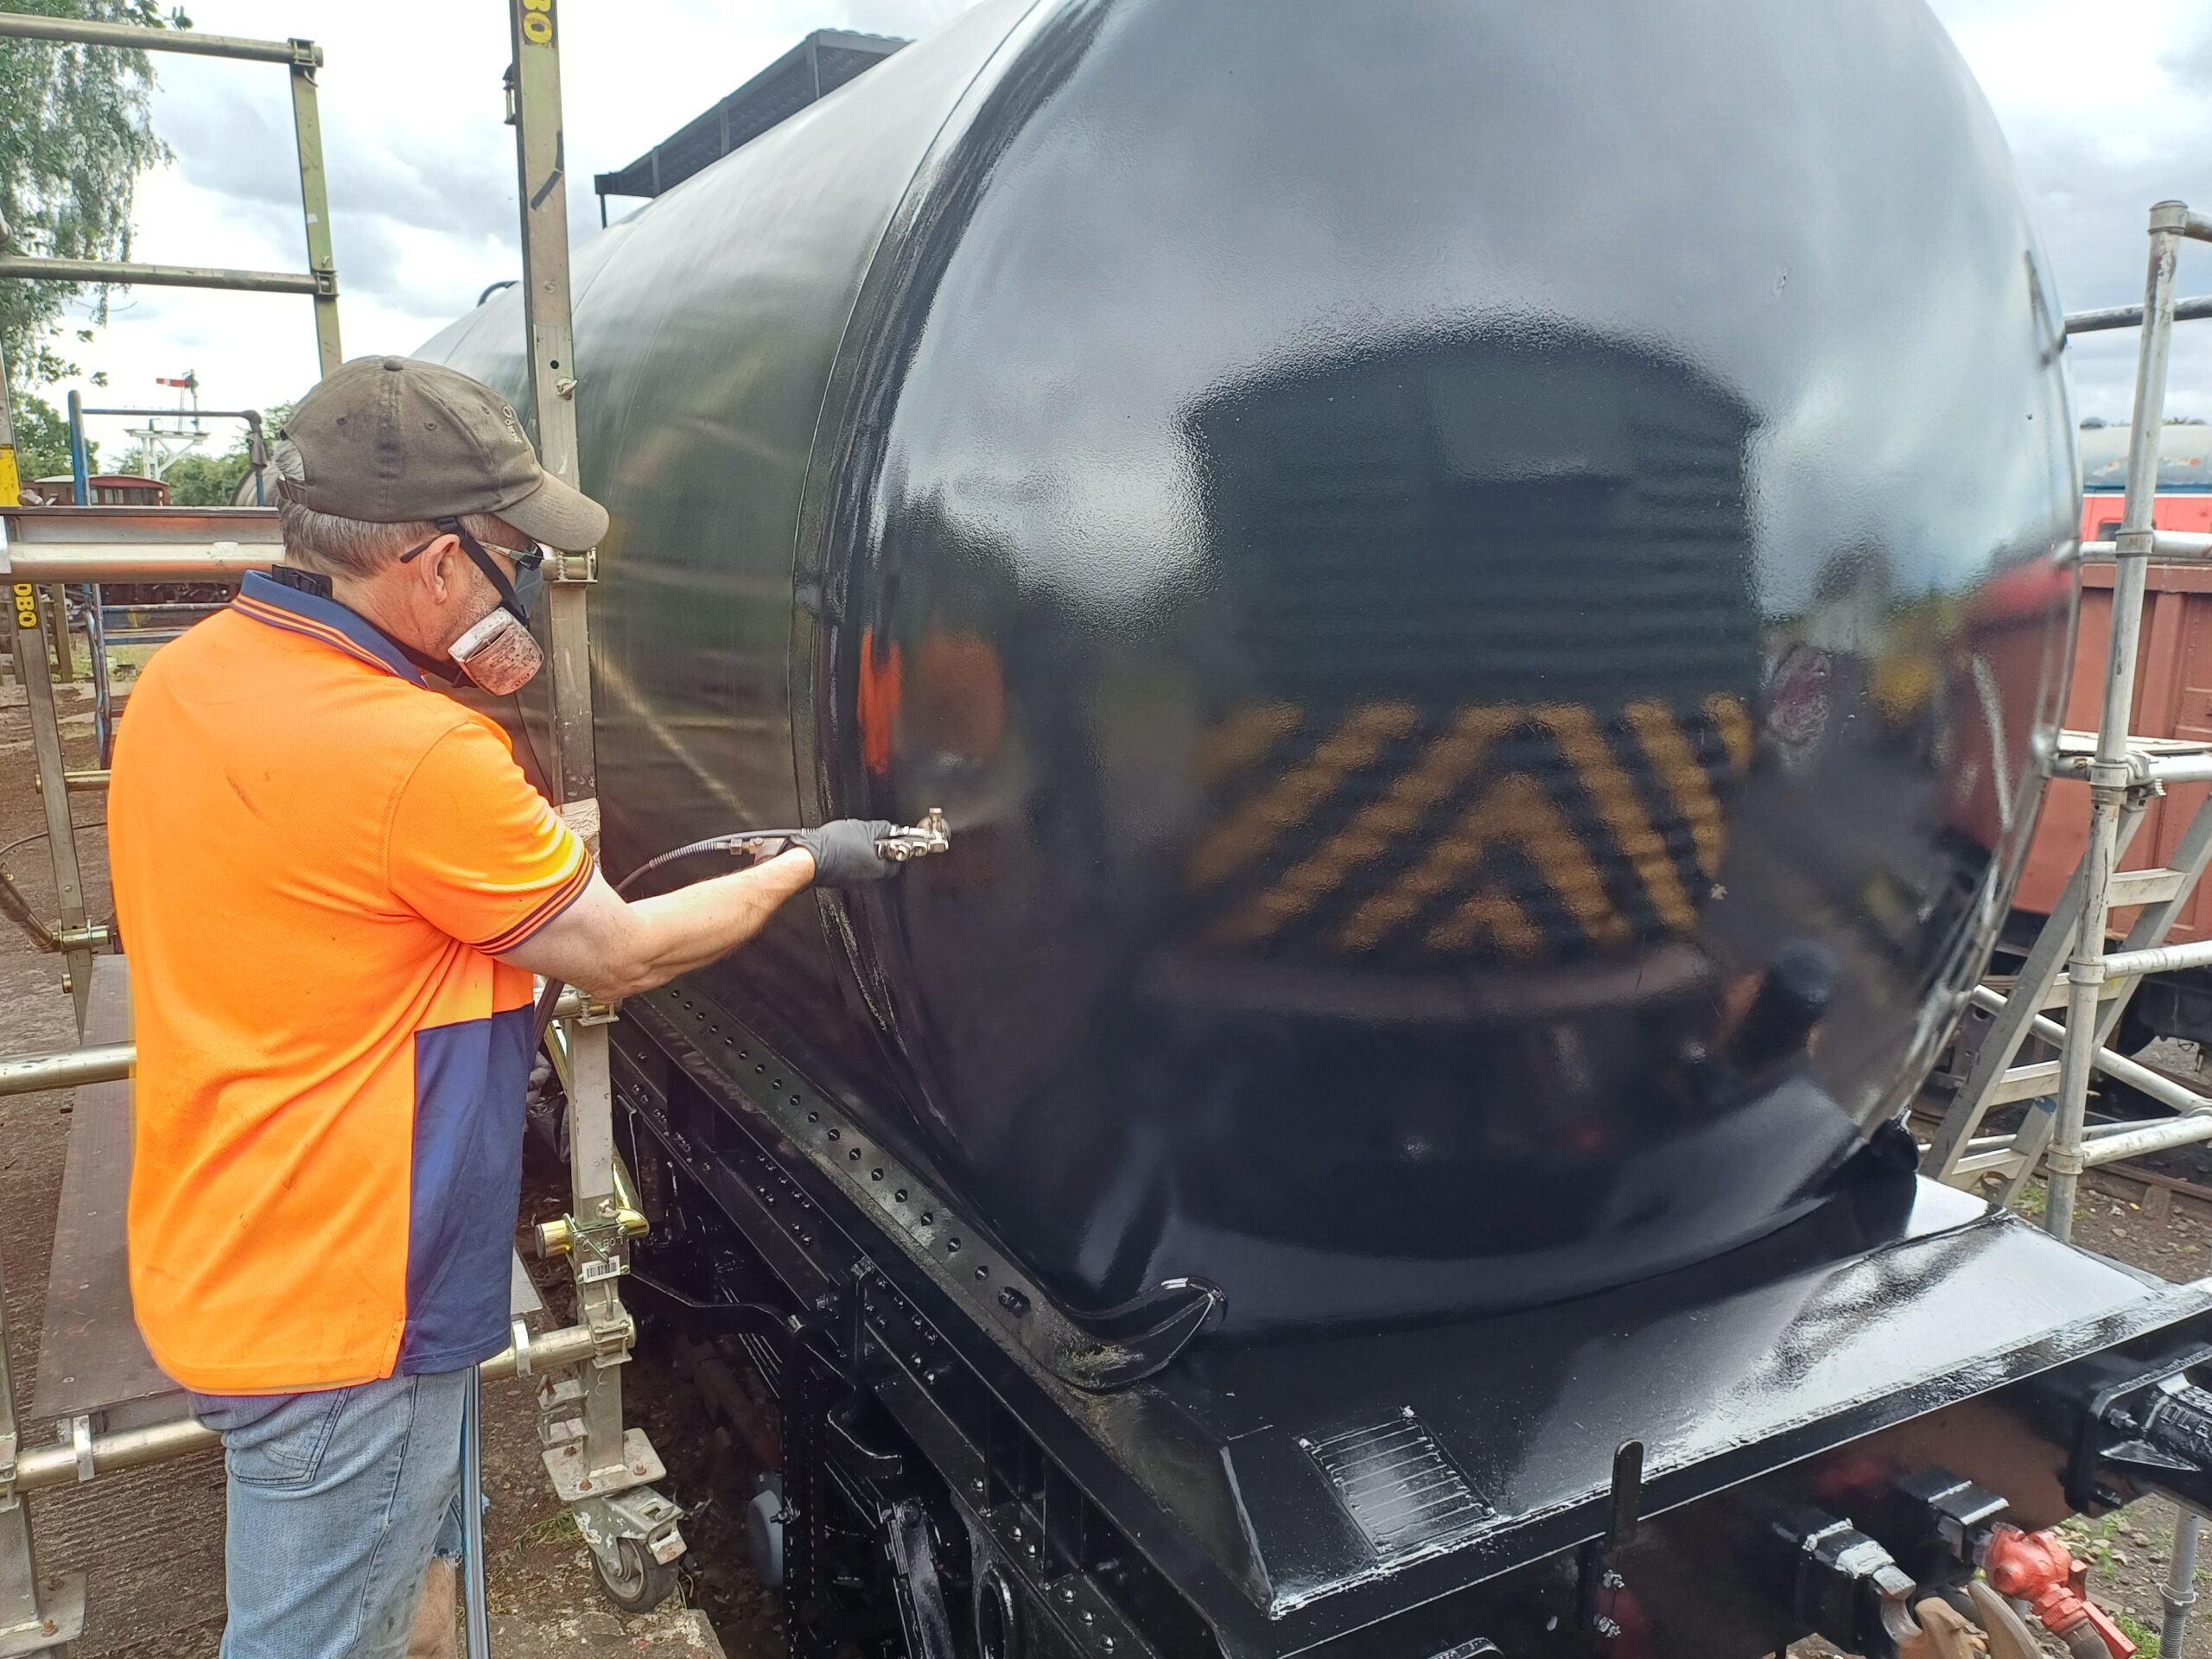
We tackled the two ends of the tank 1919 first, followed by the east side.
The west side was completed in the afternoon.
Further scraping and red-oxide priming was carried out on tank 3621.
Thanks for reading, the next steps for tank 1919 will be detailing, signwriting including the logo application; once we’ve finalised the templates.
As for tank 3621 there is still much to scrape and prime on the underframe, then there’s the tank barrel to sand as well as the Esso logo plate brackets to weld into place.
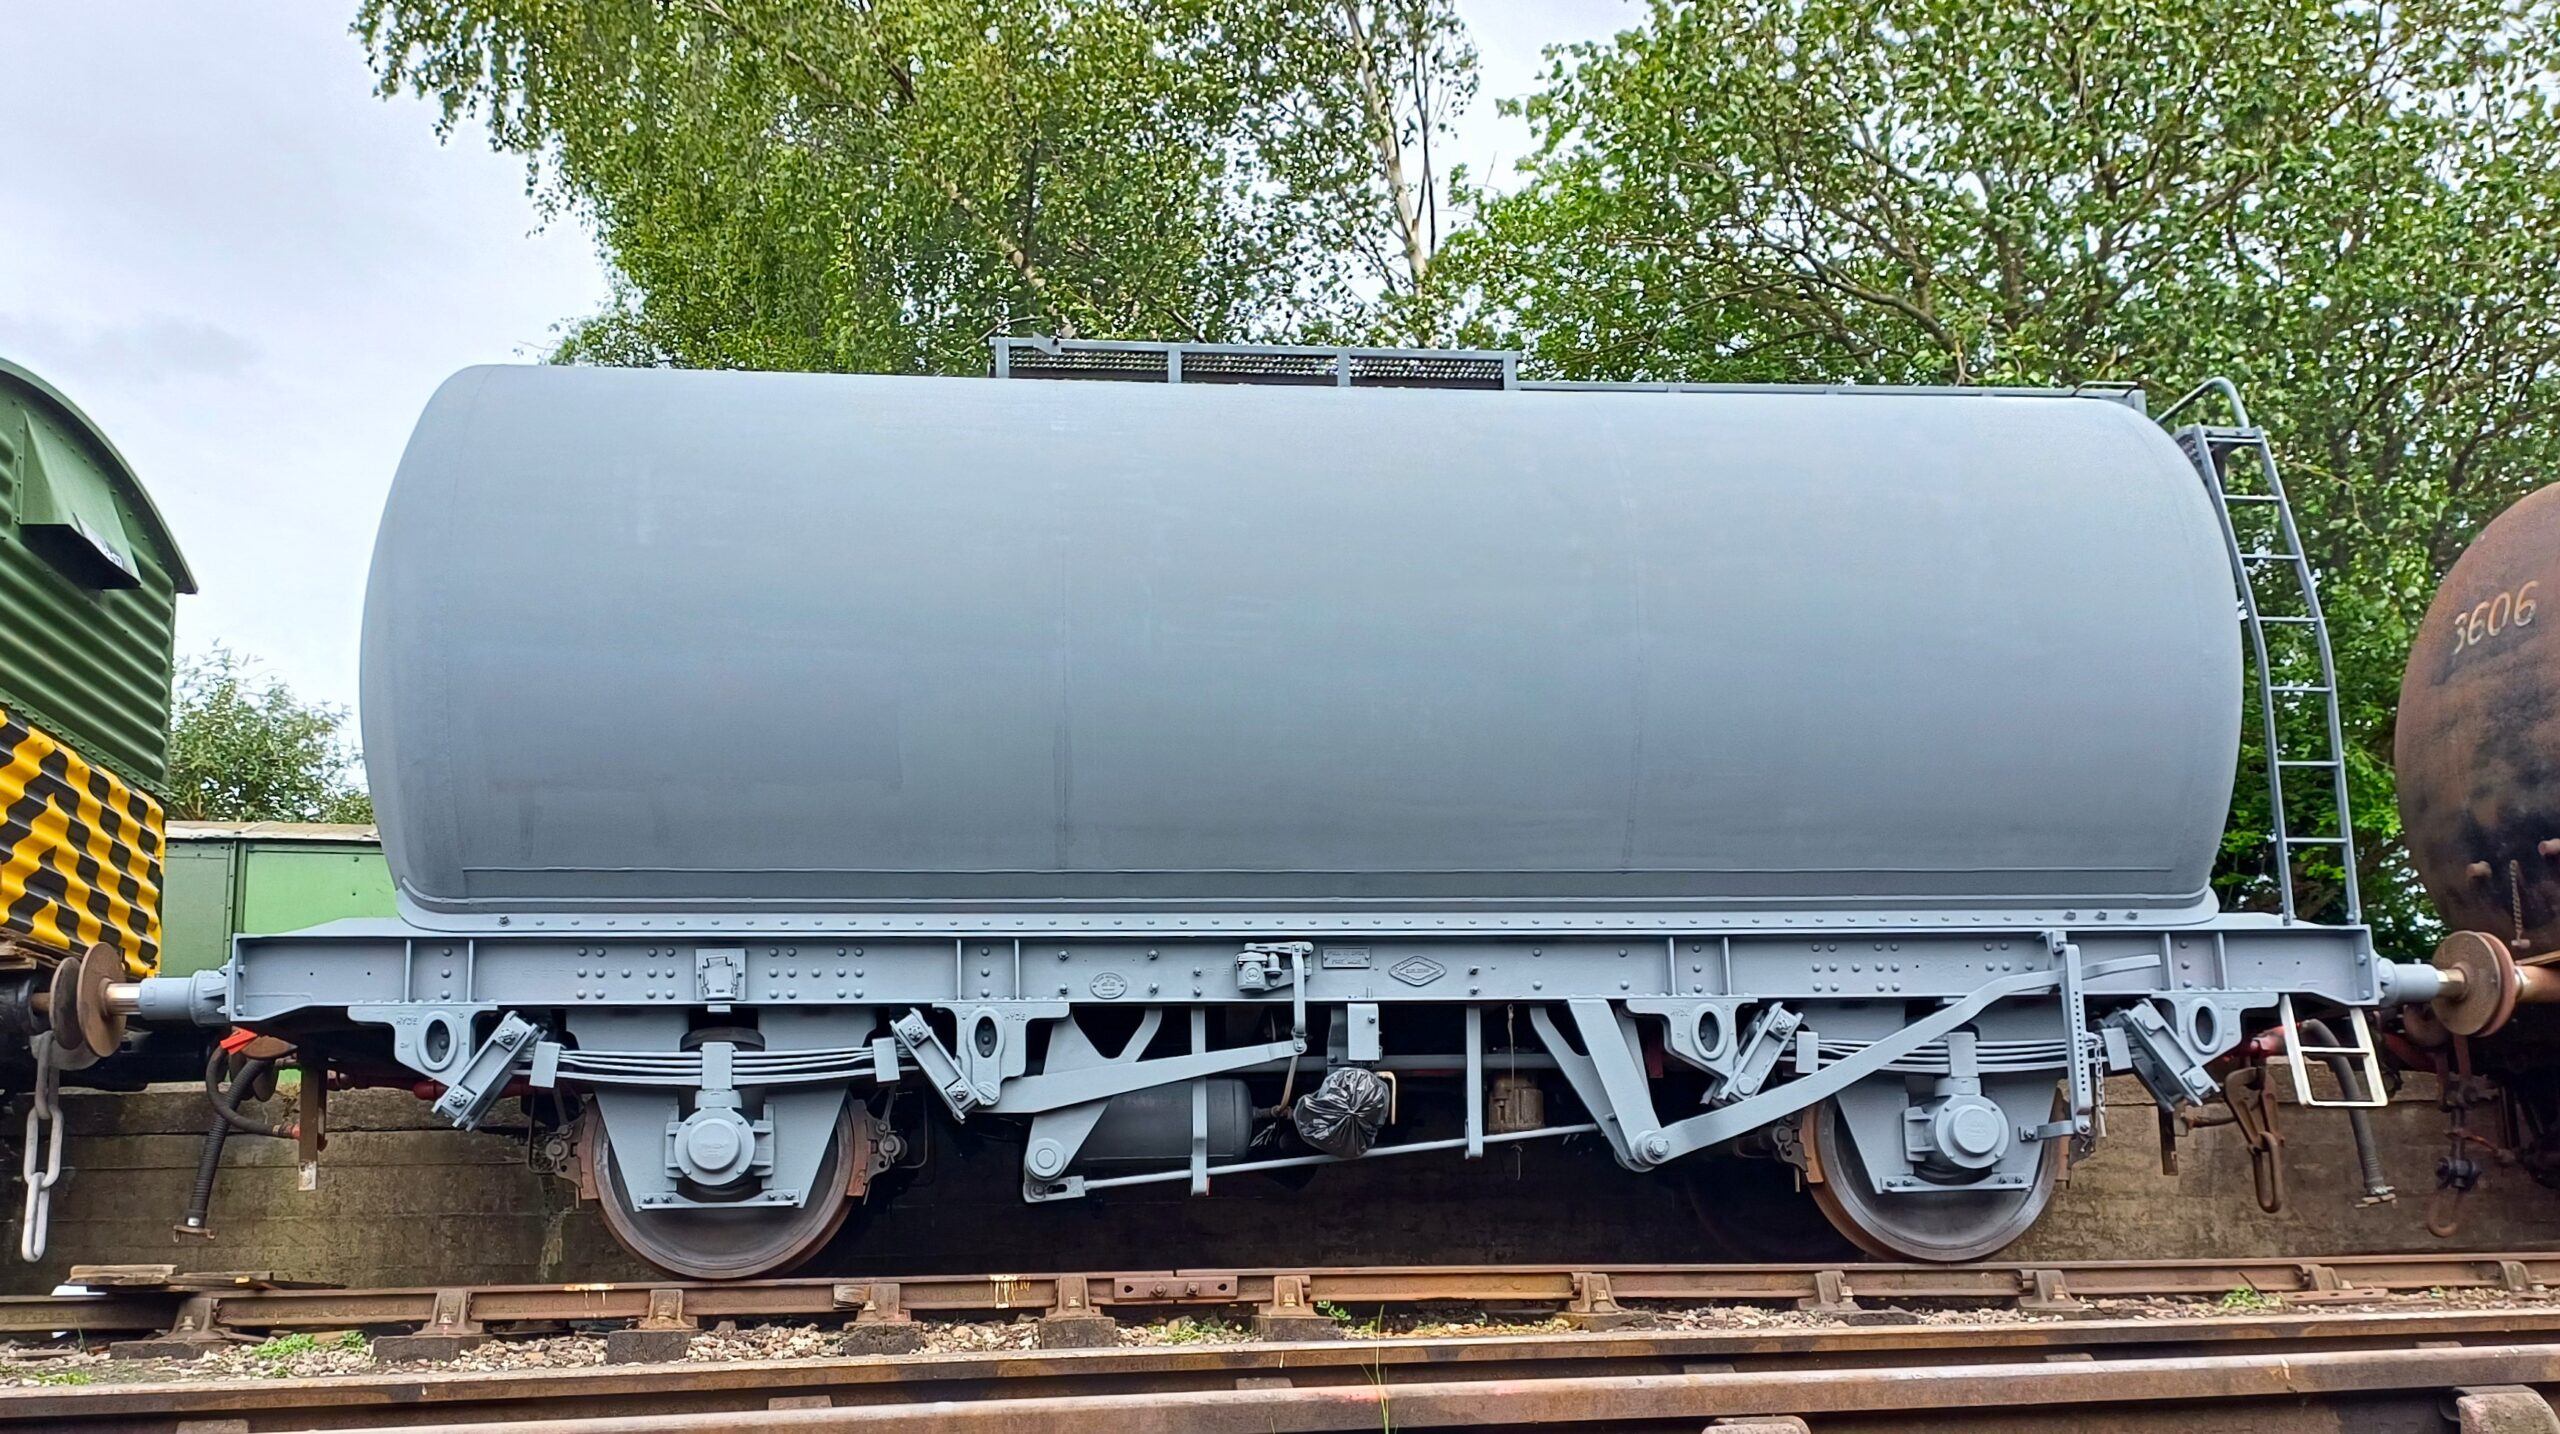
Hello everyone and welcome to this week’s update. This week, we’ve followed up the undercoat on 1919 with a gloss coat and continued the re-assembly of 3606.
1919 first then, although windy, Saturday was a perfect day for painting with it being dry and warm out so came the spray kit. With eight litres of thinned down paint, I applied a solid first coat to the tank barrel and sole bar all round, with the west side underframe getting a look in too.
Charlie cleaned up our spare direction switch for the Brush Pony trucks, and also cleaned up the top of the underframe on the Lowfit, making good work of the whole frame and applying some red oxide primer.
With the paint drying on 1919, our attention turned to 3606. We’ve had a sample bend section supplied to check which was close, but required some alteration to fit, which was carried out between Nick, Ernie and I. Some bends were altered and a section of material let in to extend the front section. this can now go back to the supplier so that they can make the full foot wide support pieces for this tank.
The heating coil pipe on 3606 was also completed, with Nick and Ernie having to recover one of the cutting rings from the compression fitting being used to complete the work. The bent sections where fitted together, then I welded them to the bosses on the tank, as would have originally been done.
That wraps up this week; next week maybe another coat on the 1919, or it could be something else. Lets see what the week and the weather hold for us. Thank for reading
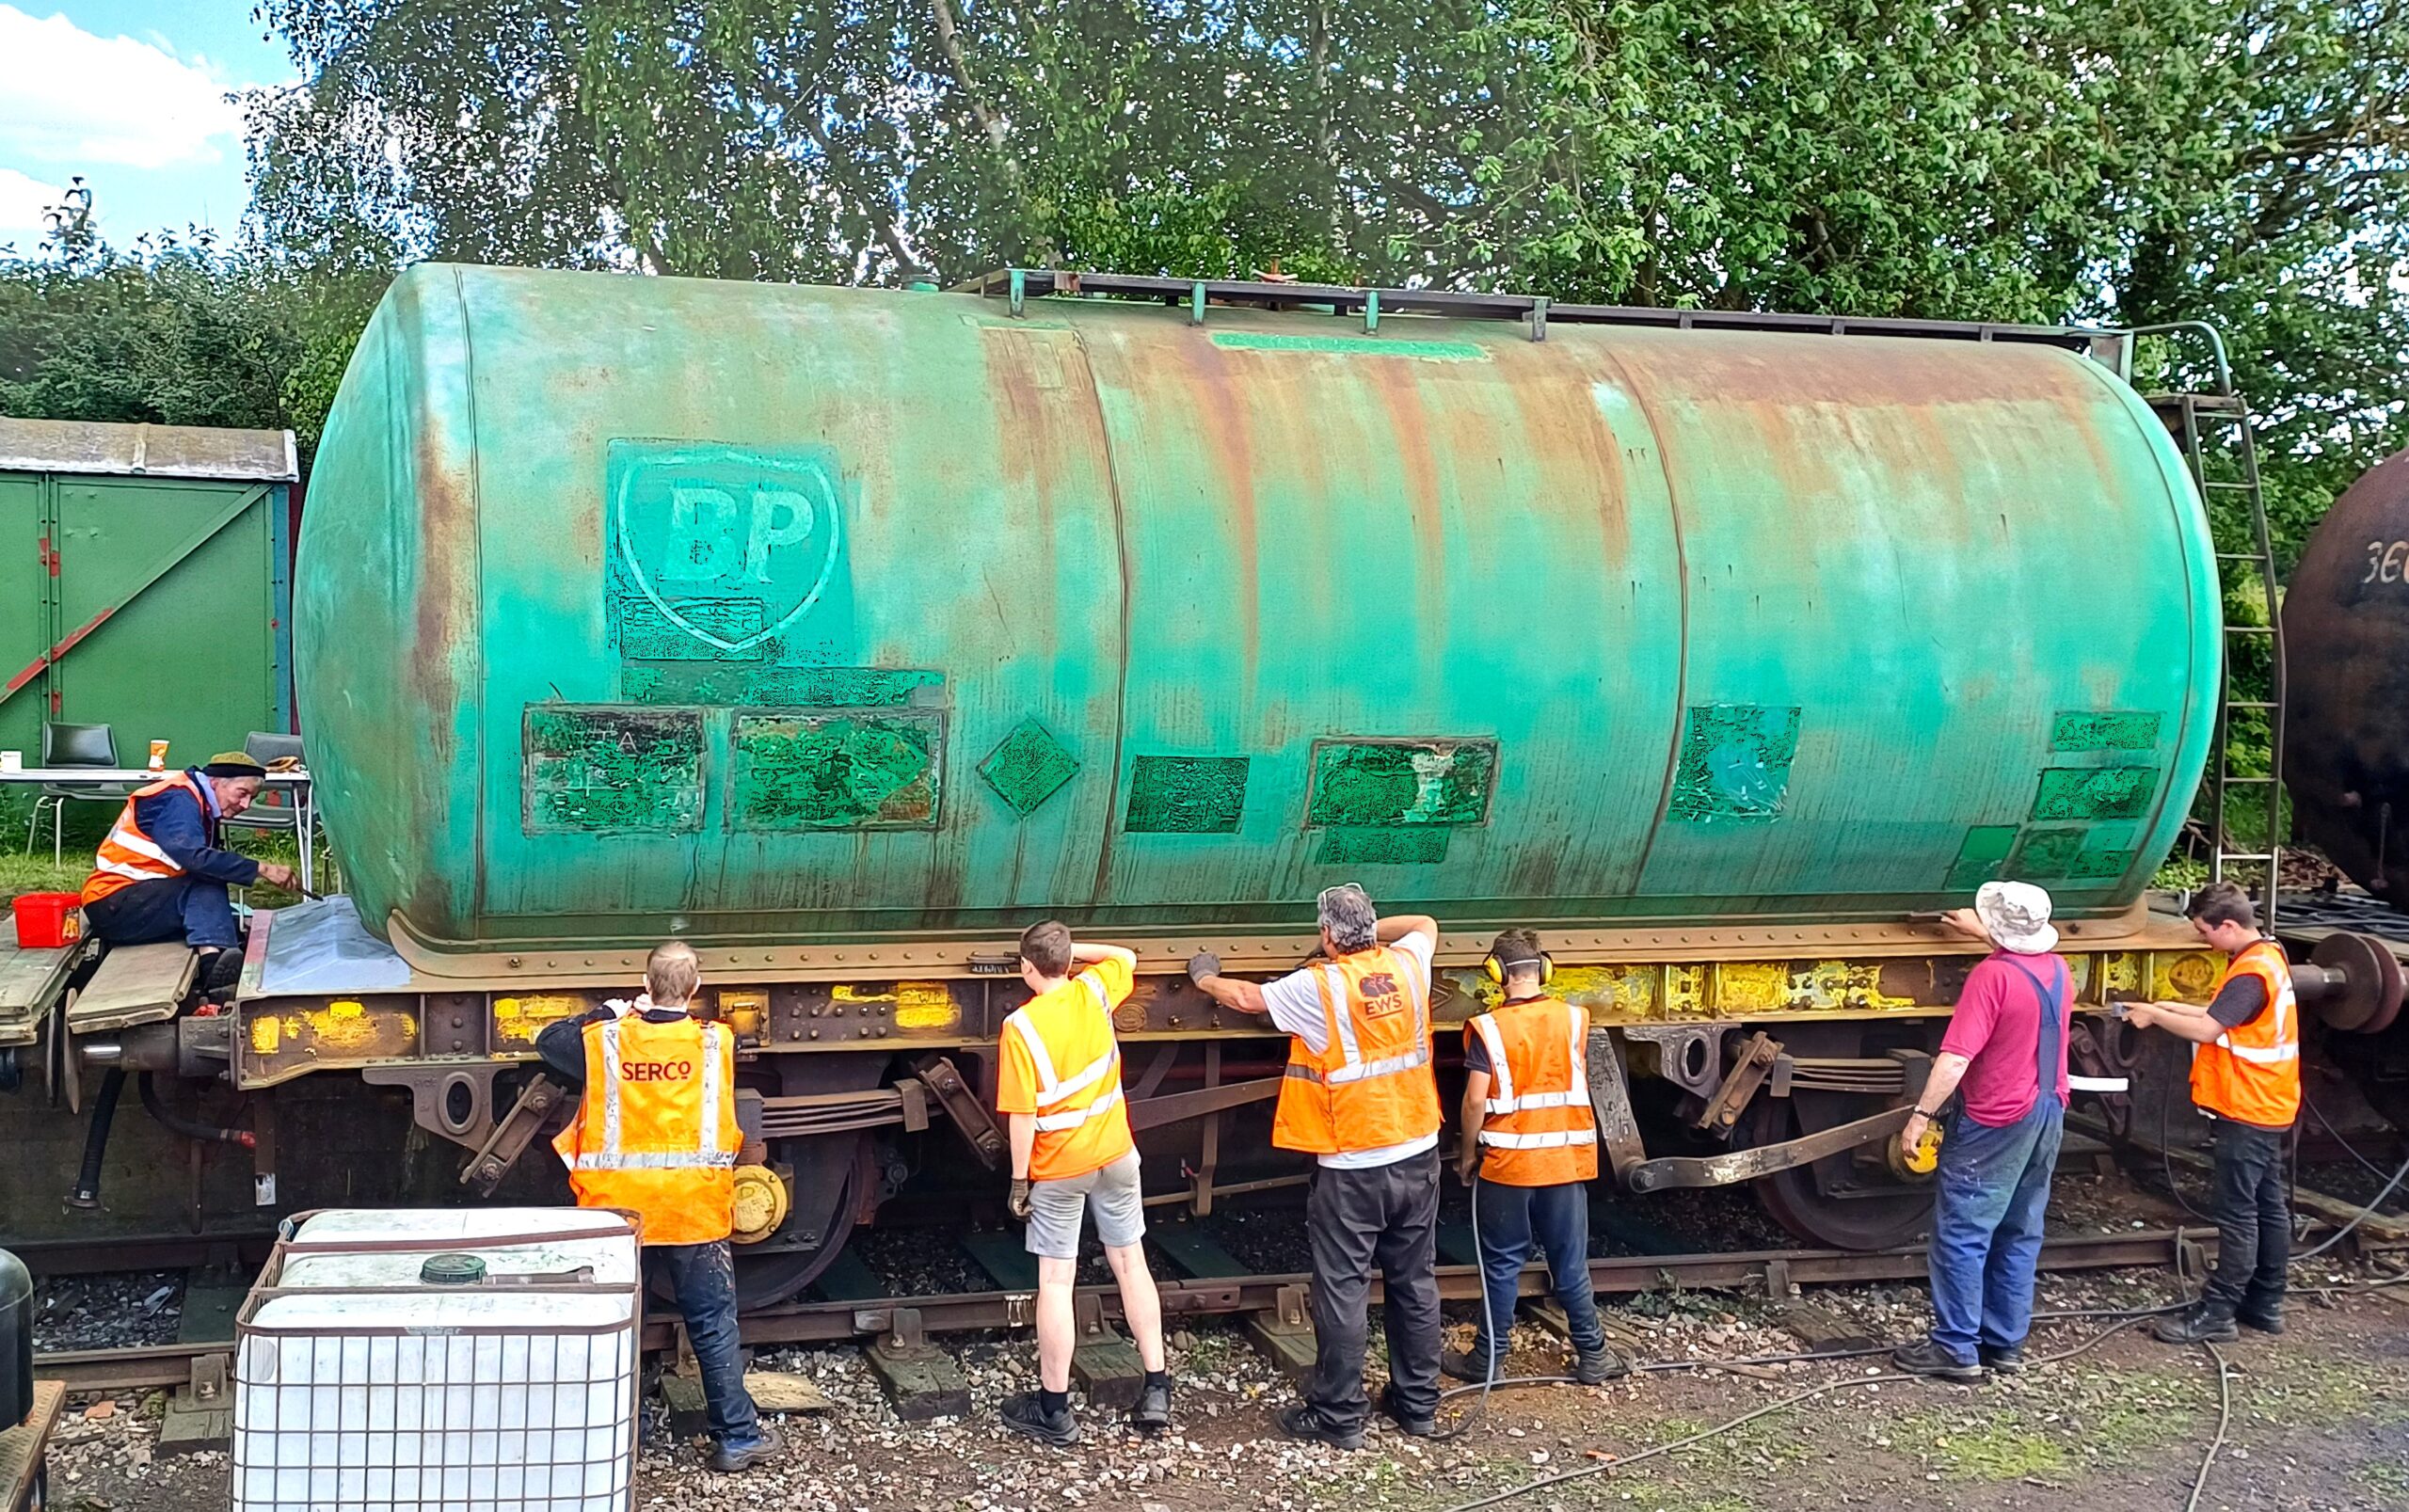
On Saturday Mark, Oliver, Tom, Daniel and Charlie got stuck in to some scraping, wire brushing, sanding and needle gunning on Tanks 3606 and 3621.
The Young Railway Professionals team worked on the Lowfit underframe, again with scrapers, wire brushes and a needle gun.
Ernie, Ross, Dan and myself set to work making 16 steel brackets that will be used to mount the Esso plates on tank 3621. After measuring up the existing brackets on tank 3606, some steel plate strip was cut into lengths and the holes drilled.
The first plate was marked for the bend position, heated and bent to shape. This was then checked against the existing brackets.
The remaining 15 cut and drilled plates were then marked, heated and bent to shape.
The blanked off heating coil bungs on tank 3606 were cut to get the bungs out with a view to making a replacement section of pipework.
Red Oxide was applied to some of the cleaned up areas on tank 3606.
Sunday saw Harry, Charlie and myself continuing with cleaning up areas on 3606 and 3621 followed by more red oxide primer.
All in all another busy weekend with progress on the Esso tanks.
Join us again next week as we continue with the tanks, all the best, Dave
As we move into June, we get the spraying equipment out to give tank 1919 its undercoat.
On Saturday the final parts of the underframe were scraped and needle gunned.
A few areas had some red-oxide primer applied, which dried quickly in the sunshine.
During the week a replacement for a missing 4″ tank top cap was created by 3d printing, this was sealed to the adaptor and will be fitted to the tank in due course.
Whilst the 1940s weekend was getting into full swing in the yard, we got the BBQ equipment out to celebrate Ross’s birthday, as a much enjoyed change to a birthday cake. The salvaged and repaired picnic tables being put to good use. HAPPY BIRTHDAY Ross ! Thanks for the BBQ 🙂
After lunch Edward the compressor was topped up with diesel and we got prepared to start applying the undercoat. The spray gun was set-up, the paint was mixed and thinned; once we had the right consistency this was poured through a filter into the paint sprayer can.
Over the next few hours Ross and myself sprayed the tank barrel, with a little help from Dan and Harry who also tried their hand with the spray gun.
Once the barrel was covered, we continued with the west side underframe.
On Sunday the last few areas of the east side suspension were given a coat of red-oxide, which thanks to the sunshine dried quite quickly.
The headstocks, buffers and east side solebar were hand brushed with undercoat. These areas were not easy to get to with the spray gun due to the wagon being in the dock. The ladders were also undercoated.
Another lorry curtain side sheet obtained from a lorry breakers was prepared ready to be used for van roof coverings. After cleaning and removal of the shackles and straps the sheet was measured up; luckily it’s just big enough to be able to get two 12T van roof coverings out of. Once Charlie had cut the sheets they were folded and stored.
My attention turned to making a jig that will help us with positioning of the Esso logo plates on tank 3621. Unfortunately the Esso plate brackets were removed at some point in the tanks life. The jig will allow us to position the brackets correctly for welding into place. Having tank 3606 alongside with brackets still in-tact made creating the jig much easier. Two ply sheets were clamped to the two upper and lower sets of brackets on 3606.
The ply were cut to shape to allow access to the brackets for welding. Holes were then drilled and the ply was bolted to the brackets.
Timber was then used to create a frame down to the solebar for positioning vertically, and a separate timber up against the handbrake rack to position longitudinally. Frame parts were then made to join the upper and lower ply sections together. Once I was happy with the fit, all parts were drilled and bolted together.
The finished jig was then un-bolted from 3606s brackets.
Once we have made the new Esso plate brackets for 3621 these will then be bolted to the back of the jig, and the frame positioned onto 3621 so the brackets can be welded into the correct place.
So a very productive (and enjoyable) weekend for the team, join us again next week, all the best, Dave
Hello and welcome to a bumper update from the team at Quorn; reporting on two weeks work on the TTA Tank 1919. It was also great to see the mixed goods running again for the popular Goods Experience event.
Last week progress was made with the headstocks and sanding the tank barrel. The remains of the last stubborn sticker adhesive took a bit of removing.
Two discarded picnic benches were recovered from Rothley and given some tlc. These will be put to good use by the team at Quorn.
A donated vice was attached to the heavy framed workbench.
This weekend started with a snapped brake release chord on the Dogfish in the mixed goods, which was given a temporary repair before Witherslack Hall arrived to take charge of the Goods Experience event train. The release chord will be fully replaced in due course.
Work then continued on tank 1919, sanding, wire brushing, scraping and needle gunning the solebars.
Followed by a coat of red-oxide primer; and a bit of much needed tlc for some paint brushes.
With the needle gun out an opportunity was taken to clean up some of the Lowfit underframe.
Monday and we were treated to a couple of customary Bank Holiday showers, however there were sufficient dry spells to continue with solebar and underframe scaping, wire brushing, sanding and red-oxide painting more areas on tank 1919.
A bit of tree pruning was necessary to get a couple of overhanging branches clear of the tanks; of course firstly making absolutely sure there were no nesting birds.
One of the theatrical prop bicycles was repaired using parts obtained from a local car boot sale. Some of the rod type brake linkage needed a bit of re-shaping to fit and operate smoothly.
Tank 1919 is progressing much closer to being ready for undercoat painting, lets hope the weather is kind to us next week !
Hello and welcome to a sunny weekend update from Quorn; we’ve continued with getting tank 1919 ready for paint and completed a small repair to part of the brake rigging on the Lowfit.
Lowfit wagon B452718 is due to go to Rothley at some point for underframe repairs, in the meantime we need to progress other jobs which include a repair to a broken part of the brake rigging. One of the twin operating arms has a fractured spacer and a missing spacer. To make the repair easier, on Saturday the arm was removed from the wagon.
The spacer attachment areas were cleaned up and a new spacer cut from a piece of tubing.
The arm assembly was then clamped together and welded up.
The rigging arm was then treated to a coat of red oxide primer, followed by a coat of gloss black.
Dan continued with his work on the A-Type container, cleaning up more of the metalwork and applying red-oxide primer.
The main focus for the weekend has been needle gunning, sanding and scraping of tank 1919 to progress closer to being able to apply paint.
Where bare metal was revealed, red oxide primer was applied and when dry the north end headstock panel had grey undercoat.
On Sunday the sanding and scraping continued on tank 1919, also a couple of areas on tanks 3621 and 3606 were attended to.
Again any bare metal areas on all 3 tanks were treated to some red oxide primer.
The repaired brake rigging arm was re-fitted to the Lowfit after straightening the locating pins.
The sticker glue residue was removed from the west side of tank 1919.
Next week with most of the team away, we’ll be taking a break from reporting any activity until we’re back for the Bank Holiday bumper weekend at the end of the month.