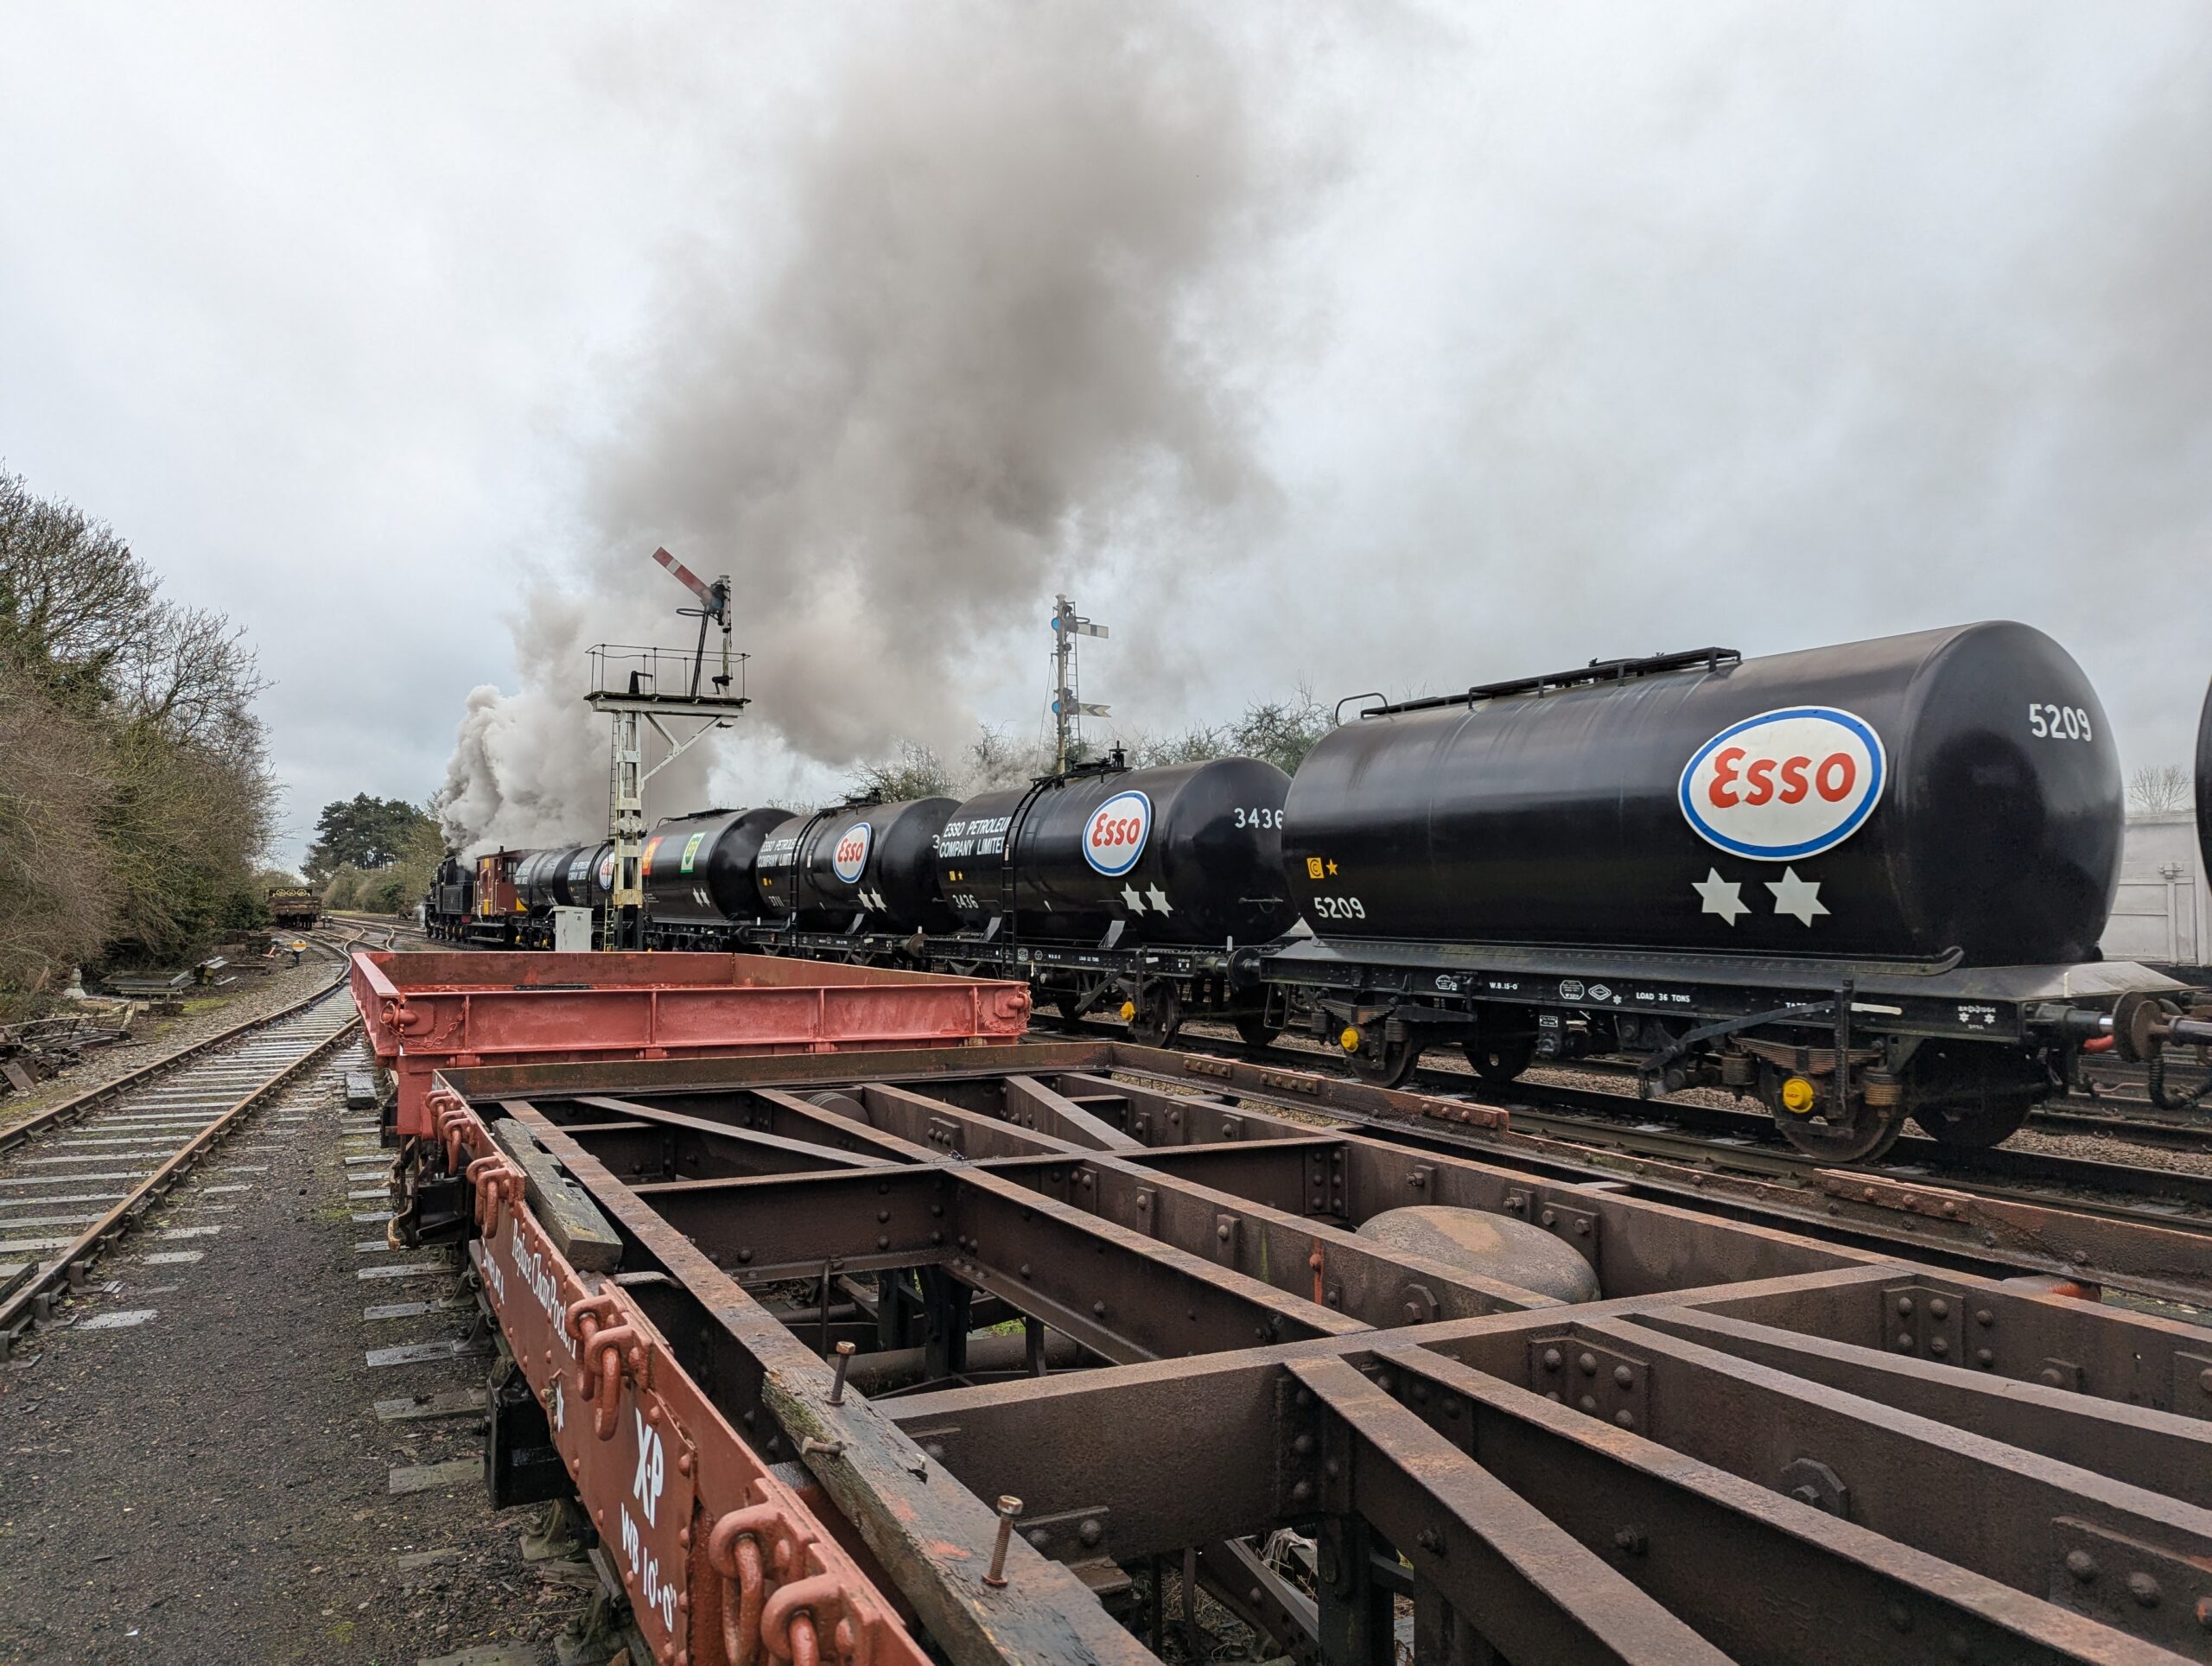
Hello everyone and welcome to another update from Quorn. This week has been one of defect clearance, cleaning and finishing off vac cylinder repairs, including a new improved special tool! Its also been lovely to see the tank train running on Saturday for as part of the firing school. Okay, lets jump in to what we’ve done..
First job was to fit a flip down stop board in the four foot of the dock road to protect the vehicles in the siding, and the people working on them.
Ernie arrived with a new plate to use for pressure testing vacuum cylinder domes once they have been repaired. This also means we can test 18 inch domes as well. Thanks to Ernie for sorting this out. Between Ernie and myself we got the plate sorted and made two o rings to act as the seal between the plate and the dome.
Ernie also worked on another tool used to push out the guide bush in the bottom of the vacuum cylinder.
Charlie, James Oliver and Dan started tidying the area outside the coach beyond the dock as it was starting to look quite untidy and overgrown. Some equipment was re-sited and a lot of brush clearance was done.
Mark, Tom, Oliver and Dan finished off washing the vans in the yard. Mark and Tom then moved over to needle gunning in the pockets of 3689.
Nick and I cleared some of the defects noted against the vans when they have their Fitness to Run exams. A few handbrake rack bolts, underkeep bolts and a handbrake chain. With a bit of assistance we also change two buffers on B784409 on opposite corners.
I had managed to get hold of some soda media in the week and finally had the opportunity to try out the soda blaster, firstly on a vacuum cylinder, but also on 3689. It made a bit of a mess, but thankfully its water soluble! We’ll keep experimenting on this to find out what its best to use it for.
We pressure tested the latest cylinder and found a few further pin holes, however the new plate worked a treat!
Thanks for reading, and join us next week to see what we get up to! Cheers, Ross
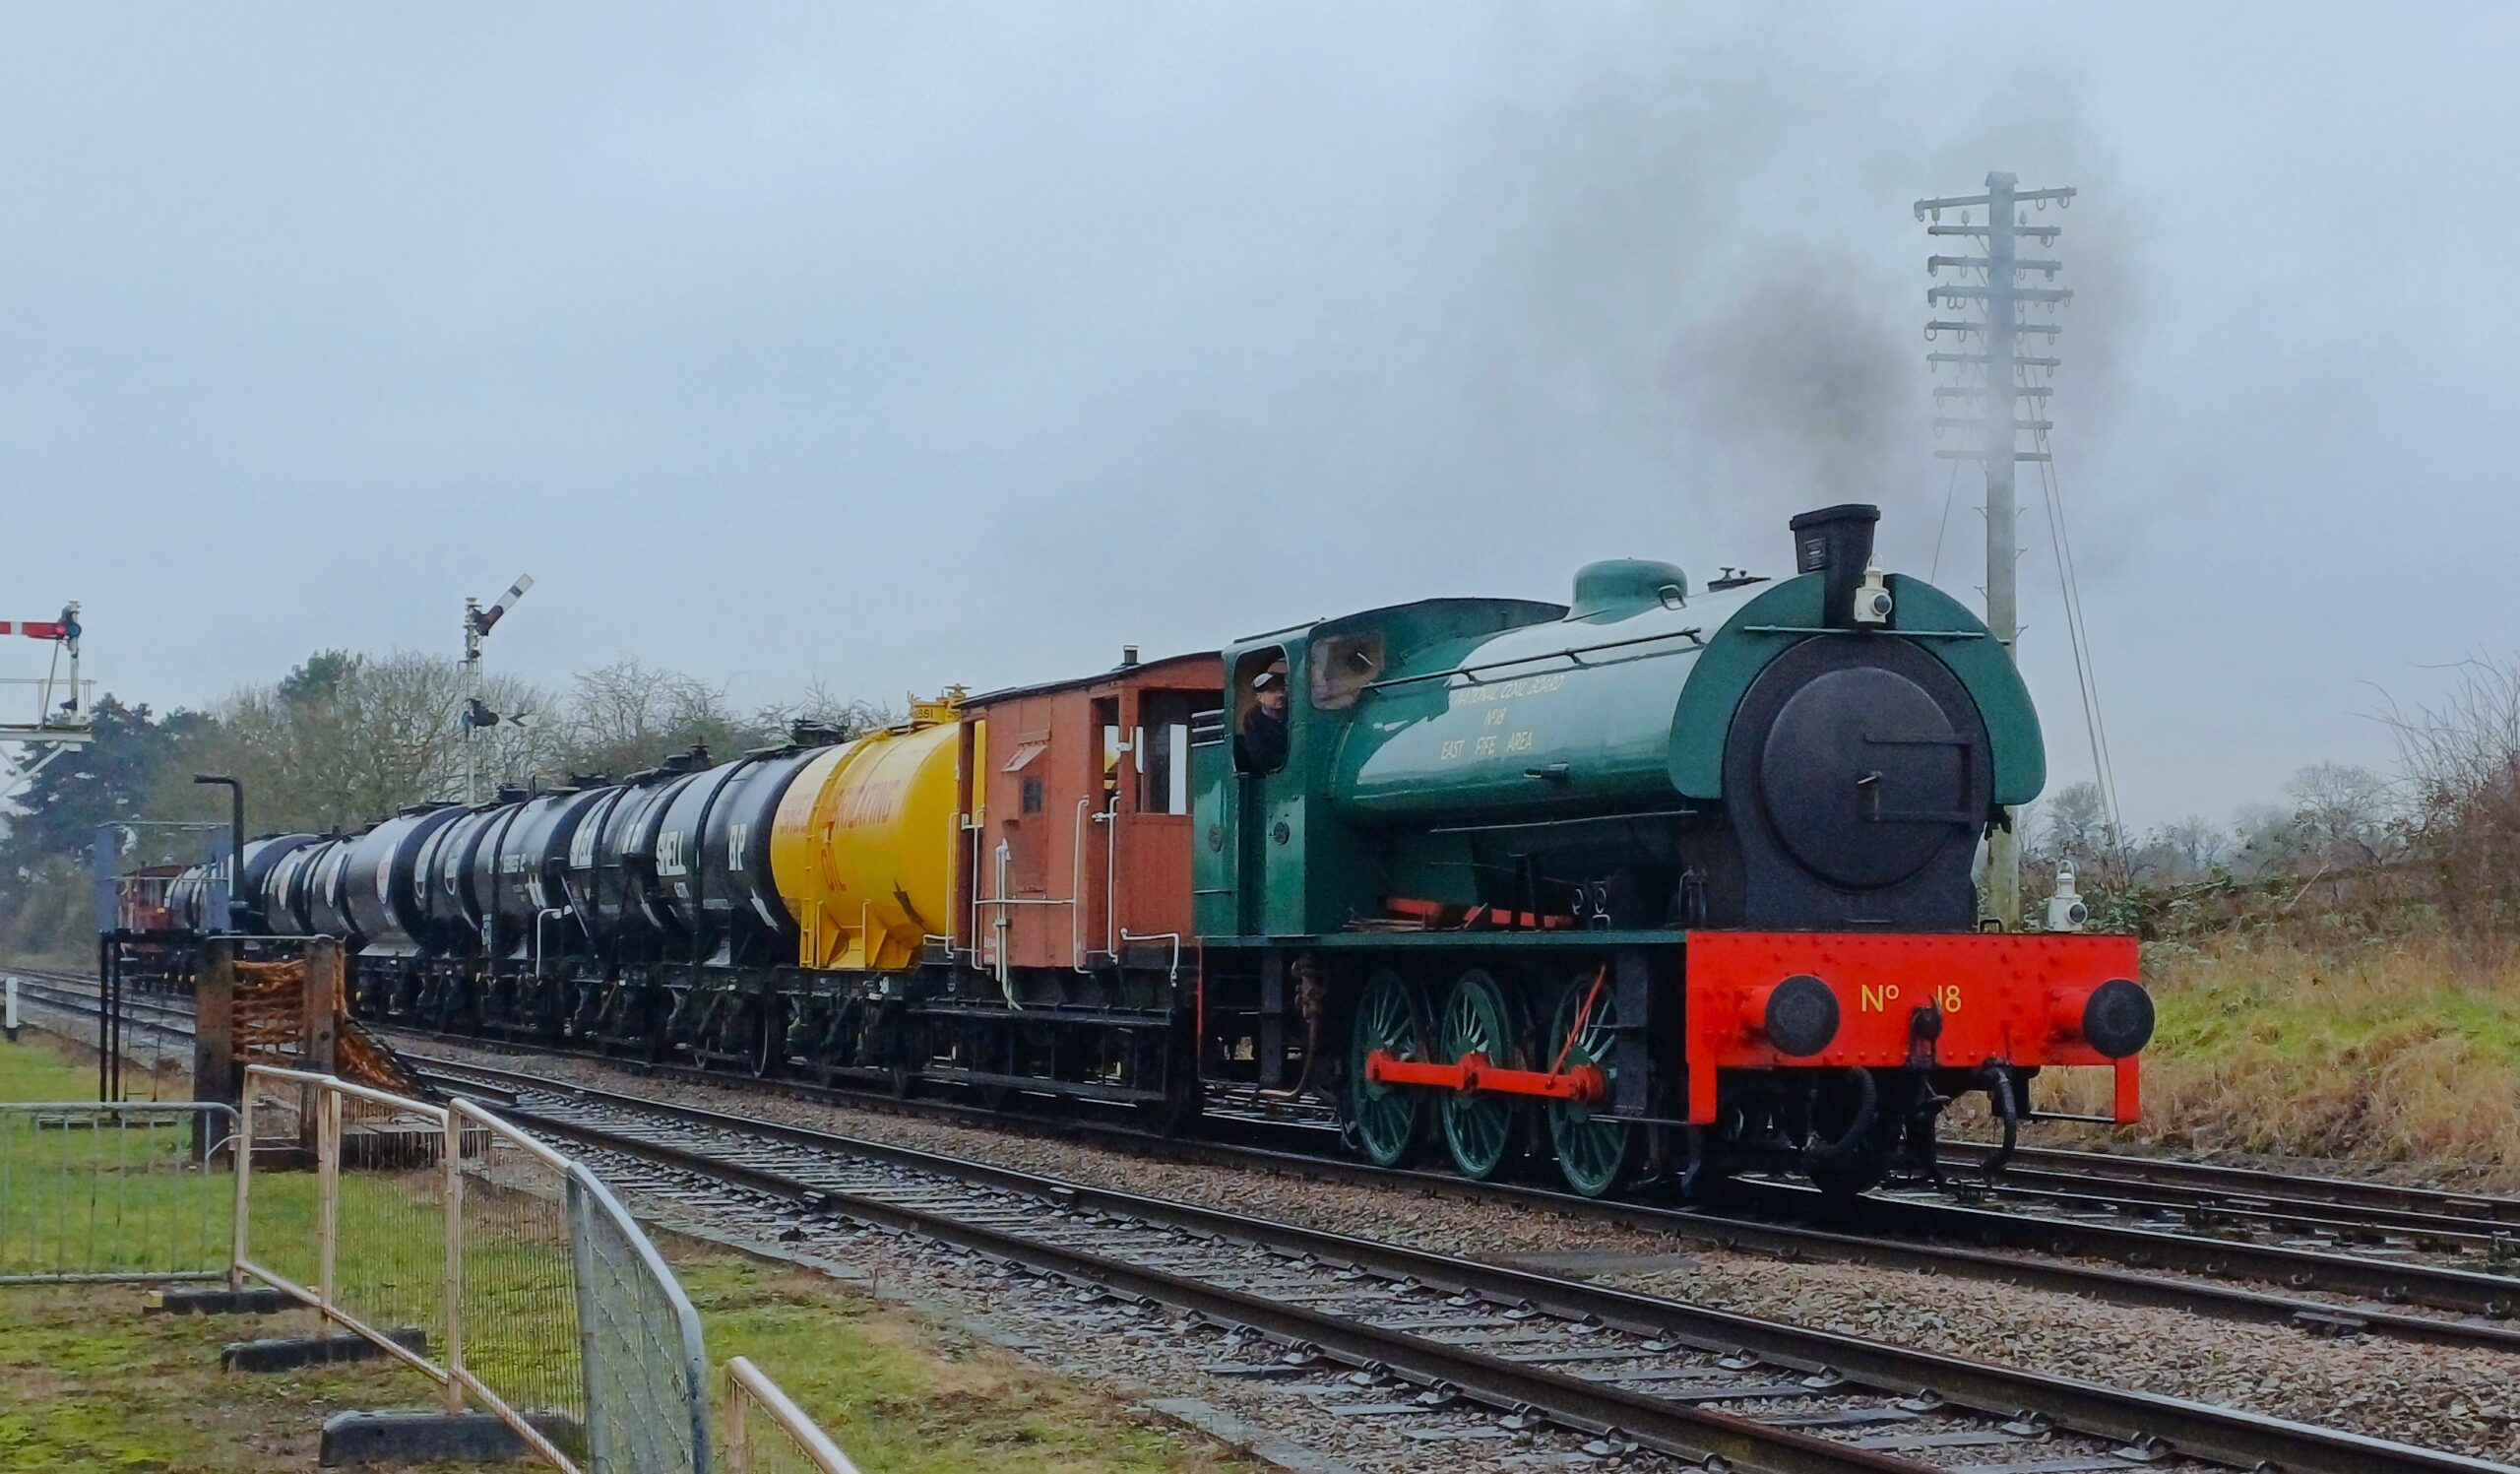
Hello everyone and welcome to this week’s update from the railways winter gala. The tank train has been up and down, with both 3606 (sans Esso plate, though more on that later…) and 1919 making their freight train debuts. Apologies to some of you as they were both facing north!
Ernie carried on with Operation Vacuum Colander, tackling the cylinder removed from 3689 with the hole in the side. Using side wall sections out of a donor cylinder, Ernie cut out the rot and replaced with the ‘new’ metal. This kept Ernie busy for most of the weekend, as more metal was put in the more holes appeared!
Daniel and Charlie started wire brushing two vacuum cylinders which have been in the garage in bits. The surface rust has been removed now ready for some primer to be applied to the appropriate areas
James helped me fix down the table top in the mess coach, finishing the preparation and spreading the glue contact adhesive on both surfaces. The Formica surface was lowered back onto the wood and then clamped and weighed down. I’m going to try and polish the Formica and the surrounding wood will get a coat of varnish too.
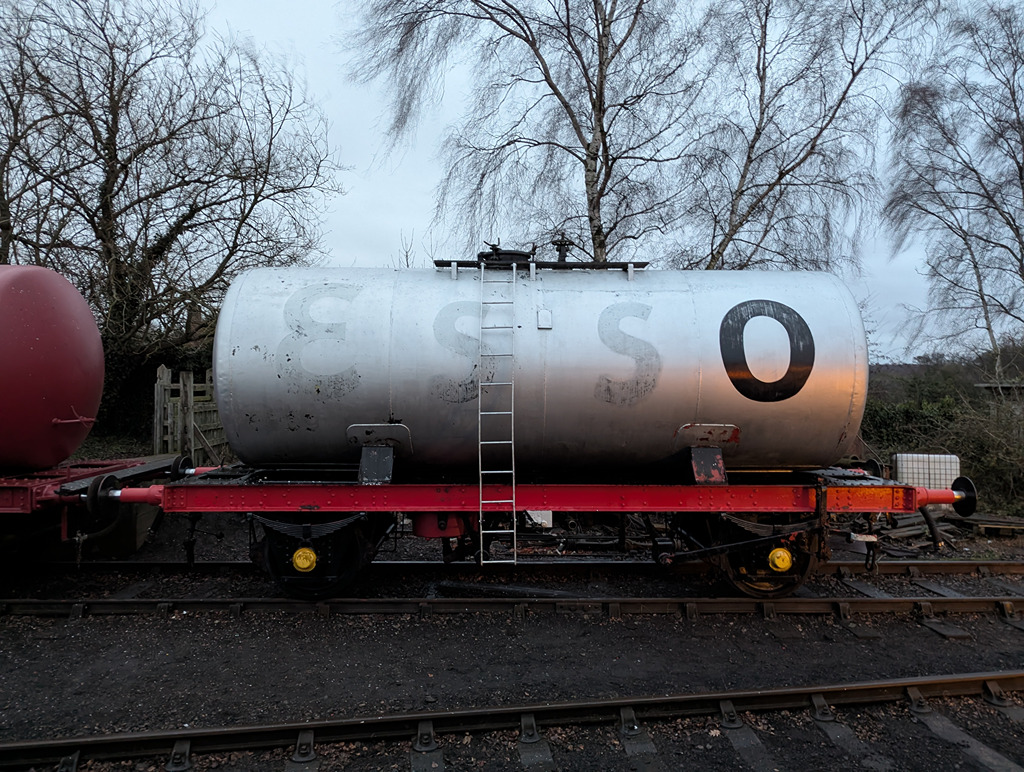
During the week, I collected 8 Esso plates from DEU in Derby who cut, rolled and painted them white for us. This leaves Dave and I to signwrite them. Nick and I unloaded these from my car and stored them in Madge’s box trailer out of harms way.
Dave used the good day on Saturday to get the ‘Esso Petroleum Company Limited’ wording on the west side of 3621, which finishes the lettering on that side, just details left there now.
Nick, Charlie and Oliver went to Swithland on Sunday to recover a gas box to fit to the mess coach, which was done when they got back. We’ll use the gas box to store the fuel for the new heater.
Mark and Tom gave the Conflat a wash down, and then got the needle guns out to prepare the end pockets on 3689. While they did this, Dan picked out the lettering on the Hurst Nelson builders plates.
Dave and I got set up in the Test Car, each of us tackling an Esso plate. There is some work still to do on these including a coat of varnish. Not sure if we’ll put these on 3606 or 3621 yet, but they’ll appear out in the wild soon!
Thanks for joining us, and hopefully you’ve enjoyed seeing the tanks out again at the gala. Next week, I’m sure there will be more tank related activity, but who knows! See you then.
Hello everyone and welcome to this weekend’s update. How did everyone enjoy the weather they got? There was no snow evident at Quorn at the weekend, but at home in Derby I had a good 2 to 3 inches of the stuff which was still hanging around. Both 3854 and 3689 have seen some activity this weekend, and the additional heater in the coach procedes ever closer to being fired up.
Saturday was a colder day, so I spent it inside the coach again running the feed wires from the coach’s bespoke electrical cubicle to the new DC/DC converter that I’ve fitted next to the heater.
Nick, James and Charlie went on a road trip to Foxfield to gather some more Esso tank parts, this time it was more outfeed pipes and valves to replace those that arrived missing on 3854. When they got back and after a cup of tea, the valves and outfeed pipes were fitted.
With the day being a little warmer on Sunday the pressure washer was cracked out to clean down 3689. Tom, Dan, Oliver and Tom worked on this most of the day, getting wet through in the process. Most of the unsound paint came off including most of the black sign writing resembling silver snowflakes. After this the team gave 1802 a going over, removing its layer of algae.
I carried on in the coach, getting the heater all wired up and at the end of the day I was able to get the heater powered on which leaves the plumbing for me to do. Ernie spent the morning at Loughborough using the machinery to make us a tool for punching out the bushes in the base of the vacuum cylinders. Thanks to Dave Wright of LMS for the material offcuts.
That wraps up this week, thanks for reading everyone! See you next week for more wagon antics!
In what is our first post of the 2026, we look back on 2025. For us you could call this the year of the tank, perhaps more specifically the year of the Esso tank. We started off the year however with the TTAs.
In the first months of 2025, we worked to produce two identical vacuum through pipes for both 1802 and 1919 after first establishing the routing. This has turned our two TTA tanks into TTBs as they were built – B being the suffix code in TOPS for an air braked and vacuum piped wagon.
February also marked the arrival of 3621 from the Fox field Railway. Its arrival marks the fourth such tank at the railway, and you may notice a thread forming…
In March, an Esso tank chassis arrived from Foxfield Railway which, thanks to our friends at the National Wagon Preservation Group (NWPG), was identified as the chassis from 3797. This began a bigger project, and probably a preservation first, to reunite a barrel and chassis.
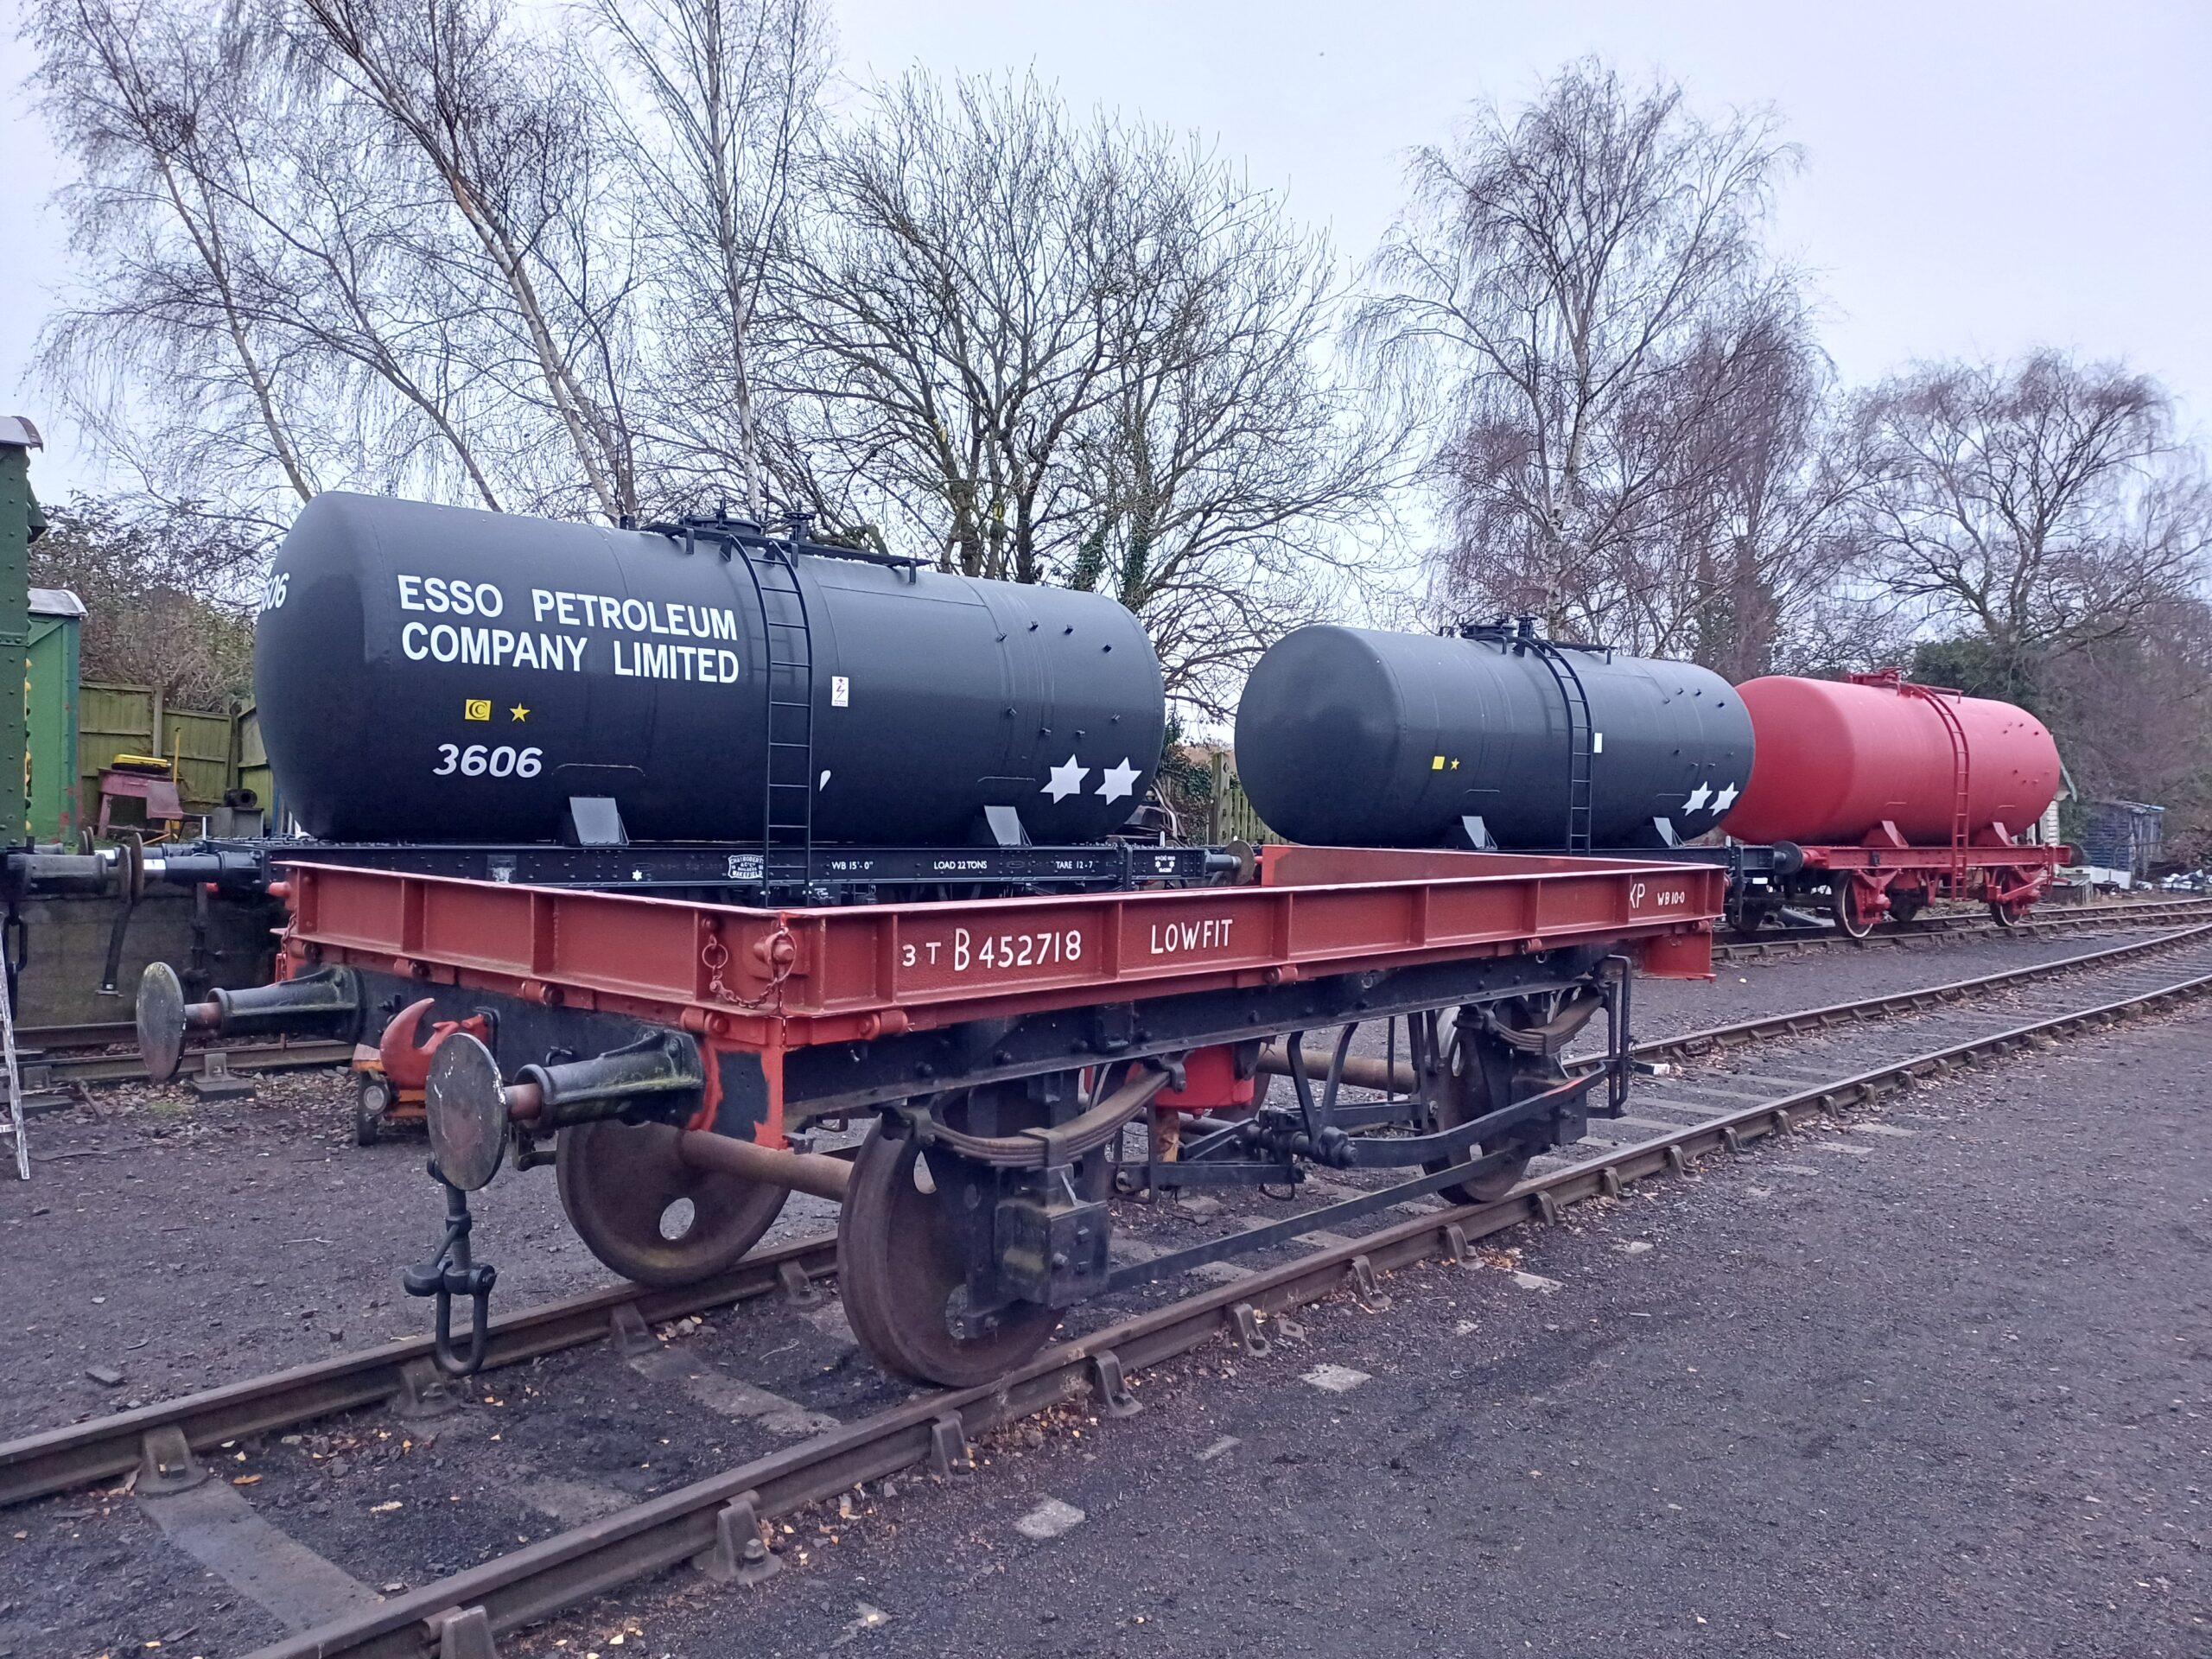
Thanks again to the NWPG, a barrel was located and purchase and was lifted on in March, and welded on in July with new side tank supports and ladders fabricated and fitted. 3606 and 3621 were both prepped and painted in October.
With 1919 still at Quorn, its barrel and chassis was prepared, painted and signwritten and release to traffic in August.
Winding back to July, the gang helped Eireni and I celebrate our wedding at the Museum of Making. I still smile at the memories of the day and seeing the Quorn lot greek dancing.
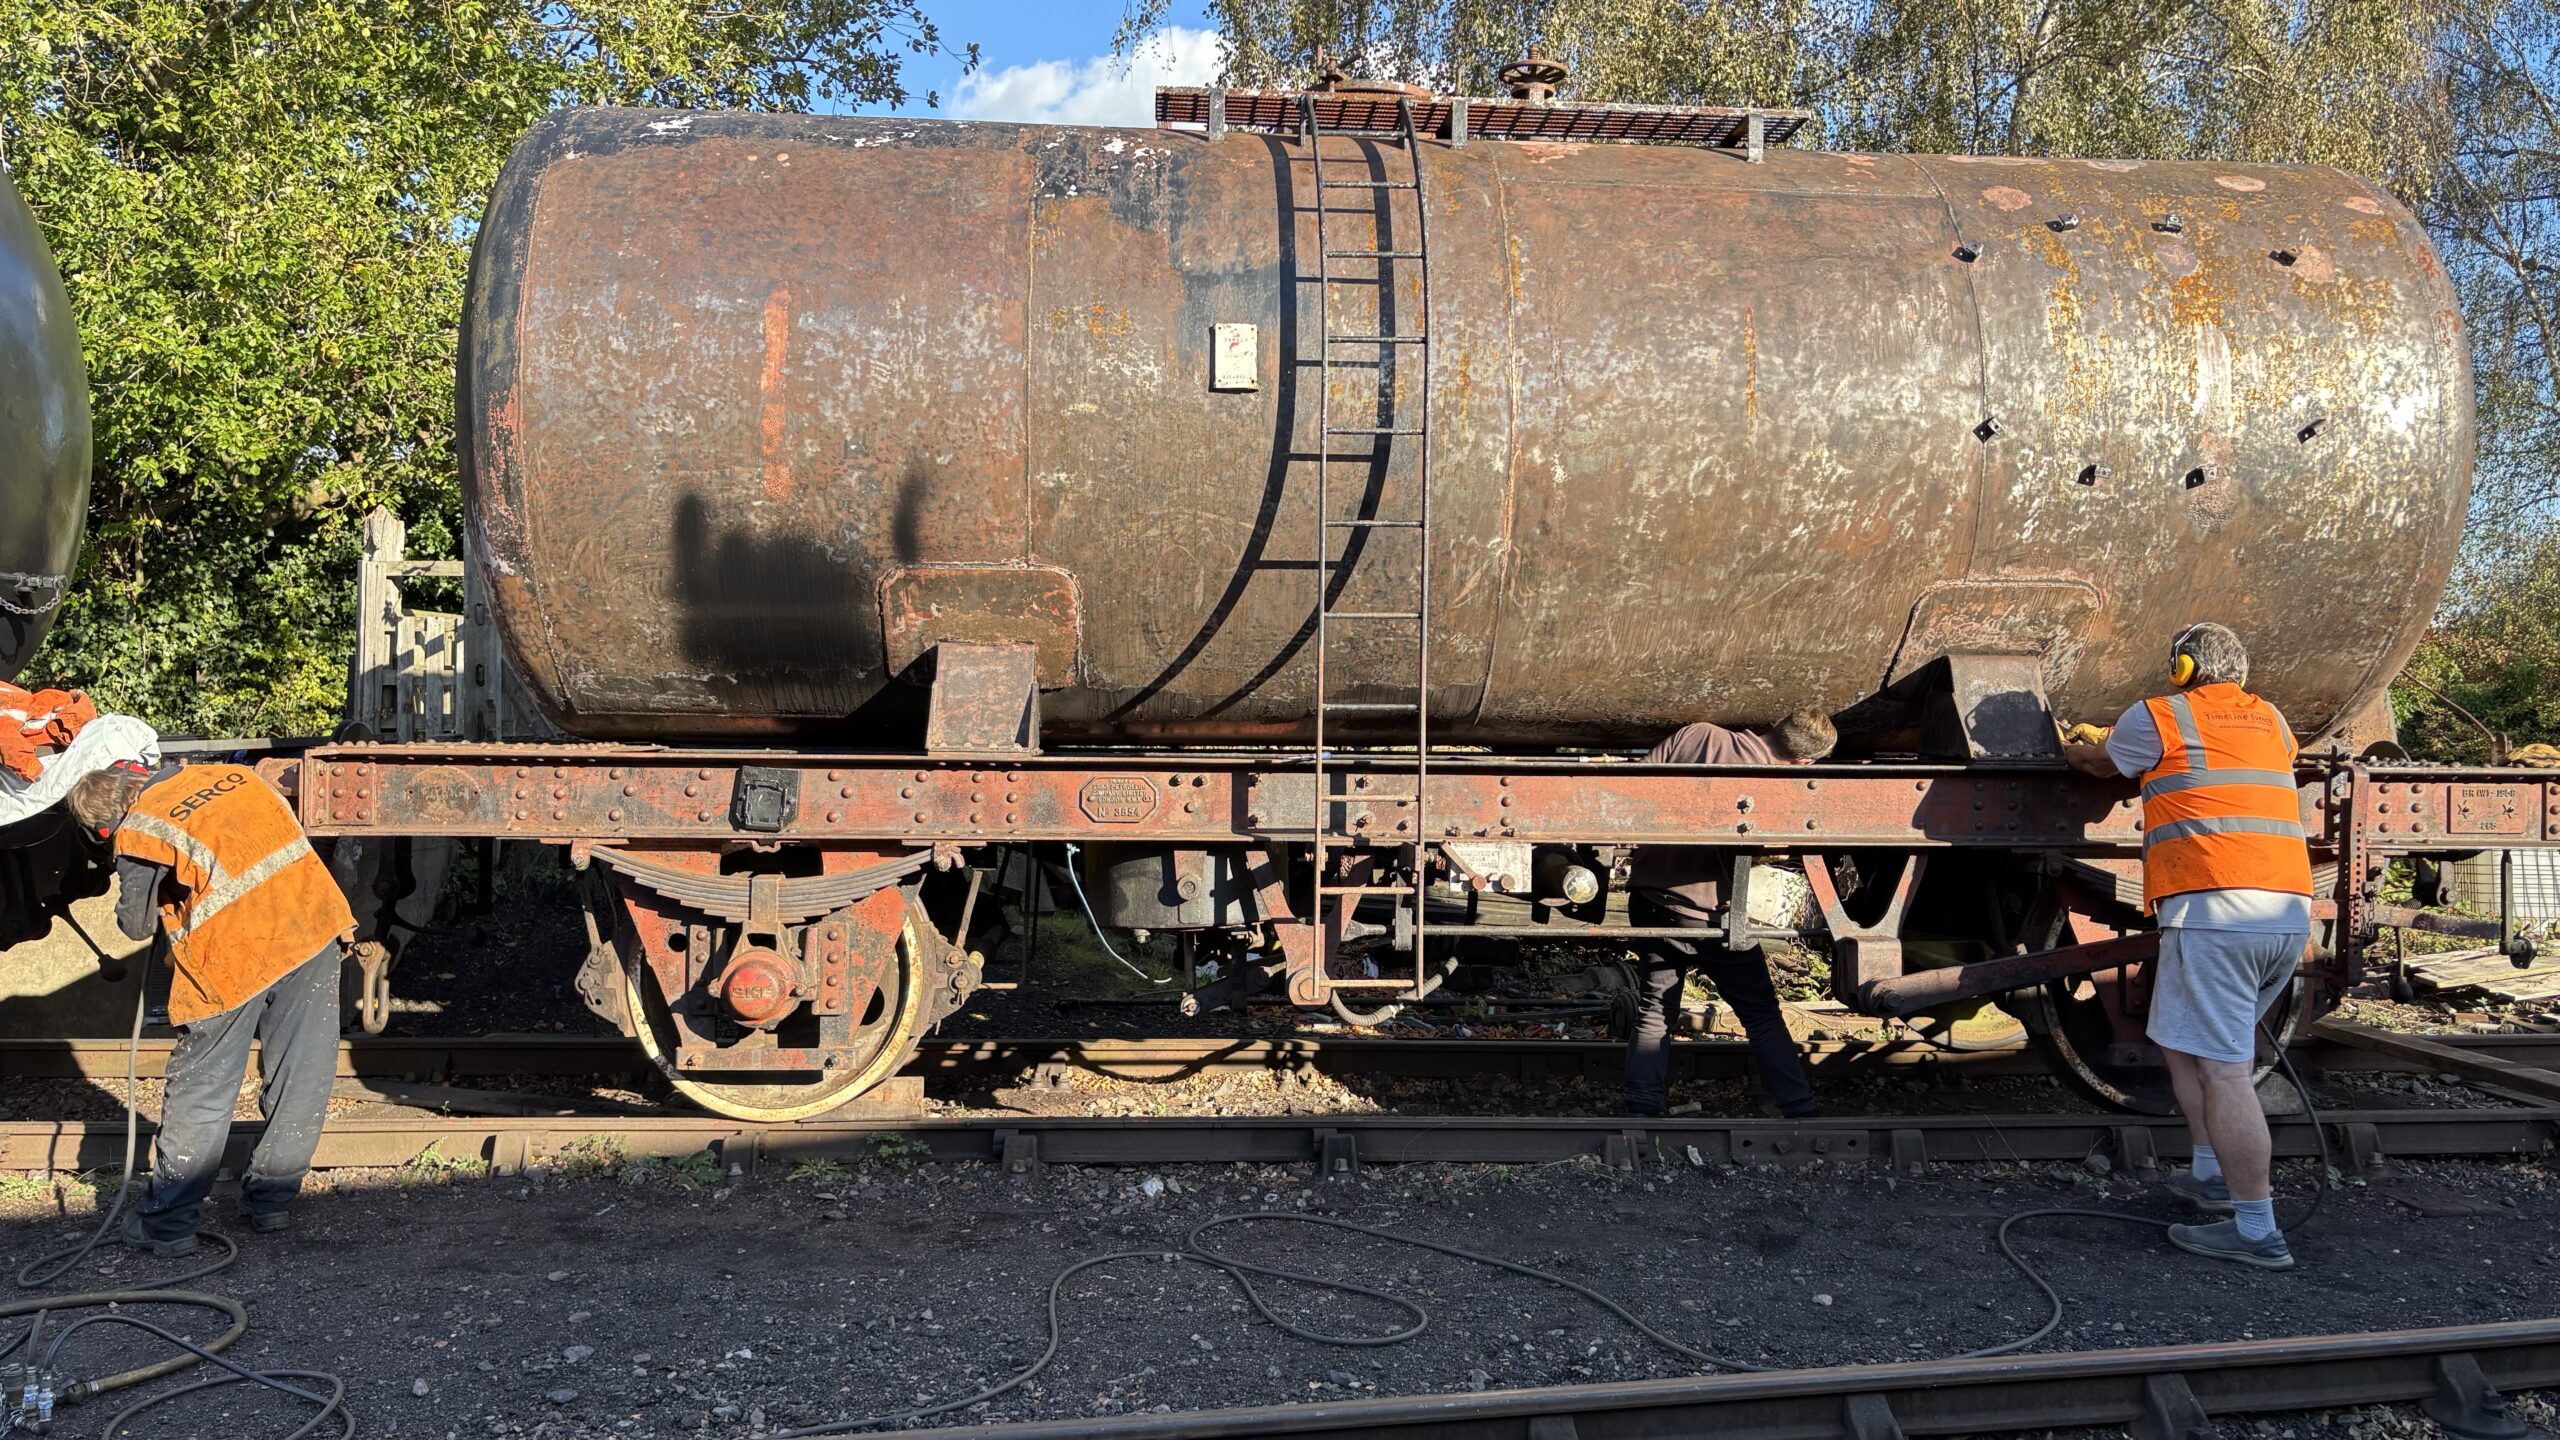
Also in July, another Esso tank had arrived from Llangollen. Numbered 3854, it sat as next in the queue. By the end of the year, its sat in primer waiting for undercoat and gloss when the weather is right.
The Lowfit went to Rothley to have both dragboxes rebuilt has a contract job by the C&W team, and also at Rothley a further chassis had arrived to re-wheel a Shock Palvan body. The body was owned by RVP as a store, and is in good general condition aside from the door frame work.
In October, yet another Esso tank arrives at the railway this time from the North Dorset Railway. This tank is 3689, it was made fit to move and has had the vacuum system repaired following the discovery of a ventilated vacuum cylinder. This tank marks the 7th 35t gross Esso tank to arrive at the railway.
Now back at Quorn, the Lowfit received a vacuum cylinder overhaul and a weld repair to the vacuum train pipe.
Towards the end of the year, we’ve again been able to move to Rothley to repair B777728 after it was withdrawn earlier in the year due to the roof trying to part company with the van. We’ve been able to repair and re-sheet the roof, we’ve fitted new door ‘noggins’ and have repainted the two ends and the east side. The west side has also been varnished to increase its longevity.
We’ve opened the Test Car for various events in the year, three times in April, and also the Rail 200 event in August which has given us the opportunity to share the vehicles unique history and meet you all. We supported the ever popular Railways at Work Gala and put on a fantastic show.
Around new arrivals and repaints, we’ve carried on with the usual vacuum cylinder overhauls, annual bearing exams and other small jobs. The BEVs have had repairs and maintenance, and Edward has also had a rebuild.
We’ve launched our new look website, and after a few teething issues its settled down. I’ve got a few other ideas for improvements which I’ll be working on over the coming year.
In 2026, we’ll be continuing push on the Esso tanks, aiming towards a block train of Esso type tanks. 3621 is awaiting signwriting, 3854 is awaiting undercoat and gloss and 3689 needs the works. We’re planning to refresh the van train, the east side of most vans haven’t bee touched for a number of years and they are starting to look a bit tired. We’ve also got a few more roofs to look at. We’ll also get the Conflat and the Lowfit out after a new floor each.
Thank you for reading, and for your support over the year. Our next update will contiue as normal on the 4th.
Hello everyone and thanks for joining us for the last update before Christmas. We’ve wrapped up our last bit of work at Quorn while we move to Rothley over the Christmas period to work on B777728, which was withdrawn earlier in the year with a roof that was trying to break free.
Our weekend starts this time on Friday after B777728 was placed into the shed to start its drying out process. Nick and Charlie stripped the roof hoops and roof sheet, then removed the previous roof edge repairs.
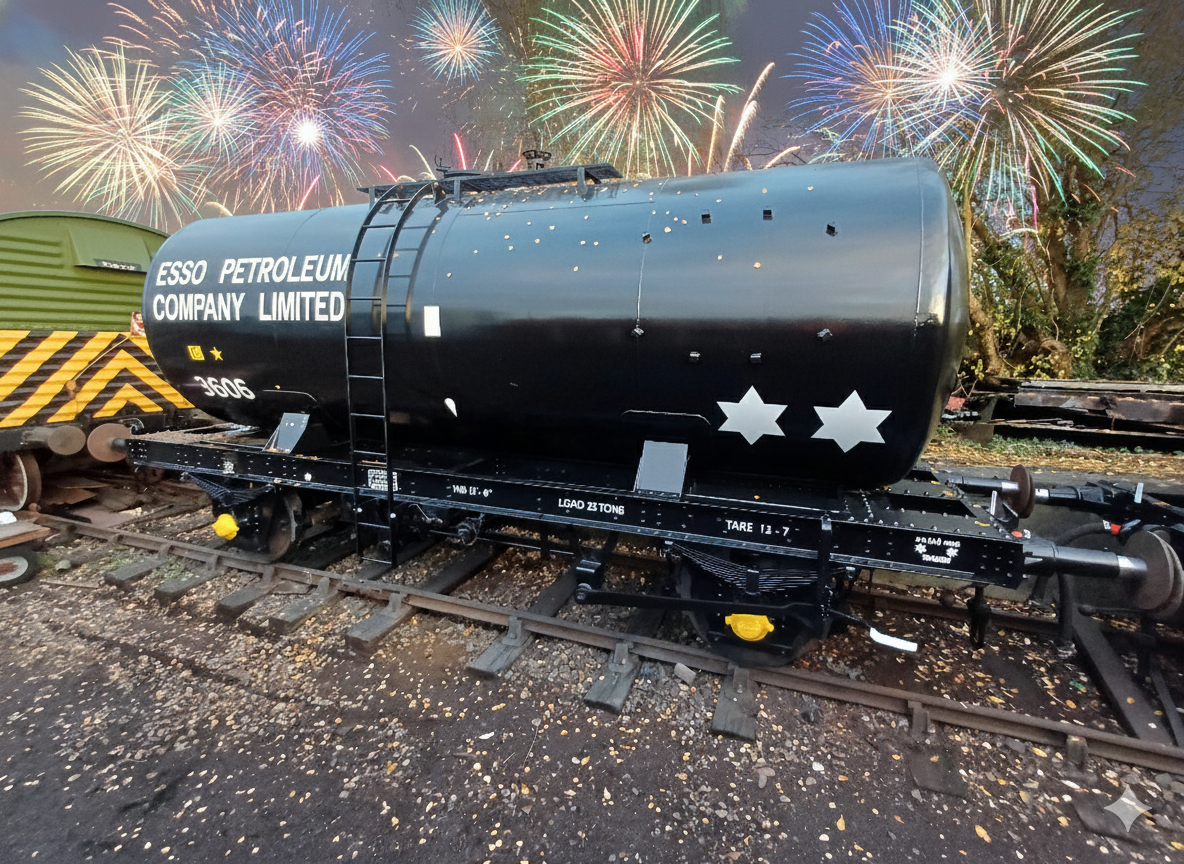
On Saturday the team were back at Quorn, first task for Nick, James and I was to vacuum test 3606 to prepare it for release on Monday. We’ll have to sort out getting the Esso plates fitted at a later date, but we can do this from two ladders. Only three missing split pins were found on the inspection, which were all rectified.
Mark, Oliver, Tom and Dan carried on with needle gunning the Lowfit, getting the west side and the headstock back to bare metal and then splashing the primer around.
Charlie, Harry, and James though also joined by Oliver and Dan carried on the ground works on the ramp up to the dock which got tested with both Danny and Hector.
Ernie carried on with the welding of the cylinder dome, in the cycle of finding then repairing leaks in the weld, though thankfully this time all the leak have now been rectified. This dome can now be painted inside and out, and put back into use. Ernie also welded the one corner of the side of the Lowfit, both ends of which have cracked the lower weld.
Today, Nick, Charlie, Ernie and I went to Rothley to remove the door ‘noggins’ and start to measure and cut the new roof edges. Charlie prepared the metal frame of the van, which Ernie duly primed.
Charlie and I undid the door top frames and removed them from the van, then measured up for the new roof edges.
After we got the pieces cut and before leaving, Charlie painted the framework where we had been working to get it ready to fit the repair pieces.
That’s where we wrap up today, all that left for me to do is to wish you all a Merry Christmas! We hope you have a restful and happy holiday. Join us again next week, where we’ll have a bit of midweek working to report on, as well as the activities of the weekend.
Hello everyone, and welcome to another update from us at Quorn. Its been another wet and windy one, so no signwriting for Dave, but plenty achieved otherwise! Before we get down to business, I should plug our Instagram page for those of you that are that way inclined, it’d be greatly appreciated if you followed us over there!
Having looked at the weather forecast, we decided (after speaking with the signalman) to hand shunt the Lowfit onto the middle road to start the repairs to its vacuum train pipe. You may remember that after renewing its vacuum cylinder, the subsequent test found that the train pipe was holed under the north end headstock.
With only three clamps securing the train pipe, quick order was made of releasing the bolts, either by spanner or hot spanner and then getting the pipe supported where it could be worked on.
Even though I said that there was no signwriting for Dave, he did manage to get the vacuum release star on the solebar of 3621, however decided after that to cease, owing to the fact the drizzle was washing the chalk marks away.
Back to the pipe then: the holed end was cut off and a new stub end found. This was clamped to the good metal in the train pipe, then Charlie and Ernie welded the joint together. Once the pipe had been welded, the pipe was scraped and wire brushed then it was moved into the back of Nick’s lorry to paint.
Ernie continued the welding on the vacuum cylinder removed from the Lowfit, heating the patch and knocking it down to close the gap, then welding round the seam. There is still some work to do on this and it has been moved inside the garage to give it an opportunity to dry!
Dave made a start on a different vacuum cylinder dome recovered from the fish van body. This was removed from one of the Esso tanks, maybe 3711. There was no chance of it holding vacuum, but with a new dome, there was a good chance it would go again. Dave cut most of the old dome off the cylinder, then he and I started grinding the weld to remove the final half inch left.
Tom removed the cast owners plates from 3854, which will be replaced with the 3D printed plates by Dave. After removing the plates, Tom then applied some primer to the bare metal.
In the back of the lorry, I pressure tested the repaired pipe using compressed air as any leaks from this are easier to find than with vacuum. Some small pinholes were found in the weld joint, so the pipe was removed for re-work.
Ernie ground out the defects and re-welded the pipe, after which it was pressure tested again with no leaks present. However a leak was found in the tee off for the vacuum cylinder, so that was ground out and re-welded. Nick coated both areas in red oxide primer.
Once we had got the dome sited in the cylinder, Ernie tacked it into position and got ready to weld the outer seam, which he then did.
Mark, Oliver, Tom and Dan got started needle gunning the solebar and side panels of the Lowfit, making excellent progress.
The 3D printed plates also received a coat of primer and undercoat.
The pipe was re-fitted back to the Lowfit and the vacuum system tested. The cylinder worked perfectly, however the hoses put on for the test may have contributed to the leak off test failing. The wagon will be fully re-tested prior to release to traffic.
The Lowfit was shunted back and the opportunity taken for a skip trip in Danny after a general tidy up. Dave remains ever hopeful of the opportunity to do more signwriting on 3621, but in the meantime we’ve got plenty to do repairing vacuum cylinders and other odd jobs in between!
Hello everyone, and welcome to the new look Quorn Wagon & Wagon website. As the website wasn’t ready last week, this update will cover two weeks of work. The website took a liittle more work than initially expected but we’re really happy with how it came out.
Last weekend, we removed the holed vacuum cylinder from 3689 and took a look at the brake rigging as the handbrake was difficult to operate and the brakes did not release cleanly. Charlie and Oliver took charge on the wagon, oiling and working the brakes. Eventually as with the other Esso tanks we split apart the system and found the sticky link. Usually with these its a bolted link right up in the top of the underframe that usually misses lubrication. We got the bolt undone (a surprise in itself!) and manage to get the link down to take it back up the yard for cleaning.
While this was done, a 21 inch vacuum cylinder from stock was prepared to be fitted, with Ernie and James dressing the studs from the cylinder while Harry and Charlie cleaned the cylinder, piston and dome cover. All surfaces applicable got a coat of red oxide primer.
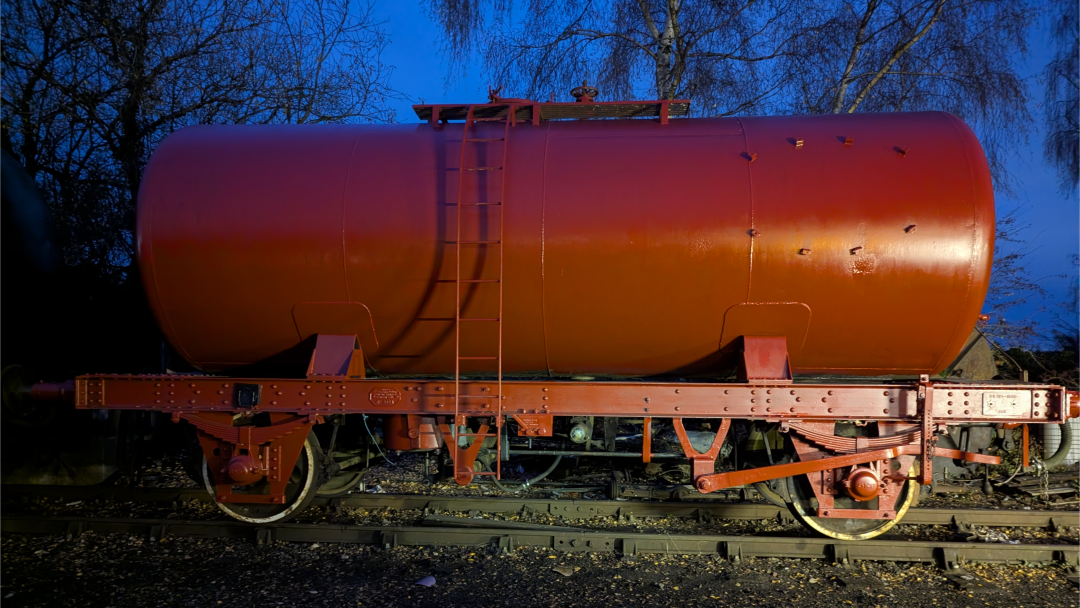
Speaking of red oxide primer, Mark, Oliver, Tom and Ernie coated the last sections of 3854’s barrel in red oxide, after first preparing the surface. Hopefully we can get undercoat on it, however I suspect we have lost painting weather for the year now.
Towards the end of Sunday we got the overhauled cylinder fitted to 3689, but lost the light before getting it connected up. I also measured up the tyre profiles for 3689, which mostly measured up as new.
On to this week then, Saturday was pretty much a wash out, with the yard under 3689 a pond meaning we couldn’t get working to reconnect the vacuum cylinder. In a gap in the rain, we got the cylinder from 3689 stripped apart, using the Volvo to press the piston out of the bore. Harry and Charlie started to clean down the cylinder in the shelter of the garage. This one is definitely a case of looking worse than it is, but there is still some distance to go on that cylinder, maybe might be an opportunity to crack out the soda blaster.
In the afternoon we looked in the van train for any spare 21″ domes as we have 2 in need of repair. we found a further one, so its possible that we can make 2 good ones out of 3 holey ones!
Sunday was a much better day, we started by shunting out the Lowfit, taking the opportunity of a clear middle road to use the Volvo to lift the cylinder out of the wagon. The cylinder in the Lowfit had been damaged by a load in the wagon, filled with water and had subsequently holed through.
To ease rebuilding an 18″ I took the opportunity to take a rolling ring piston rod to make it into a guide rod to use when lowering a piston back into a cylinder. I cut the eye off the end and then drilled a cross hole for a bar to tighten/loosen the rod. We used it, to great effect, on the replacement 18″ cylinder for the Lowfit. The piston behaved exactly as described in the overhaul spec which is encouraging!
Using the Volvo again to lower the overhauled cylinder into the wagon, it was bolted back into the wagon and reconnected ot he brake system. Unfortunately, when we tried to test the system we found a the north end of the train pipe under the headstock is a little more akin to brandy snap and was letting the vacuum out. Another winter job for the list.
Nick and Tom walked back down the yard and got 3689 ready to test after which the team went up to test the brakes, after they were knocked back a half hole on the adjuster as the block gap was too tight to spec.
Charlie looked at the release valve removed from 3689, which to be honest I thought was more use as an anchor for a dingy! Mark and Oliver also got stuck in selecting a valve to look at..
The test went well, and the system passed with flying colours. After which we put everything away and had a celebratory cup of tea!
Thanks for joining us, and do let me know what you think of the new website. Cheers, Ross!
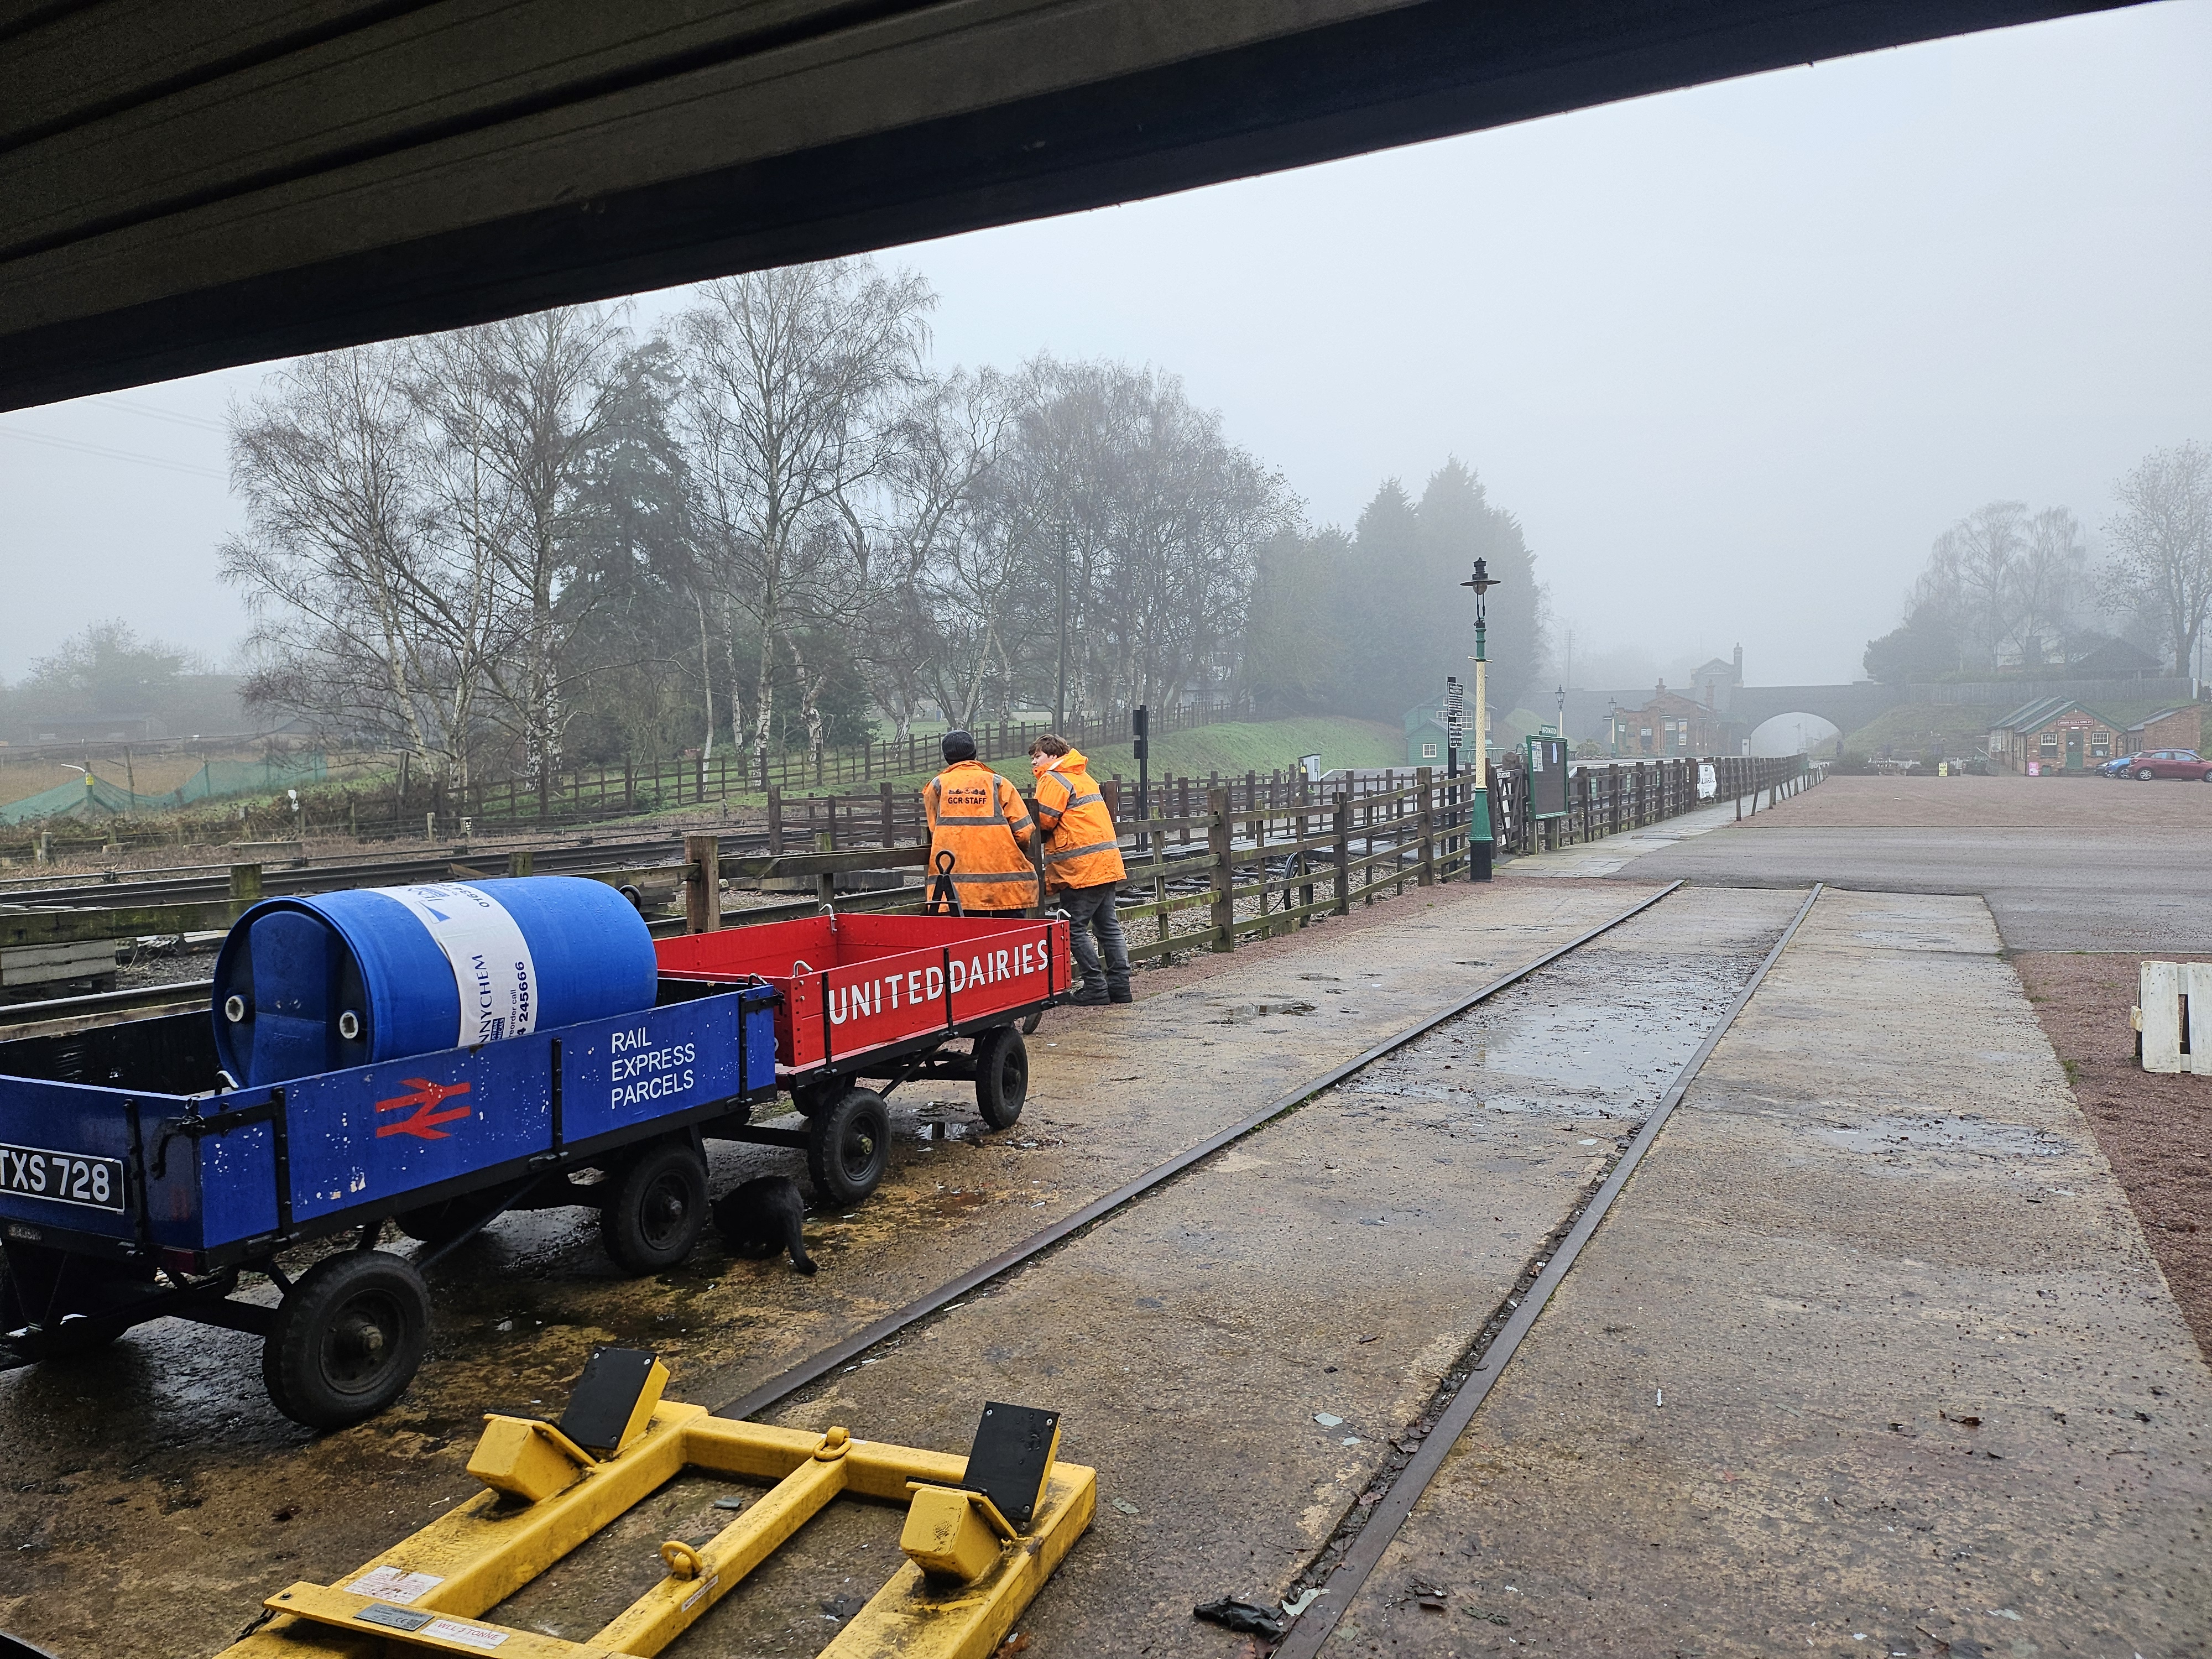
Hello everyone and welcome to this weekends update. Today’s been a bit of a foggy one for us which didn’t really let up until after lunch.
After turning 3854 in the week to allow for access, Mark, Tom, Oliver and Dan made a start on the other side of 3854, using the needle guns to bare metal the ‘belly’ of the tank barrel. The rest of the barrel will be done with the abrasive paint removal discs on the grinders, as per the other side.
James, Charlie, Dan and I started cleaning up the brake shoe hangers after which Dan followed behind and applied some black gloss.
Dan also applied white undercoat the the axle bearing end caps, handbrake levers and lamp brackets.
With assistance from James and Oliver, Nick stripped the floor from the Conflat, ready for it to be taken to the bonfire construction area.
Charlie and I repaired the motor cabling on George and got the field reversing switch wired back up to put him back into use. He was quickly placed into work moving the floor removed from the Conflat to the bonfire pile.
I showed Charlie and Dan how to adjust the brakes on the BEVs, and left Charlie to adjust the ones on George and Zsa-Zsa.
After cleaning down, Tom, Mark and Oliver followed behind where they had bare metalled with grey primer/undercoat.
On Sunday, Ernie and I looked at some more welding on the spark/splash guards from 3854
That’s everything for this week, join us next week to see us hopefully start signwriting the two tanks, and getting further with the work on 3854. Thanks for reading!
Hello everyone and welcome to another update from Quorn. This week we’ve prepped both 3606 and 3621 for their second coat of paint, and 3854 has received a bit more work on the underframe to clear the corrosion.
James, Charlie and I spent most of the day scuffing the fresh black paint. We managed to get both east side barrels done and three of the four ends. While we did this, Ernie sorted some donated large spanners and impact sockets away
Nick, Harry, Tom, Mark and Dan continued the push on 3854, using the needle guns and hammer and chisels on the end pockets and the solebars.
Oliver and Charlie finished repairing the hand rail to the tool van
The team also finished scuffing all the areas on the two tanks missed
That wraps up this week, and sorry its a bit of a late one! I’m travelling for work again so this is the only chance I’ve had! Join us next week where hopefully the tanks will have received their extra coat. Thanks for reading.
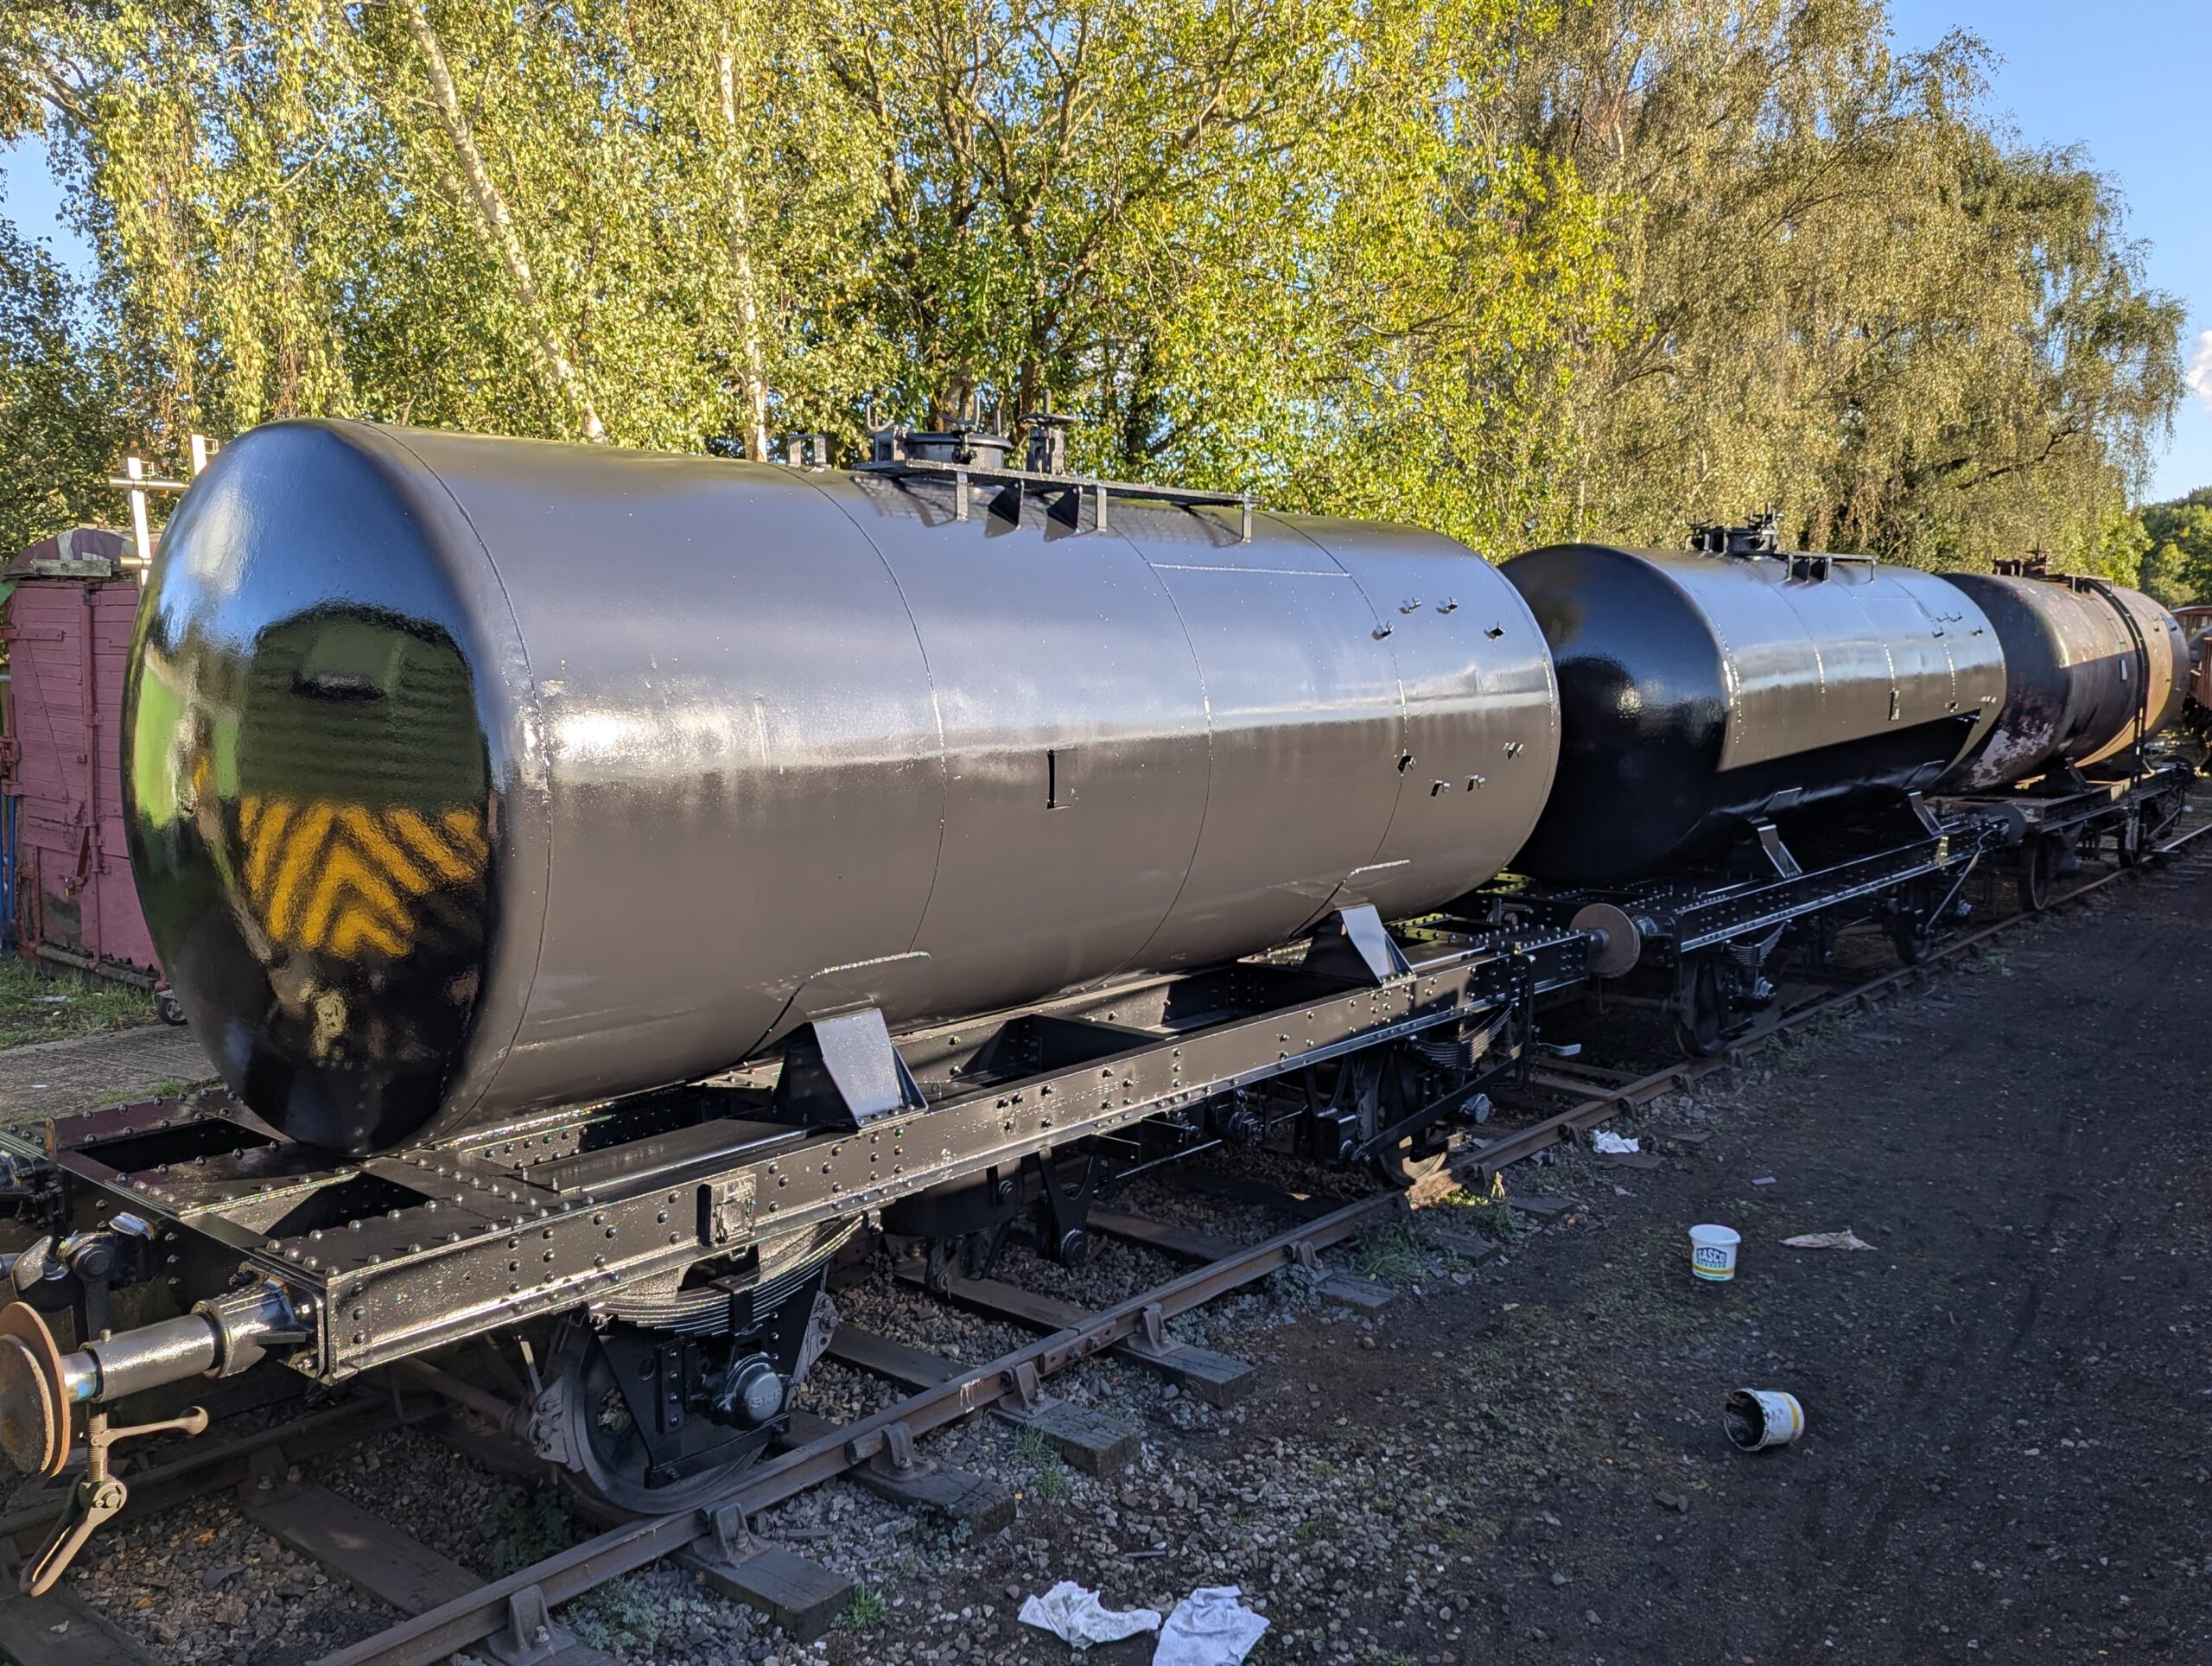
Hello everyone, and welcome to another update from Quorn. This week, we’ve finally been able to get some paint on both 3606 and 3621 which marks a big step forward in their restoration, especially given the recent abrupt end to the summer.
While Dave and I got the equipment assembled and ready, Ernie, Daniel, James and Nick completed some final preparation work on the tanks.
Our new paint pot is an upgrade, we now have capacity for 10litres of paint up from 2, which means a lot less time spent mixing and filling up the tank! Dave and I used 12 litres of grey primer/undercoat over both 3606 and 3621. We had to spent a little bit of time avoiding/ drying up after small showers during the day, but we were able to get both tanks into undercoat, save for the portion of the under fame below the dock.
While Dave, Nick and I got the tanks painted, Charlie and Ernie made a start welding up the splash guards for 3854. Nick assisted with bending up a new end for one of the pieces.
For Dave and I, Sunday was pretty much a rinse and repeat of Satruday, only this time with black gloss paint, rather than grey! Nick and Oliver assisted with some spot drying of the tank barrel and underframe. We’ve opted to try some skip and container paint on these as an experiment. Tom got some undercoat on the underframe on the parts of the tanks below the dock, and he was willing to have a go with the spray gun.
Nick and Oliver ended up going to Swithland to look at 80307, which was noticed to have had a window blank fallen inside the vehicle. This has been fitted since it arrived, and had fallen out in the wind. The piece was refitted, and sealed back to the door for the time being.
Charlie and Ernie carried on with the weldeing until the generator ran out of petrol, after which Charlie and Oliver started to repair the steps up to the tool van.
Tom finished up the tank; by taking the spray gun below the dock again and spraying up the underframe. A second coat is required for both tanks, but we’re glad we’ve got them both started!
That wraps up this weekend’s work, We’ll have to sort out a second coat for the tanks at some point soon, and then its on with the signwritng. Plus we’ll have to sort out the Esso plates! I’m not sure what the plan is for next week, we are very dependent on the weather at the moment, so join us next week and see what we end up doing! Thanks for reading, Ross