Author: rloades109

  • 22/07/18 A new skin(ish)

    22/07/18 A new skin(ish)

    Another weekend, another update from QWW. This weekend sees us continue work on M730562, which seems to be becoming a bit of a saga!

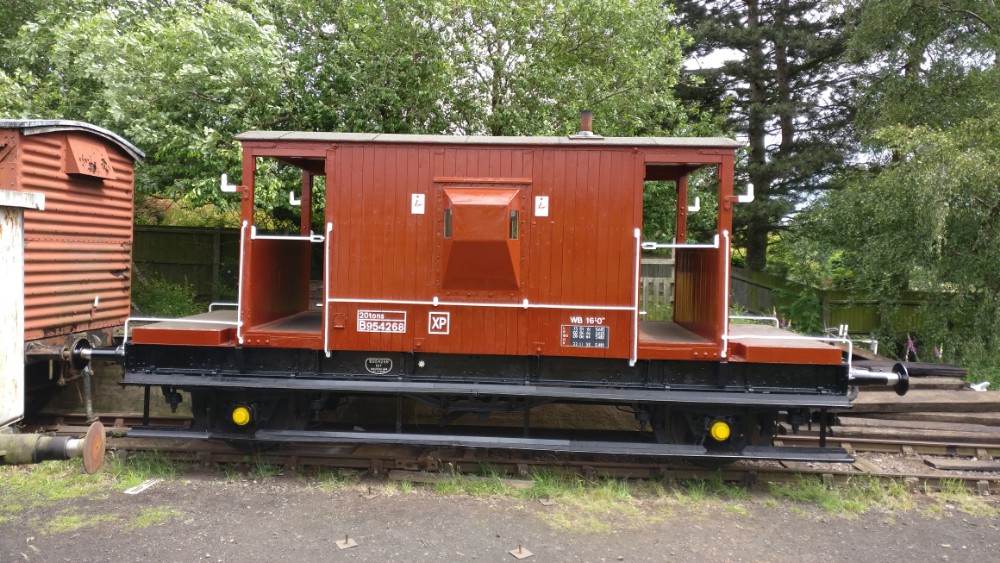
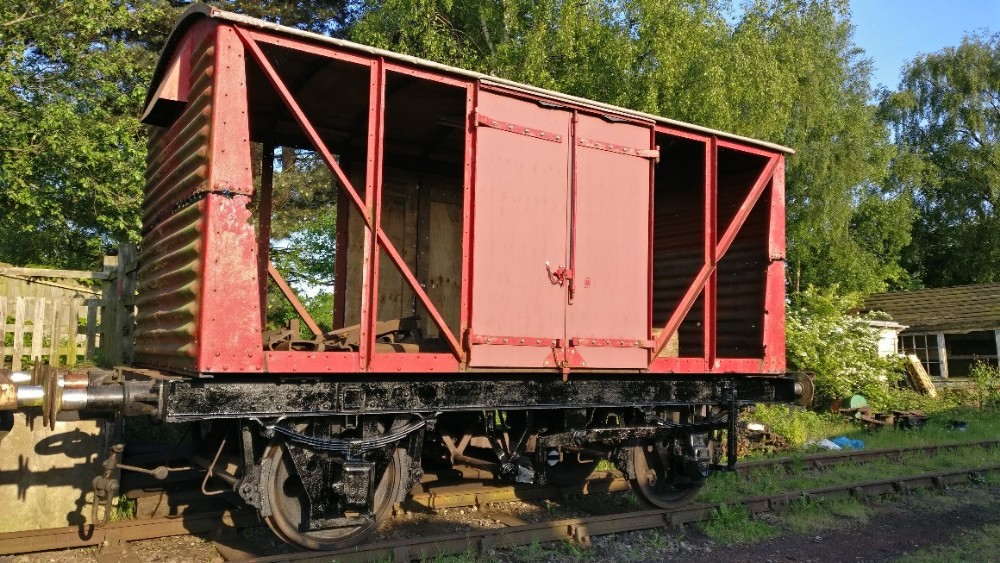
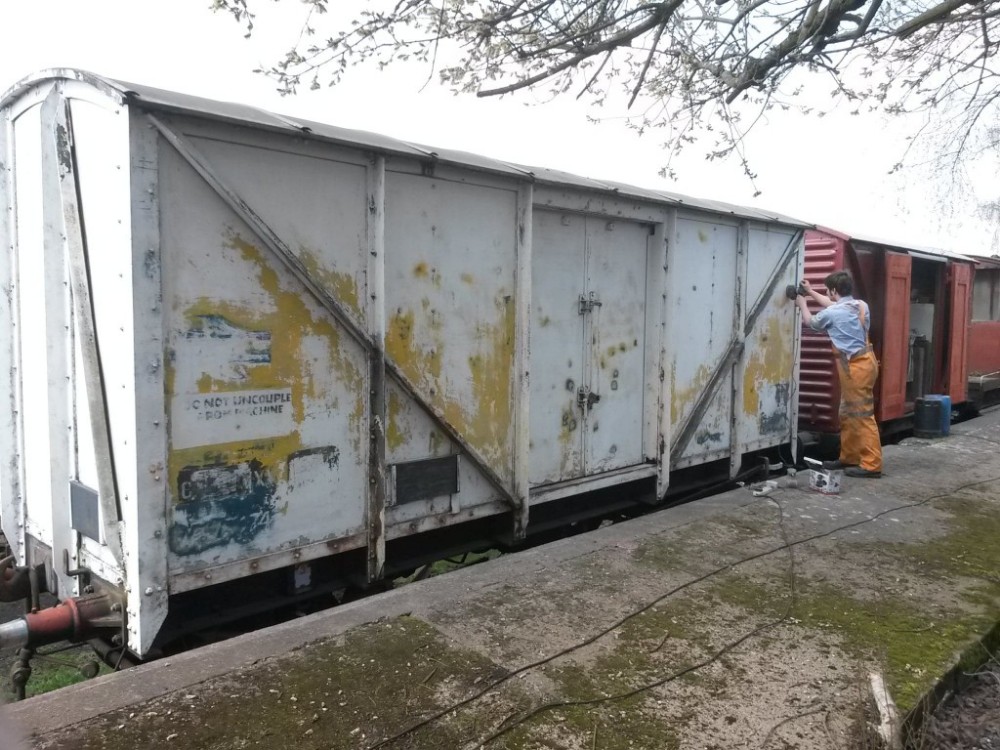
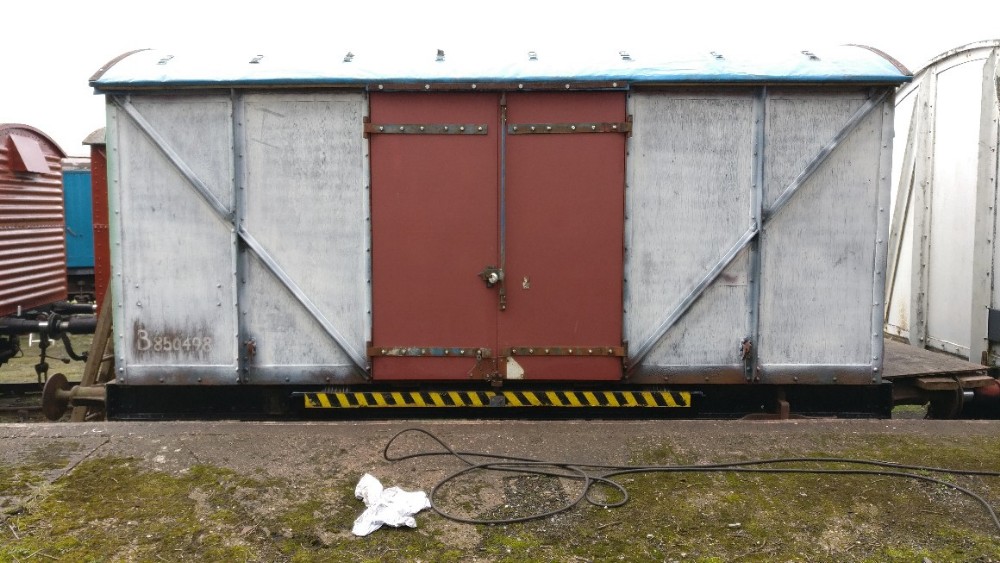
    Following last weeks stripping of side planks, we have taken delivery of the new, replacement side planks from Harlow Brother’s Timber merchants. We took them a sample of an existing board taken from the side of the van, and they have cut the boards to size, machined the edges to have the rebates and bevels, and finally pressure treated the board to tanalise them. The only thing left for us to do was cut them to length and fit them to the van!

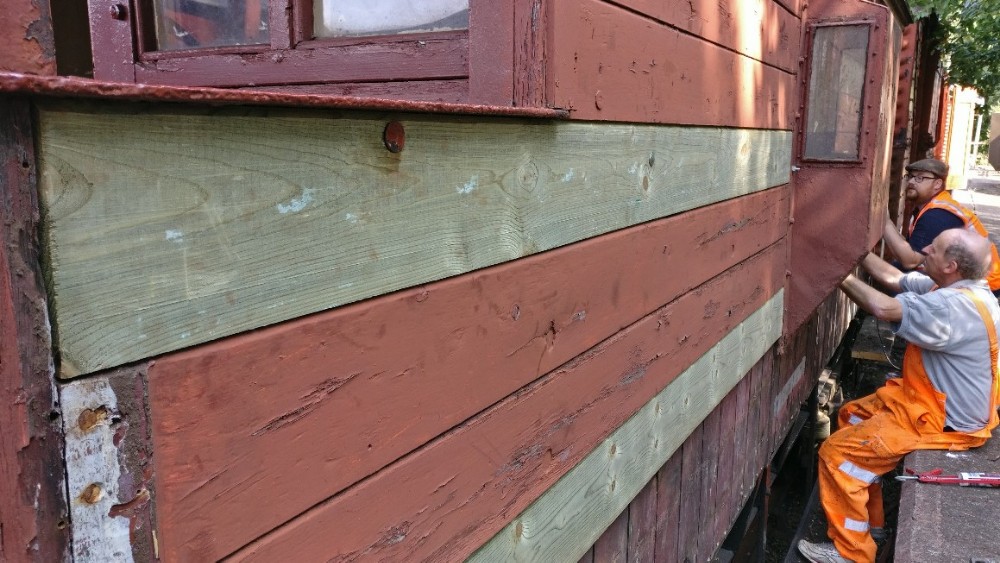
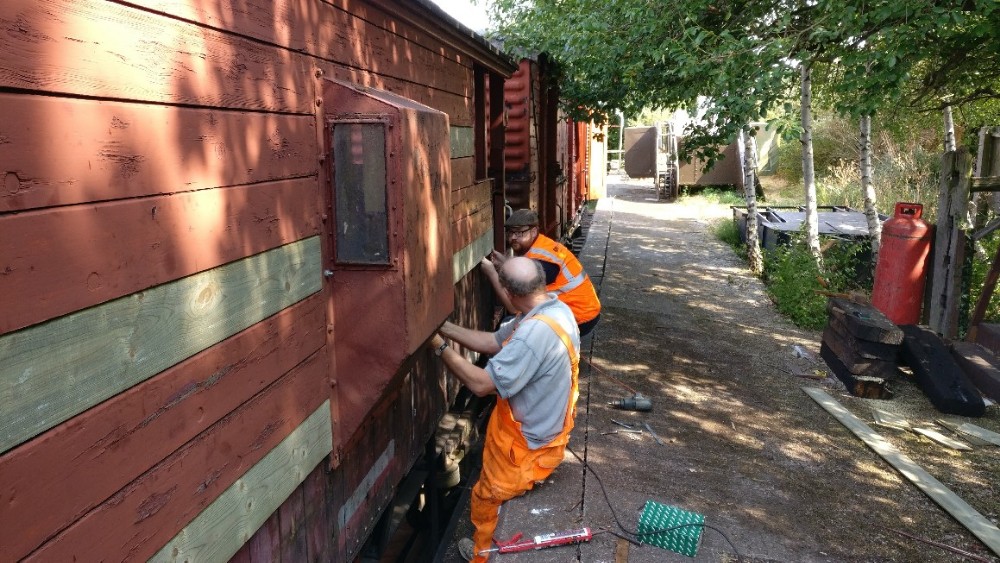
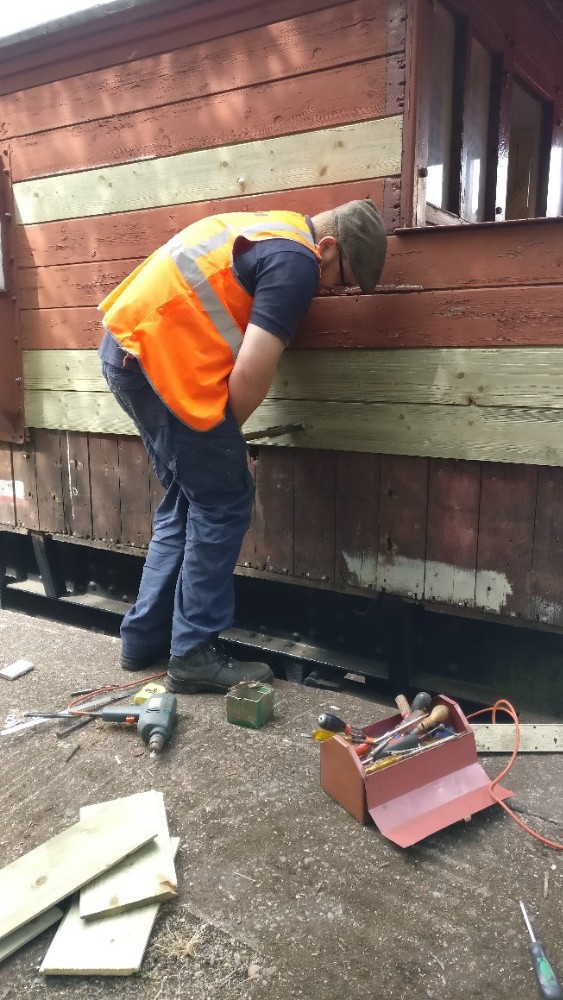
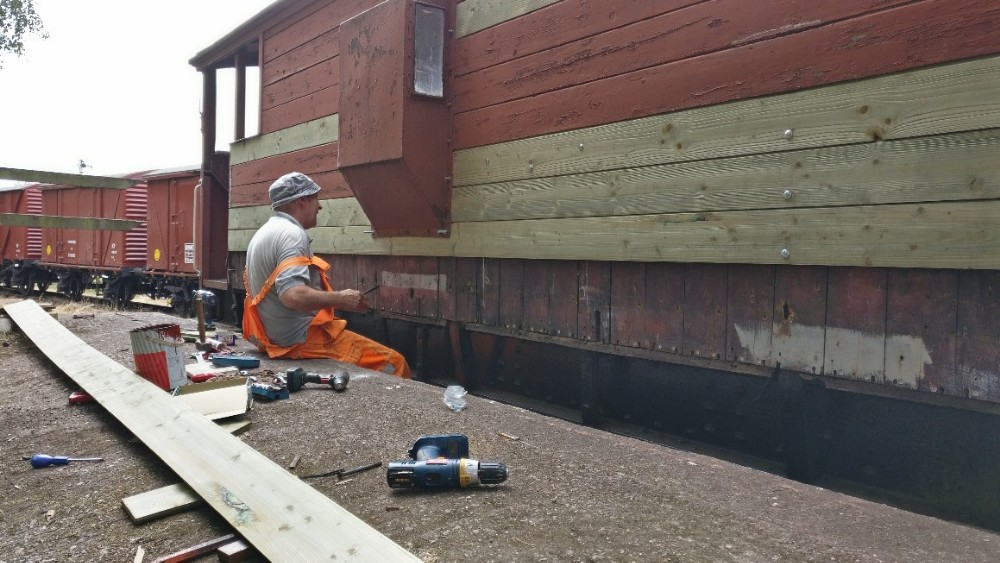
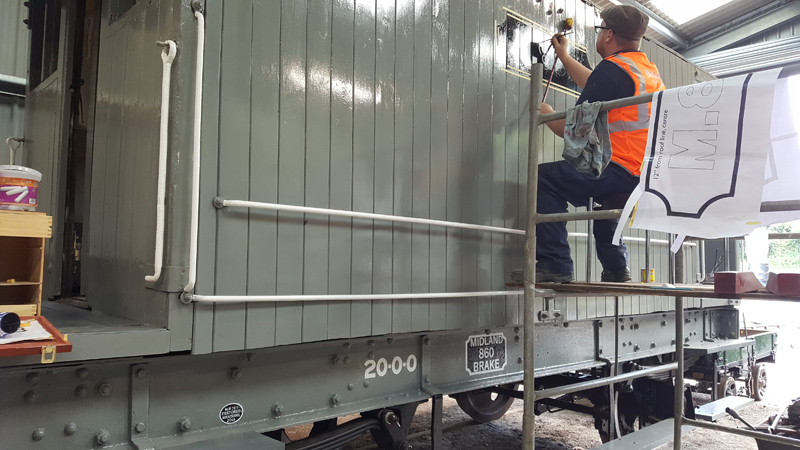
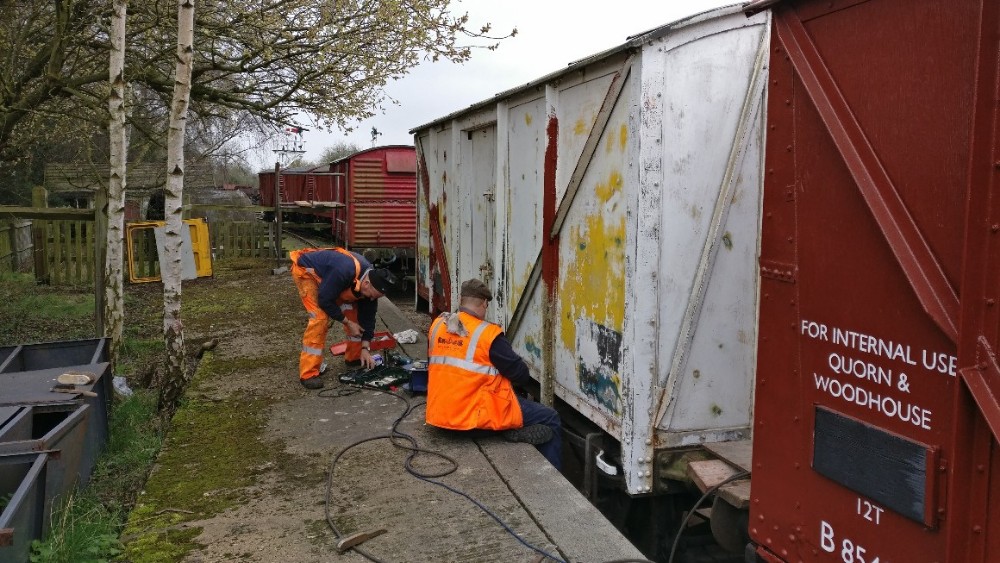
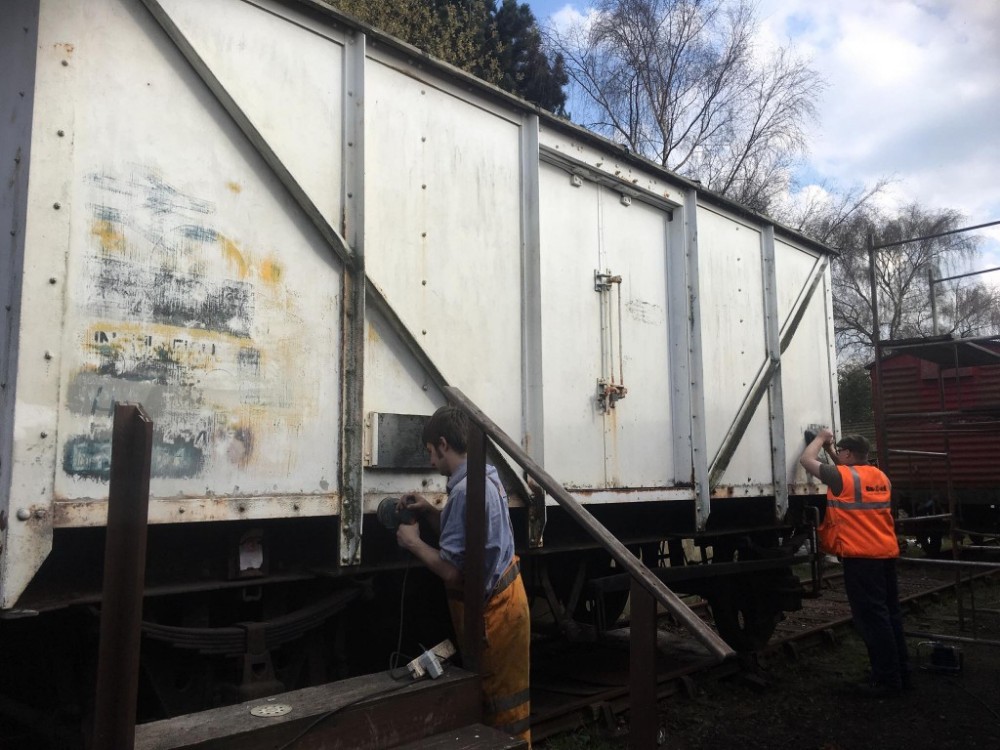
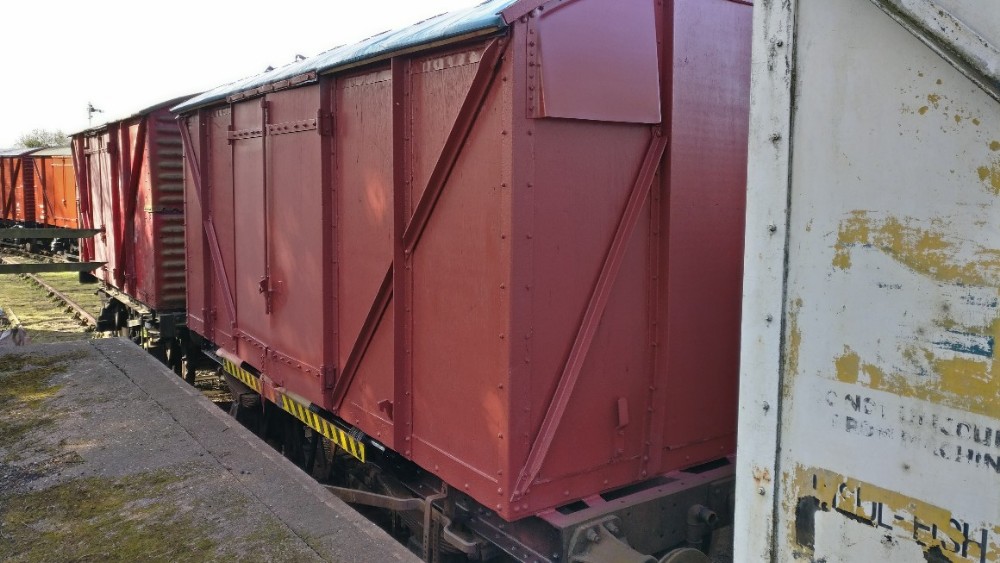
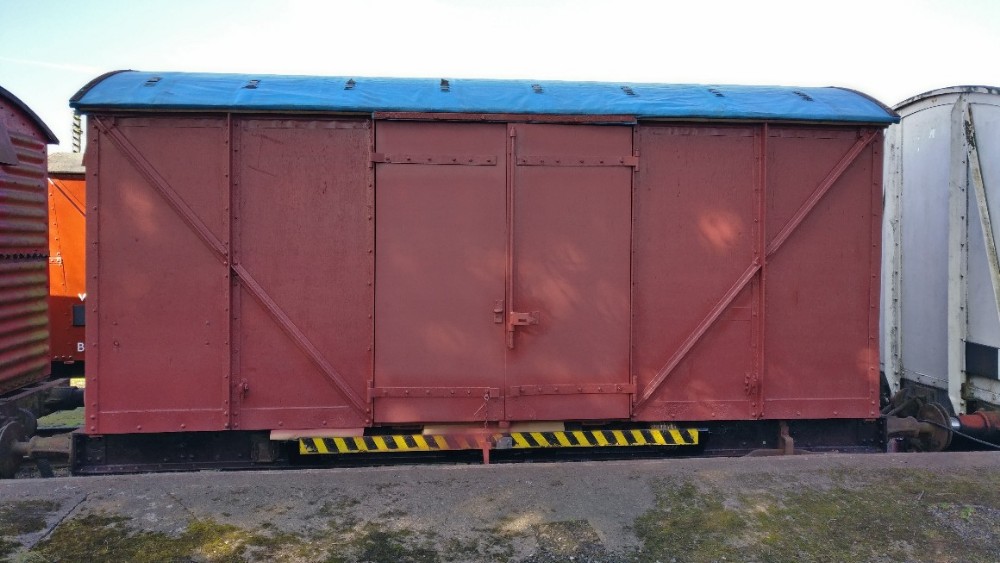
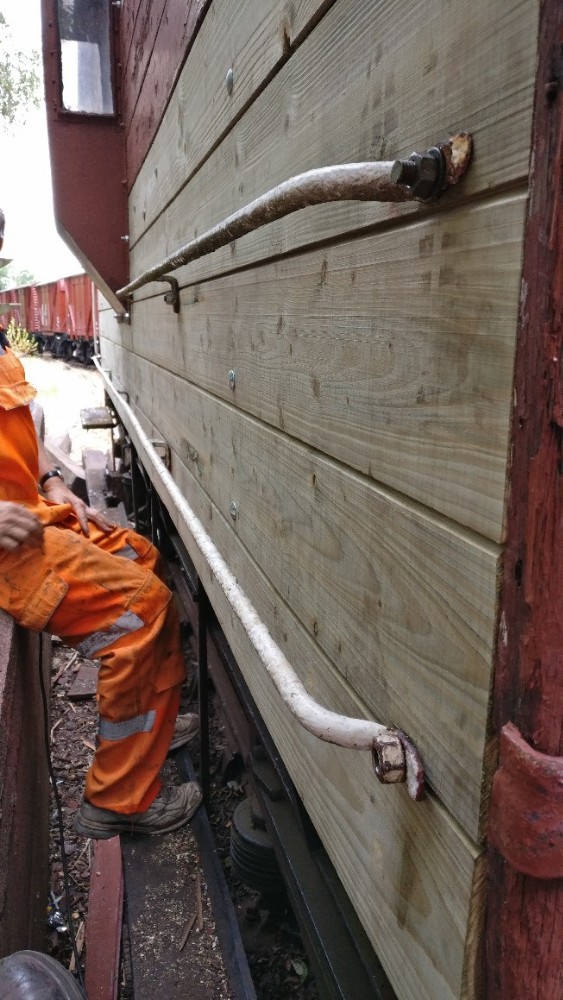
    Saturday saw all the side planks fitted, and the long bottom hand rail refitted to the East/Dock side of the van.

    wp-15323311554637560814931220411169.jpg

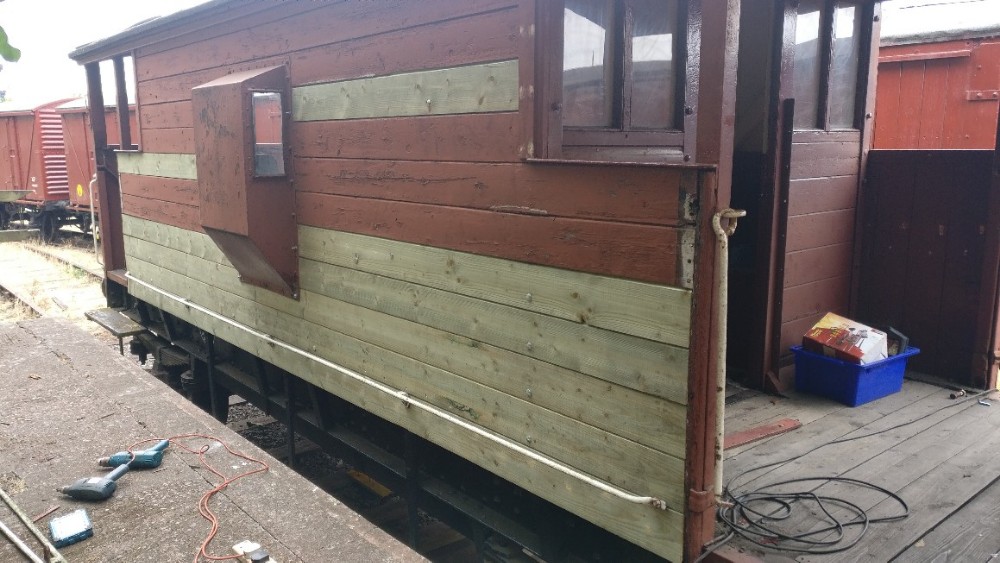
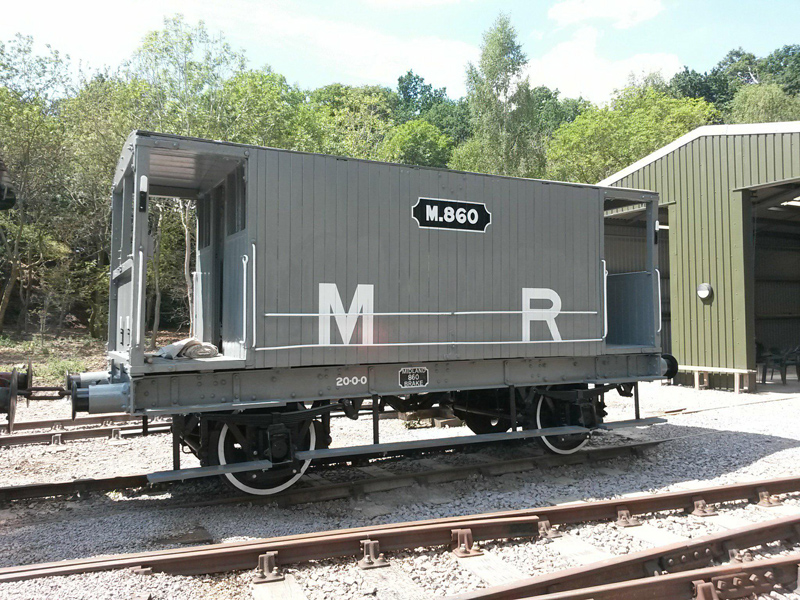
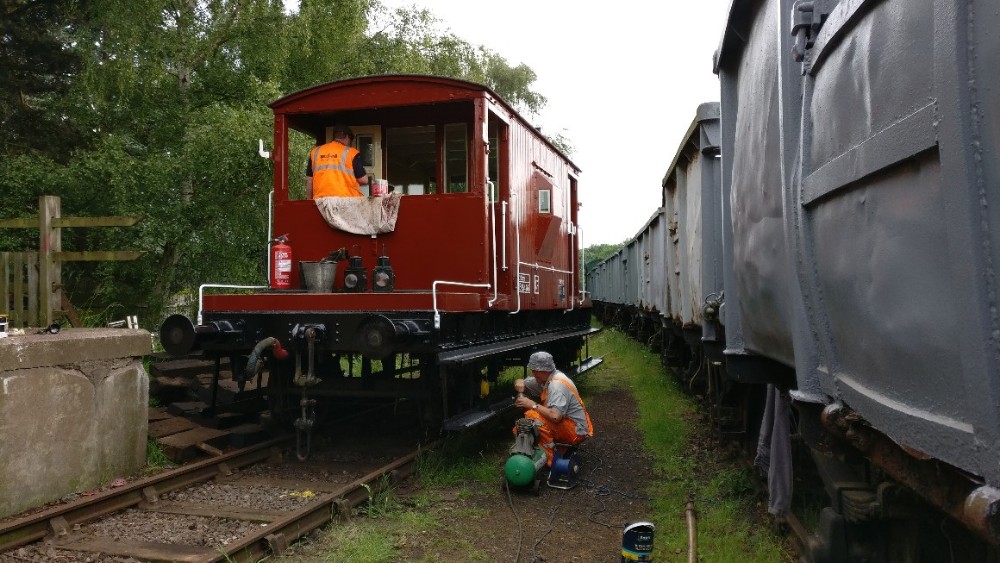
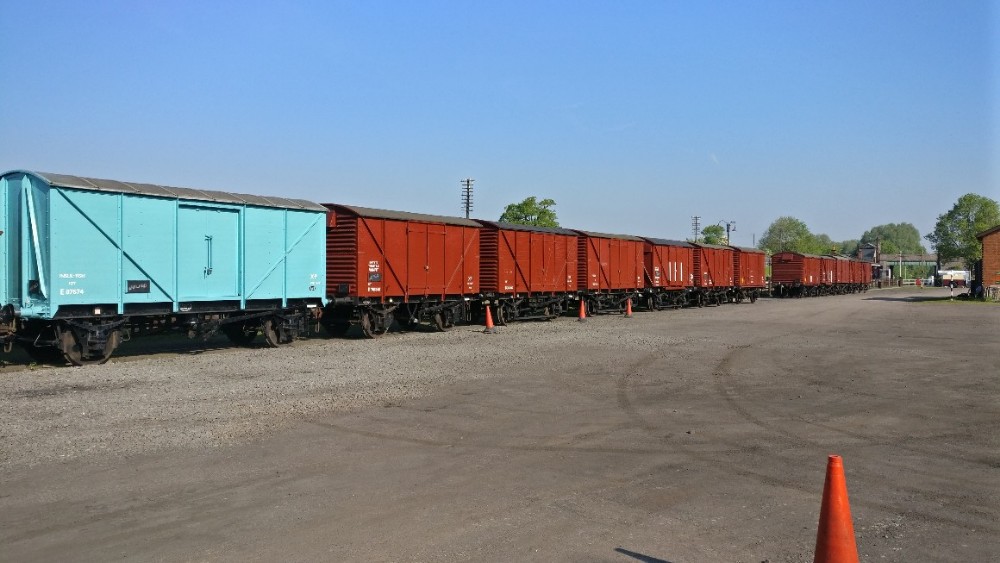
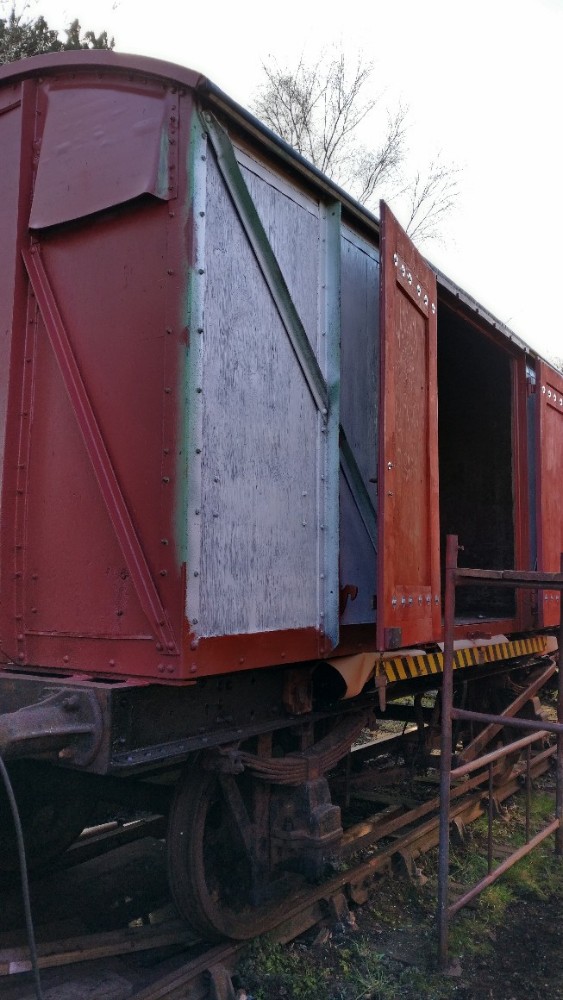
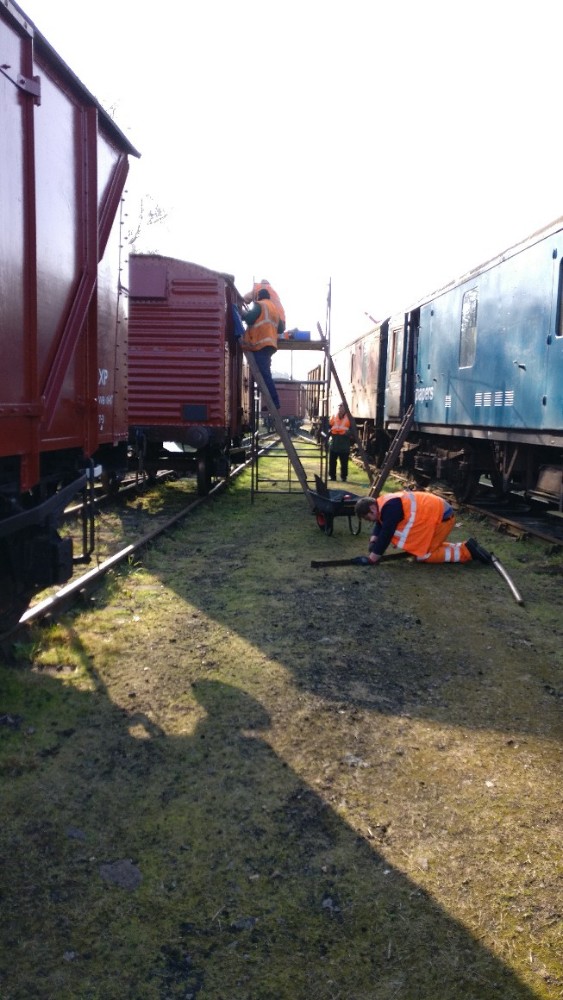
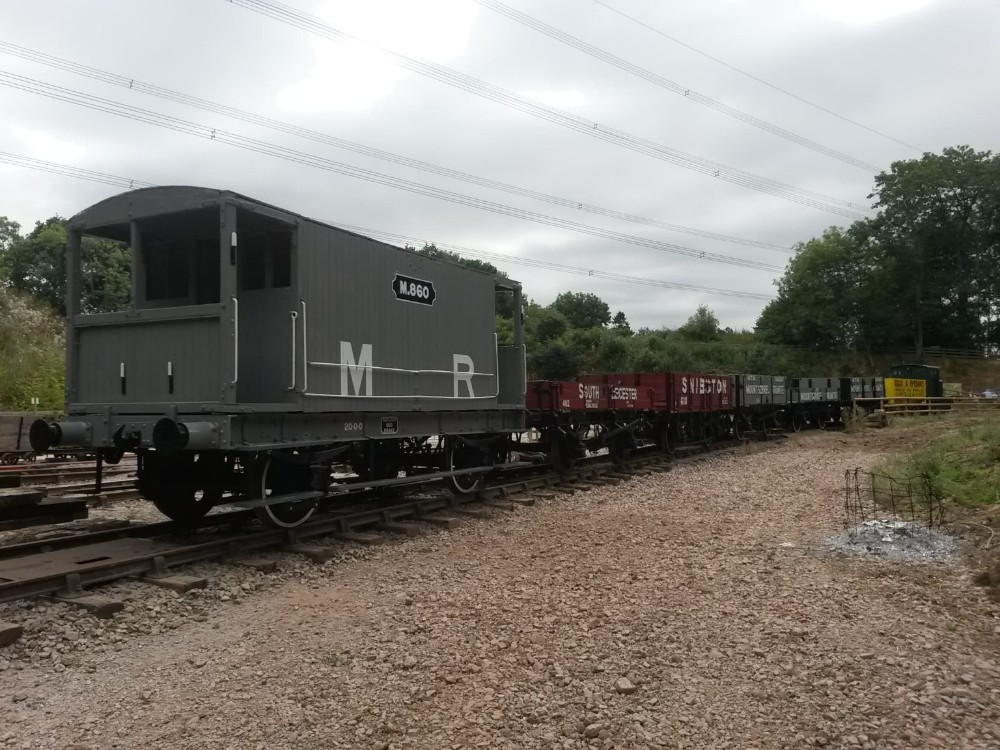
    On Sunday, Nick and I refitted the rest of the handrails to the vehicle, and fitted new capping wood to the ends of the planks, adjacent to each access doorway. We believe the the capping wood isn’t an LMS original, and was added later by BR. We opted to replace it with some hardwood, as these support the vertical hand rails used by the guard to access the vehicle from ground level. Meanwhile, Matt was carrying out shunting demonstrations at Mountsorrel’s running weekend. There he formed a train using the wagons we have based up there, and the Midland Brake.

    Thanks for reading!


  • 08/07/18 – Midland Brakes

    08/07/18 – Midland Brakes

    This weekend we haven’t managed to achieve much, mainly due to the heat. On Saturday, Matt made a visit to the Mountsorrel Heritage Centre at Bond Lane, to assist in the signwriting of their Midland Brake van. It looks marvellous and awaits a few final details before it is release to traffic

    At Quorn, Nick and I were working on the Midland Brake’s successor, the LMS brake M730562. Initially, we started on the west side (where it was shady) where we replaced the stepboard that runs the length of the body of the van. we had sourced a quite twisted bit of wood that had the right dimensions. This was trimmed, and clamped into place, ready for drilling. The board was drilled and then the underside was painted in black bitumen paint. The plank was then bolted into place and again coated in black bitumen paint on the top side. the next step for this board is the kickplate backing.

    As the sun moved around and the day got hotter, we moved round to the dockside. There, we began to remove the handrails and capping wood from the dock side of the brake van, in preparation for some planks to be replaced. We are currently sourcing the replacement wood for this, for which we had the remove a plank. This took a surprising amount of disassembly, both inside and out, including the stove side seat base.

    On Sunday, Nick and I effected a repair to the South-west step board, used by the guard for access. The metal plate that supports the end of the axlebox cover flap had rotted, so the step board had to be removed in order to replace the plate. I coated the replacement plate in red oxide before it was refitted. Whilst this occured, Matt started signwriting the van’s number above the ducket seat on the side of the van that is fitted with the seats/storage benches.

    Matt mainly concentrated on the interior of the vehicle, removing a redundant batten of timber, and making a cover plate for the bit of capping that was displaced. We think the batten of timber was part of a lamp filling table, which would have had a zinc top. We removed it because it interrupted the demarcation line between the cream and the bauxite, and had no purpose. Matt also touched in some areas of the cream paint that had been bled into with the removal of the masking tape used when painting the bauxite.

    We finish the update on an announcement. We have recently acquired an LMS van, from the David Clarke Railway Trust. M500604 (was M501438) is in use a nut and bolt store for the Windcutter Group, a purpose it will still continue to serve. we plan to re-clad the van to that the van can be released to traffic. The van is also still holding the interior of the packing van, B854782, so we are loath to start working on it whilst these items are held under cover.

    Thanks for reading!

  • 17/06/18 – Finishing touches

    17/06/18 – Finishing touches

    Not a huge update this week, as we have finished our revamp of B954268 and the large events in the yard recently mean that we don’t have something else we can get started on.

    Matt has been popping in after his early shifts at work to complete some of the smaller details on the interior of the brake van. This includes the stove surround, handbrake stack/column and the handbrake wheel itself. This also includes the vehicles number signwritten above the ducket adjacent to the stove, and its allocation for which we chose Tinsley.

    Onto this weekend, we have now finished the brake van. Matt painted a second coat on the external ceilings on the verandah. I dismantled the top of the vacuum setter to remove layers of hard, flaky paint before Matt applied a new coat of red to the top of the setter. Whilst this was taking place, Nick fitted the Overhead Line wires flashes to the West side of the van.

    img_20180616_1344545599288441240976161.jpg

    This culminates the work on this brake van, and it can now be released back to traffic. we are anticipating the arrival of the LMS brake van for a refresh.


  • 10/06/18 Sole Bar, Internals and Brake adjust

    10/06/18 Sole Bar, Internals and Brake adjust

    This weekend, work continues on B954268. Following last week where Nick, Matt and Jake completed the rest of external work, which only left the underframe to be painted. A few areas were left to be scraped and then blown down, ready for the application of the paint.

    Matt sanded down and hoovered the interior of the van to give it a key before he started glossing the top half with cream colour. Whilst Matt was painting the interior of the van cream, the underframe and step boards of the west side were painted in black bituminous paint. Nick followed along, picking out any areas that couldn’t be reached with the spray gun. The headstocks were then painted using brushes, as using the spray gun would result in overspray on the soft, bauxite gloss. The interior surfaces of the windows were masked off whilst Matt was painting the large panels.


    The van was pushed out of the dock so that the East side underframe and step boards could be cleaned, blown down and painted. Once the black paint was away, the roller bearing end caps were picked out in yellow.

    wp-15285791428069039843070688013941.jpg

    When the van was painted into gloss, the verandahs were spray painted internally. Whilst we had made every effort to mask where we could, the only place that wasn’t, and thus caught the overspray was the ceiling. Saturday Matt repainted this surface white.


    Report continued by Matt

    Sunday continued with me (Matt) initially signwriting, this was in the form of the “D” Plates Vacuum release chord stars and the Running number within the van.


    Nick added a further coat of paint to the axle end covers and a red coat to the Vacuum pipe swan necks.  The OLE warning panels he also added to the East side.  Myself and Nick also took a look at the Brake rigging. We made a few adjustments and Nick lubricated it all.


    I continued with the internal repaint masking off for the bauxite areas to be raised up to window level,  the actual BR specification called for the lower bauxite area to be 3ft 6in high this, however, would result in the demarcation line being 1/4 the way up the window level and it was common practice for the demarcation to be lowered to window level which in my opinion looks a lot smarter, as can be seen below.
    I also popped in Monday after work to apply Black to the Brake standard and Stove surrounds.


    Last item, My signwriting box has had an appropriate paint and signwriting applied just so I don’t forget who I am and what I do.

    Box.jpg

    Still a few finishing touches to apply including the Stove surround in black gloss.


  • 20/05/18 Shock(ing) Van

    20/05/18 Shock(ing) Van

    This weekend saw us working away on B854782, preparing for its visit to the loco shed to have some remedial work to the corrugated ends. Matt has also removed the branding posters pasted onto the vans for the photo charter and gala, and touched in the paint where it had become detached.

    wp-1526849093112413449020420690207.jpg

    Last week we scraped the underframe on B854782 down in preparation for painting. As the welding work is predominantly occurring on the ends, we took the opportunity to paint the underframe, aside from the headstocks.

    wp-15268468156465035258087688316117.jpg

    The item we have been calling the tax disk holder has been painted in black and reassembled onto the van. This details the non-standard, experimental centre shock system fitted to a batch of these vans. Once fitted the screw heads were touched in the same black paint as the cast ring.

    As we were working below solebar level, we also performed an axle box exam. A while ago, we came into a TOPS wagon codes book, so we chalked the cripple code for this van on the doors. CG denotes a green card (defected but able to run at design speed), D denotes defect due to damage, and the C denotes Bodywork.

    wp-15268468627041165572332233676491.jpg

    Next week, we hope that this vehicle is in the engine shed being nursed back to health, and that B954268 is in a position to enable us to give it some due attention.

    Thanks for reading!

  • 22/04/18 Mr. Blue Sky appears again!

    22/04/18 Mr. Blue Sky appears again!

    This weekend we have continued working on the Fish Van. We are also a man down this weekend, as Matt has become a member of the Royal Flying Corps for a photo charter. This hasn’t impeded progress, however, there are fewer photos. The below picture shows how we left the vehicle at the end of last weekend.

    Saturday started off with us sanding the south two panels in the picture above, along with the south end. Following this, the undercoat was cracked out to get the van finished off in undercoat. I cleaned the gun out and started thinning the gloss down in order to start spraying the East side and North end, whilst the new undercoat was drying.

    wp-15244223080649024821702654495031.jpg

    As with last weekend, this also included the headstocks. This is just after the headstock had been painted into gloss. The details such as the drawhook, vacuum swan neck and buffer heads were painted later one once the Ice Blue paint had hardened off.

    As the paint is only for the fish van, we tried to put as many coats of paint to use the paint up. By the end of Saturday, the Eastside had 2 coats of gloss and both ends and headstocks had been painted. To finish the day we scraped the underframe on the West side as it is accessible. Before we started painting on Sunday morning, we blew down the debris following scraping the underframe, then painted the 2nd coat of gloss on the Westside.  We shuffled the vans down so we could get to the East Side to scrape and paint it.

    Once the underframe was painted the bufferheads and swan necks got painted, along with the lamp brackets and handbrake lever ends.

    As the wheelsets are close to the end of the van, we painted up the brake cross shafts in black and refitted the couplings.

    Next steps for this vehicle are the signwriting, unfortunately, no blue spot as the vehicle doesn’t have roller bearing wheelset. This will then be ready for traffic.


  • 15/04/18 A very blue Fish Van

    15/04/18 A very blue Fish Van

    Following on from Matt’s report last week, B850498 has now been completed. The roof has been touched up following last Sunday’s rain. Here are 2 photos of it in “ex-works” condition. This vehicle has now been put into the van train, thus having its debut at Good Galore! (not bad for a grounded body!)

    On to this weekend, which saw us preparing the Fish van for its new colour scheme, whilst the Spring Diesel Gala was taking place. The aluminium body sides and ironwork was sanded, scraped and wire brushed in order to remove old flaky paint and to return the surface of the aluminium to a stable state, suitable for painting over. Areas where the ironwork was pitted was treated with red oxide primer. Some minor repairs to the bottom door runners were also enacted. These had dropped below the bottom of the door so weren’t supporting the door, making them hard to open.

    The results of the sanding can be seen in the below pictures, the leftmost picture showing the various items that have been sign written onto the panel, not limited to; BR double arrows from its time in BR blue as an SPV, a Blue Spot from its time as an Insul-Fish and yellow from its time attached to a ballast cleaner as the tool van.

    Today, with the weather being changeable, we opted to start painting the van into its undercoat. It was nice to spray something other than Bauxite or Bauxite undercoat!

    The eagle-eyed among you with notice that we have painted the headstocks and buffers in the body colour. this is an unusual, yet prototypical detail that is rarely seen in the preservation of these vehicles. Unfortunately, the rain started so the paint had to go away. Next weekend, it is hoped we can finish painting the west side and the south end.
    In other news:

    The Swithland Wagon Group have finished their restoration of our tank wagon, A6581. Tommy Lees, Keith Lloyd and David Wood have done a fantastic job with this wagon, and it looks great on the front road at Swithland Sidings. I for one am looking forward to seeing it and A6071 in the trains at Good Galore!

    30741415_10156215292351668_5451630480976357813_n
    Photo by Tommy Lees

    Lastly, we took delivery and put into store a rather exciting item! Hopefully, more shall be announced in the fullness of time.

    wp-15238218015903609158132716337280.jpg
    Photo by Jack Shaw
  • 25/03/18 We have painted!

    25/03/18 We have painted!

    Welcome to this week’s update from Quorn Wagon and Wagon! The weather was excellent the weekend just past, so we managed to paint B850498, the first van to be painted this year. Looking back to last year, we painted B852838 into undercoat on the 2nd April, so we are one week ahead this year!

    wp-15220437725128307197508280373234.jpg
    Warm sunny weather!

    On Saturday, we finished preparing the wood work on the van while the temperature rose sufficiently to begin spraying. The wood was painted with wood primer, where special care was taken to sand down the temporary numbers so that they wouldn’t show through. The iron work was painted were is was bear with red oxide primer.

    On Sunday, we went one step further and painted the van into undercoat. Sadly we must mourn the loss of our beloved compressor, Edward. This van proved too much and the motor burnt out!

    Despite threats of the “Beast from the East 3.0”, we are hoping to paint the top coat next weekend, whilst the Railway’s Easter Vintage Festival is taking place. Thanks for reading!

  • 18/03/19 Snow, Scraping and Sanding

    18/03/19 Snow, Scraping and Sanding

    A small update this week due to the weather. Last weekend, we had to turn the heater off in the yellow coach, this weekend we could have done with another!

    This weekend has focussed on B850498 to ready this vehicle for paint. We started by stripping old layers of paint by using a heat gun, as was successful on B780282. the heat gun proved of limited success, due to the wind and the temperature, so we cracked out the gas blowtorch. The gas torch proved very successful if a little vicious especially near the new roof sheet.

    Following the paint stripping, we sanded every panel using 40 grit paper. This cleared the small slivers of paint left during the stripping process and leaves a fairly even surface on the ply, ready to receive some primer when the weather is warmer. Unfortunately, we also killed our 2 sanders prepping this van, so the hunt begins for more!

    A few small jobs were completed: Fitting wagon label clips and repainting the number after sanding, in order to abide by GCR rules. This has been stencilled under the chalkboard so that it won’t be seen when the van is painted up.

  • 25/02/18 Roof sheets to the wind…

    25/02/18 Roof sheets to the wind…

    At the tail end of last weekend, I mentioned that we had prepped a roof sheet ready for fitting onto B762855. As it was still very much frozen upon arrival at Quorn, we shunted the vans down so that we could get the scaffold tower round all side of the van and be on even(-ish) floor.

    The Roof end hoops were stripped off, along with the old roof covering. The roof boards were scraped of roof adhesive and then brushed off all debris.

    The new sheet, having been rolled up in the week, was hoisted up on the roof and rolled out and positioned. One end of the sheet was fixed to the van using one end hoop, and then tensioned north to south, and fixed in place with the next roof hoop.

    The roof sheet was fixed along the side using stainless steel staples through the sheet and into the roof boards. The west side of the van (the side facing the running line/GUV and yellow coach) was positioned such that it could just be tucked up and fixed, which left the east side of the van with a huge curtain, as in the photo above. Curtainsides work for lorries, why not for box vans?

    Today, the roof was painted black using black bitumenous paint and the leftover sheet on the sides were trimmed level with the frame of the van. Other tasks completed today was the scraping of B850498. It was hoped the van would have tripped to Loughborough in the week for the welding to be completed. Unfortunately, this didn’t happen so it is hoped that the van is moved to the loco shed this week.