News and Updates

25/02/24 – Not bad, as doors go…

Good evening all and thank you for joining us on another update from Quorn. As has been the theme for the past few weeks, we’re focusing on the doors on the Palvan.

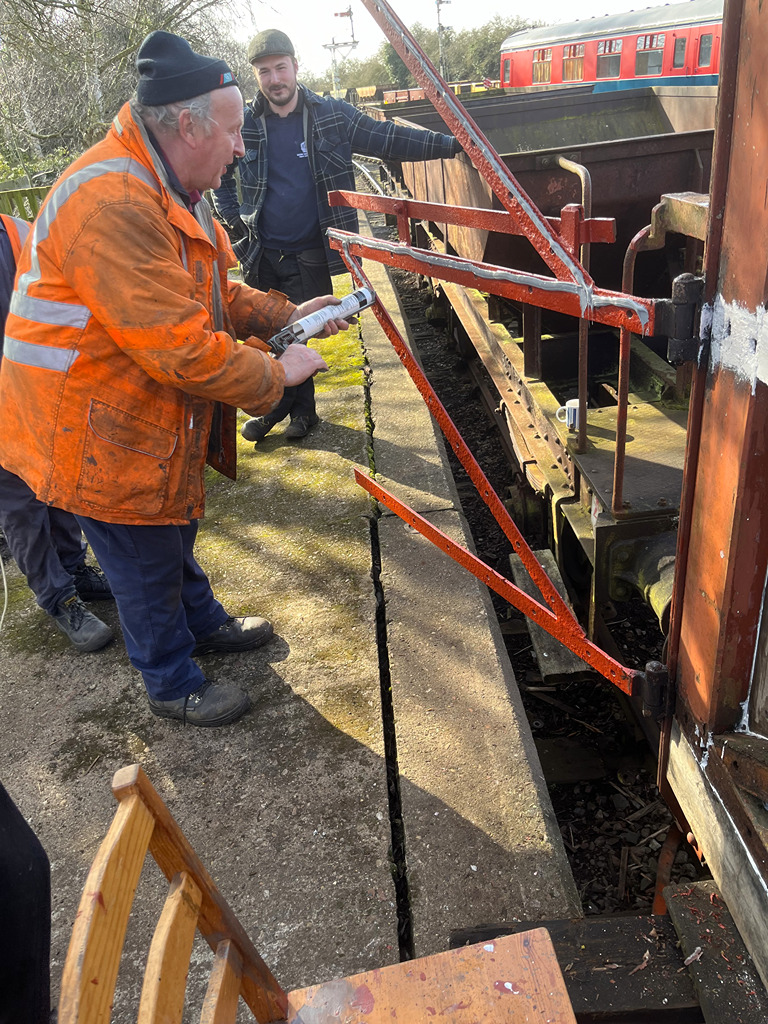
We started by removing the clamps from the door that had been assembled by the end of last weekend, which had sat with the copious amounts of glue curing all week. This was then lowered onto a temporary support on the floor and offered into the frame and to the hinges. All looked good, with the old holes lining up again where they were re-used. The front of the wooden frames were primed and the hinge offered back over with sealant applied.

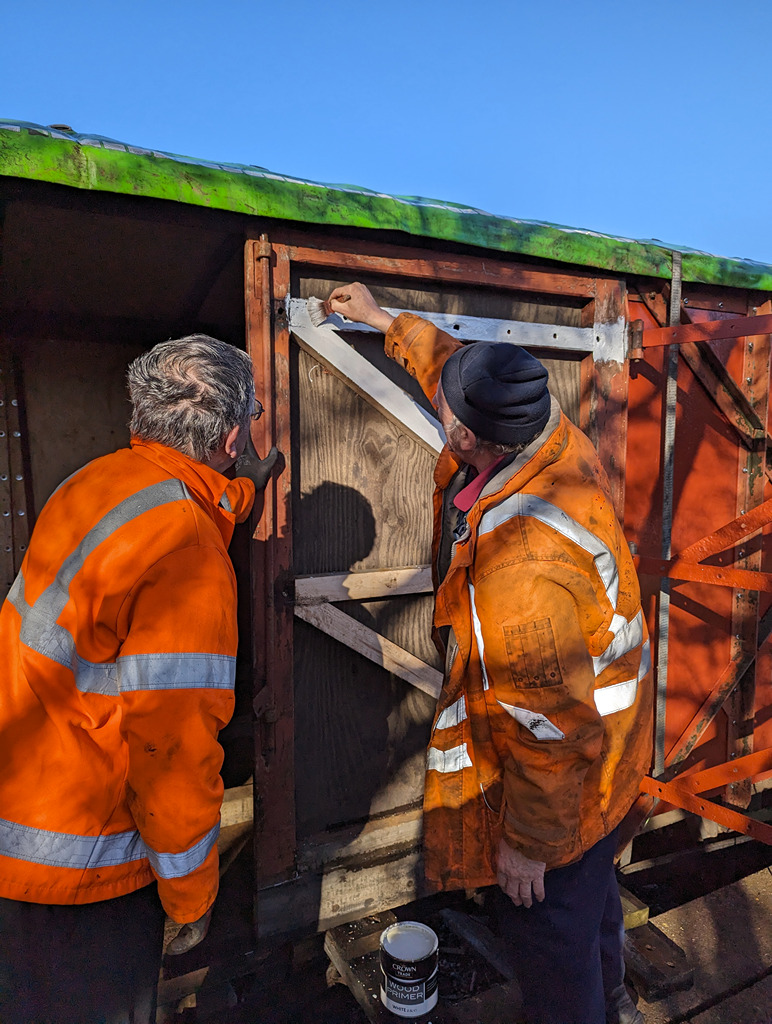
The door was slowly drilled and bolted into place, Ernie then followed and painted the rest of the door into primer while we started on removing and dismantling the other door of the pair.

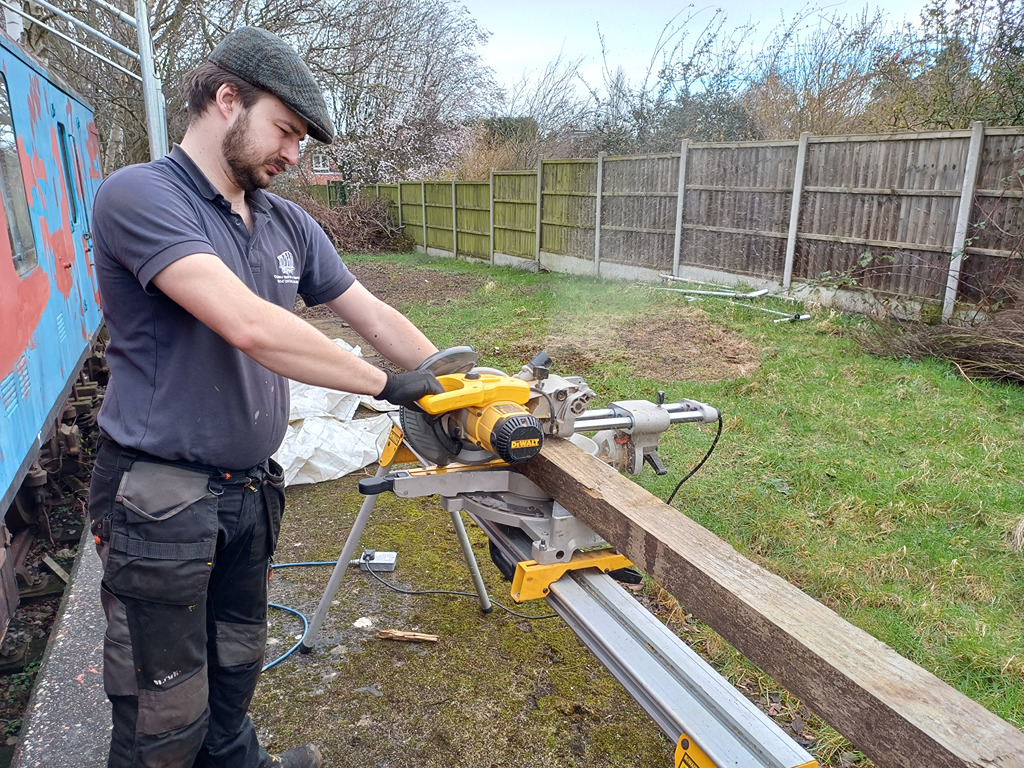
The other door wasn’t in as bad condition, and only 2 pieces needed to be remade, one horizontal member and one diagonal. While Nick cleaned down the hinges and Ernie applied red oxide primer, Barry and I made the horizontal member between us all we got the framework back together.

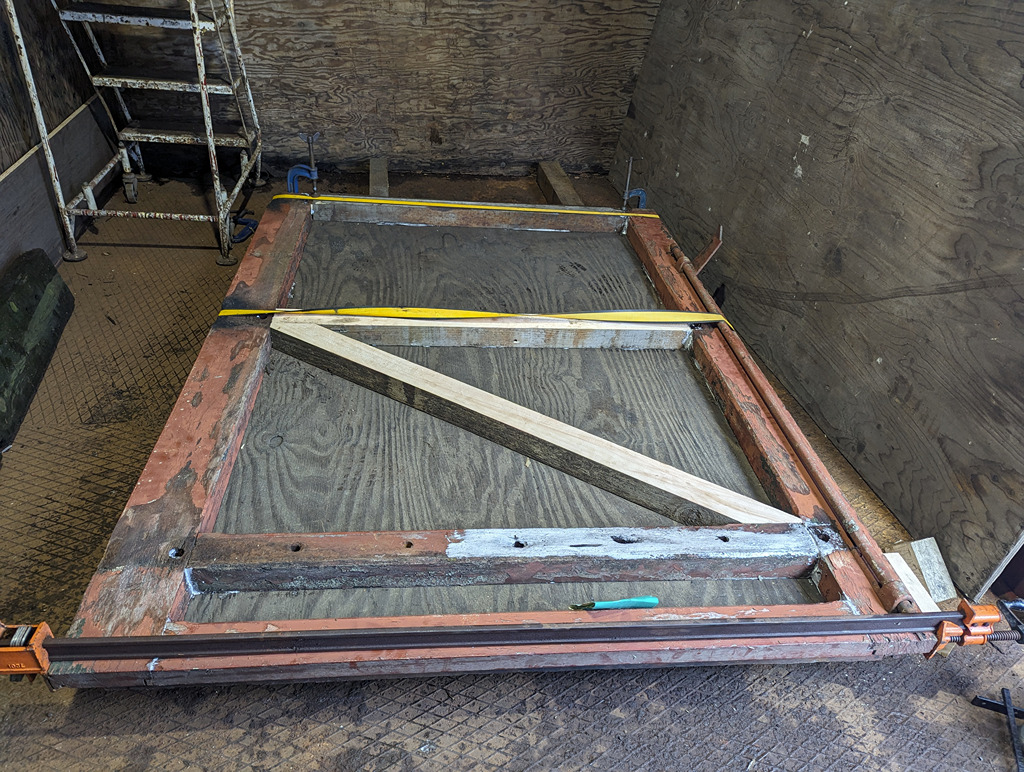
We opted to cut the ply sheet for the back of the door and then finish the door with the diagonal bracing as this isn’t jointed so could be put in later. We also cut the replacement door bottom, in the same fashion as last week which was glued, clamped and screwed together. The now fitted door had the excess length of the bolts removed.

The door was given the rather cold night to cure, until it was again lowered into position. I looked at the diagonal bracing that we removed and thought it wasn’t too far beyond hope, so applied some wet rot wood hardener to it. It may not last long, but it may outlast some of the other wood we’ve had to use; we shall see in time. Oliver helped me apply some glue to the bracing and it was fixed into position.

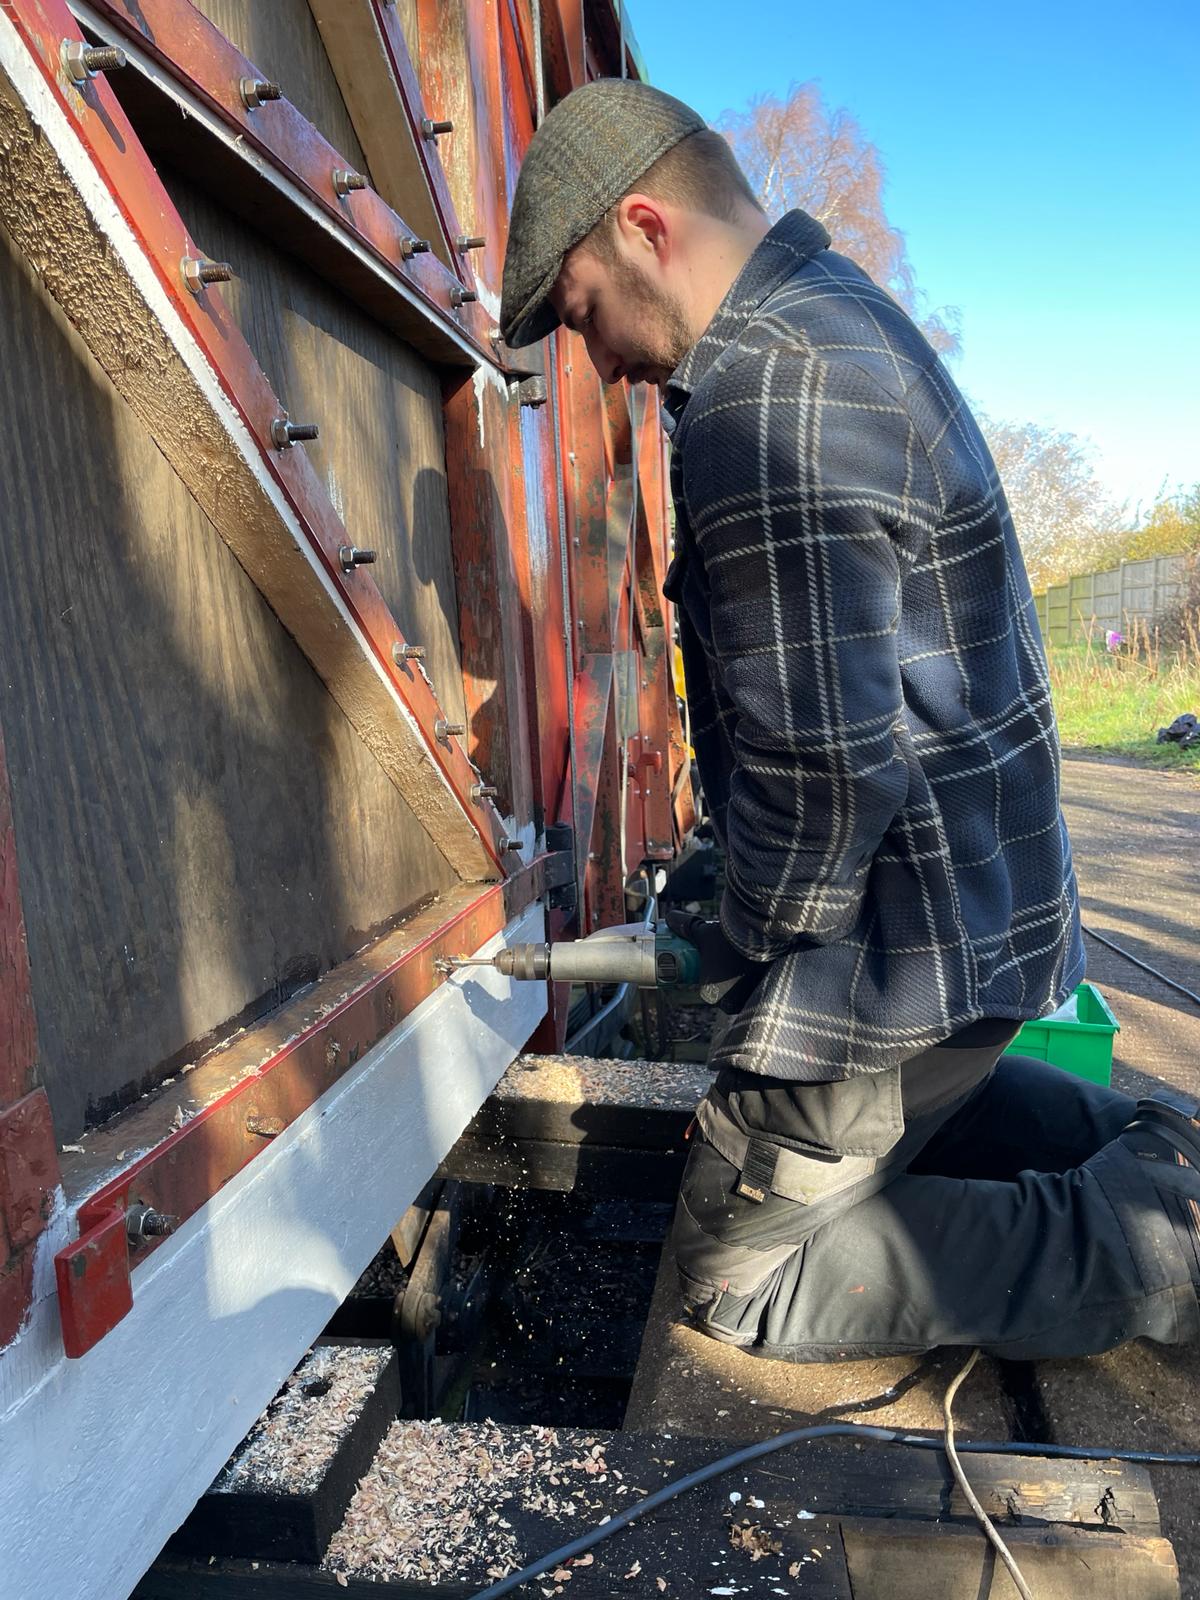
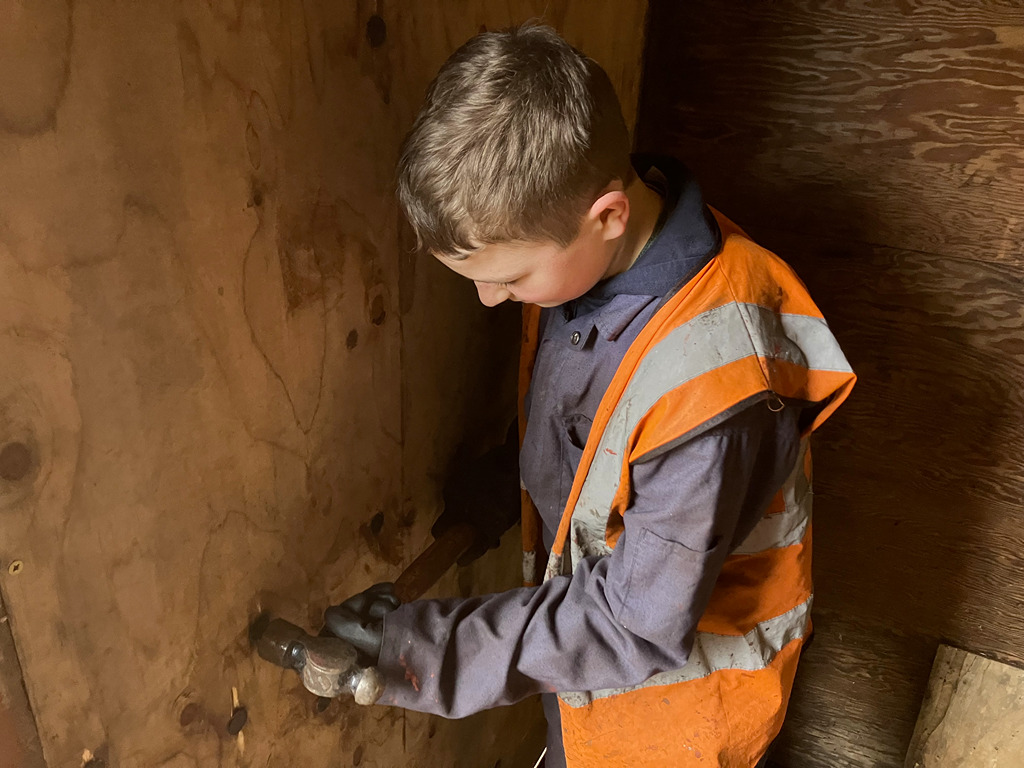
The same process was followed with this door, framework primed, sealant applied to the hinges, and then drill and bolt. Oliver can be seen greasing the shaft of the bolts prior to fitment,

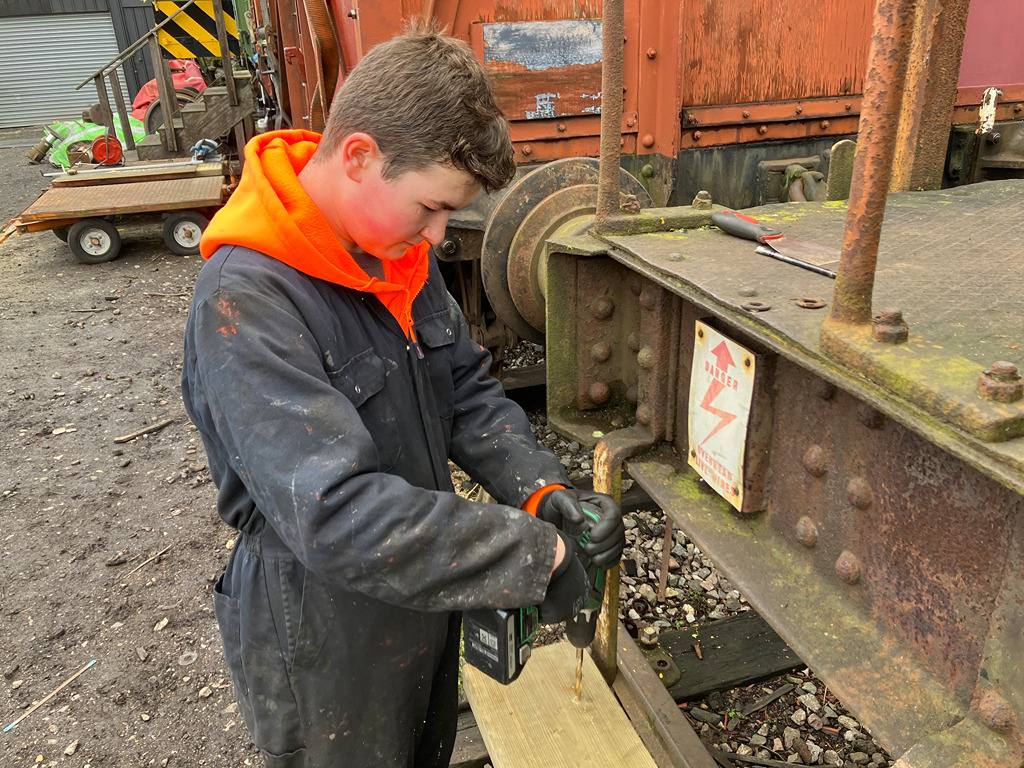
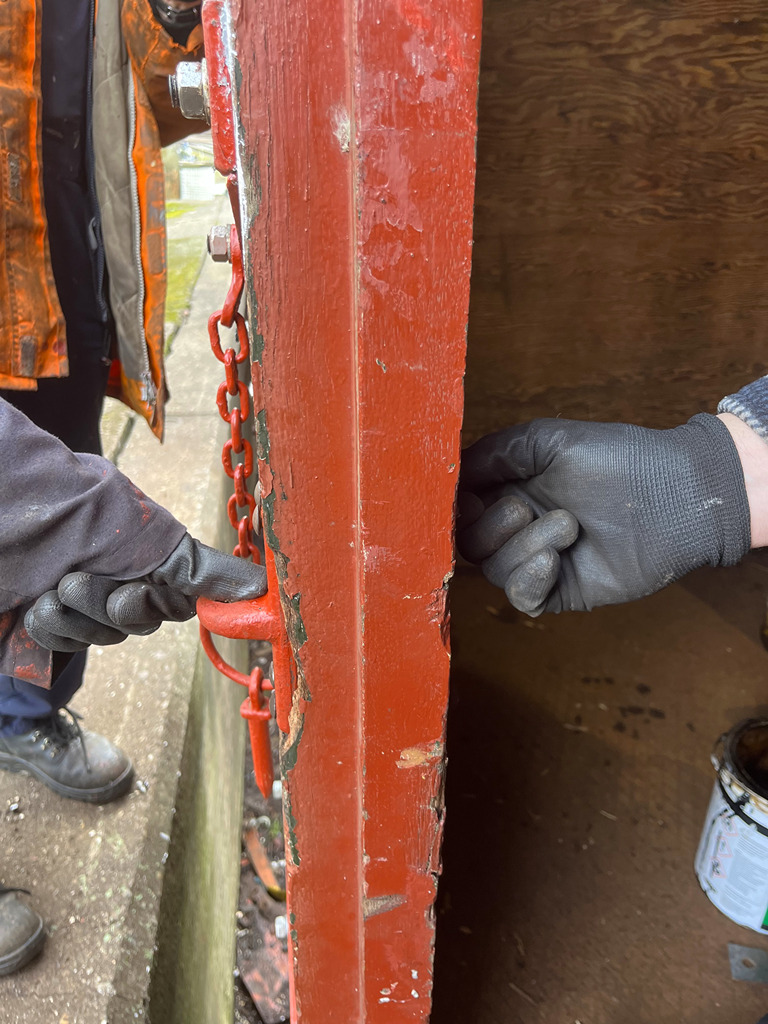
Dan and Tom started priming the door while the lock staple was refitted. Tom and Oliver had to make 3 trips to the nut and bolt van to find the right length bolts! The undercoat then came out, starting with the door fitted yesterday.

Dan, Tom and Nick continued undercoating, managing to cover both doors.

For now, that is where we will leave these doors until we are ready to gloss them. Our attention now turns to the East side to continue the work there, so hopefully more of the same next week. Thank you for reading!

18/02/24 – Hmm, not sure about these Palvan doors…

Hello everyone, and welcome to another update from Quorn. This week we’ve continued with the Palvan, making a start on the doors. We started on the dock side, and got cracking removing one of the two doors.

I went round the door and tried to undo any bolts that would with the impact gun (which is still one of the best tools I’ve ever bought!). Michael and Nick followed with the grinder to cut any bolts that had spun.

The door sort of crumbled off and was taken apart to its consituent parts. The top and 2nd horizontal members were salvageable along with the uprights, leaving everything else to be made new.

Before doing so, Barry and I retrieved our radial arm saw from the GUV and fixed it up ready to use. We dealt with a stuck motor and a non-functional start switch to get the machine fully functional. Its been invaluable to sorting out these doors because it makes it so easy to cut the tenons for the frame work.

Ernie cleaned up the hinges on the van and painted them in red oxide, making them ready to receive the door once remanufactured.

Nick, Charlie and Michael de-nailed some of the remaining planks from the loco shed roof to use as the bottom of the doors. These are the right deopth and thickness to use for a re-designed door bottom. We are having to do this as we have no pattern for the bottom of the door.

Barry and I managed to finish the day with the new horizontal members cut for the door, and dry fitted into the uprights. Dave and I started by measuirng and cutting the ply sheet for the back of the door. The frame was then glued together and the ply laid in and screwed down. The door was clamped together and then rolled over so the diagonal bracing could be cut and fitted.

Nick, Mark and the lads began by making a kit of parts for one of the Catfish, which has a cracked spring pocket on the top of the axle box. The lads had a small lesson from Nick on how the axle box is assembled, much easier without the axle there!

The diagonal bracing was cut and placed into the frame, with plenty of glue and 2 screws each just to hold them in place. Between the 3 of us we cut out the plank from the loco shed and made it into a pretty good door bottom, which we fixed to the bottom of the door with copious glue and screws.

The other half of the team replaced a foot step on each one of the Catfish, removing, cutting a new one and then treating them with preservative. Then the scrapers came out and they got to cleaning down more of the Catfish’s bodywork, getting them that one step closer to paint. Nick also finsihed off by undoing or cutting most of the bolts on the other door of the pair, getting it ready for next week.

Next week we’ll be continuing with the door, getting the finished one mounted and its partner off and rebuilt. Thanks for reading, and see you next weekend!

11/2/24 – Now we’ve done the other side

Hello everyone and welcome to this week’s update. We’re still continuing our charge on the Palvan, this time repeating the activities of last week, though this time on the West side.

First job on Saturday was to empty out one of the other Palvans at Swithland, lending assistance to the S&T team to move the stuff out of the van and into their stores.

Once back at Quorn, we made a start on fitting the side sheets into the Palvan. After some last minute trimming, the panels started to be dropped into the van, with me drilling the holes and Dan and Nick on the other side trying not to get the point!

Oliver, Mark and Tom put the nuts on the bolts and tightened the bolts down and therefore the sheets into the van, making the fixed walls now water tight once again.

The chalkboard rotten for this side so Charlie and Nick manufactured a new one and primed it. Dan finished off the priming. The chalkboard mounting position was measured on the east side and was replicated on the west ending up with one bracket being bolted on, waiting for the board to be fully painted up. The door hold back hooks were also fitted.

The interior boarding was refitted to each end using most of the original screws. Dan and I found and cut down some bolts for the vent that went through the top inner cladding board.

The inside of the van was tidied, ready for the next stage of the van’s progress which will be to start the doors. I also semi-dismantled one of our free standing lights to put up inside the van so that we can see what we are doing to repair the doors.

The injectors from the Test Car were also tested this week and passed all tests, which on one hand is great news but on the other it means there is something else wrong with the engine which we need to dig a bit deeper into.

I finish with some excellent news on the awards front, which you may have already seen on our Facebook page. The Heritage Railway Association awards were yesterday evening and both the railway and our friends at the National Wagon Preservation Group have walked away with awards. The railway won it’s award for the Railways at Work gala which we are very glad to be a part of, and the NWPG won their award for their fantastic MGR train. Congratulations to those and all other winners and runners up.

Thanks for reading, and see you next week for more antics from Quorn

04/02/24 – Applying ourselves to the Palvan

Hello everyone. After the excitement of the gala last week with goods trains running around, this one has been a bit more sedate on the train front, but just as productive for us.

We’re continuing with the Palvan, and made a start this week by removing the interior boarding on the south end of the van, so that we could start removing the side sheets on the west side.

Now that all bolts could be accessed, the team made quick work of cutting the nuts in half with the grinder and then splitting the remaining portions so that the bolts could be removed. Some bolts had to be split using a chisel due to a lack of grinder access.

Once the side panels had been removed, the team split into two. One side focusing on cleaning down the metalwork and priming it while the other half fitted the side sheets that had been cut last week.

With the east side looking quite smart with the side back in, the finishing touches were added including the chalkboard and the door restraining hook, which had been missing when we’d got the van.

Nick and I started cutting the boards for the East side, after first checking the measurements on the removed panels. The 3 boards were cut in quick succession, with Nick able to prime them to get them ready for next week.

Dave and I started to have a look at a patch of rotten plywood on the south east corner of the van. As we’d have had to remove some of the interior framework we opted to perform a patch repair, cutting out the old board as best we could and then making a new patch to fit in.

As we had to slide the pieces in, this had to be made in 3 sections that slotted together. As we did this, we discovered how the woodwork of the van was initially built. The hardwood framing was built in the carpenter’s shop at Wolverton complete with cladding panels screwed to the frame, and then the entire assembly bolted into the uprights of the van. As such, we’d have had to have stripped down all the interior frame to have replaced the plywood, so this is something for us to bear in mind with this van in the future!

Nick cleaned and primed some of the metalwork while Dave and I cut the bits of board out, and then the 3 of us fettled them to get the 3 pieces to fit in the whole nicely. The pieces were then slathered with both wood primer and PVA with a few woodscrews for good measure!

With the patch finished, there was just enough time to have a cuppa before heading home. Next week we’ll get the East side in the van, and probably get some sealant around all the edges. The next step is the doors, which will have to come off one by one to make sure we get them sorted as best we can. Thank you for reading and see you next week!

28/01/24 – Tanks for a Great Steam Gala

Hello and welcome to a special Winter Steam Gala update from the team.

Throughout the weekend it’s been great to see both the tank train and the mixed freight running.

Work has continued on the Palvan B781908 with Barry, Richard, Ross and Ernie removing the East side rotten panelling. Some chisels needed a little TLC for splitting the rusted nuts.

Oliver, Tom and Mark helped Nick scraping the Palvan framework whilst Ross removed the old screws from the internal panelling framework.

The panel sizes were checked and three sheets of 3/4″ plywood were cut by Ross and myself; Oliver helping with sanding the outer face.

The cut sheets were cleaned down and propped up inside Nick’s box van. The edges and outer faces were then treated with wood primer.

The scraped framework on the Palvan was checked for correct gaps for the new panels to fit neatly. Some minor adjustment was required before a coat of red-oxide primer was applied to the inside faces of the framework.

With the Palvan framework and new side sheets painted and left to dry, our attention turned to one of the two catfish wagons that have been brought into the siding ready to start restoration work.

DB983393 will be dealt with first as this is considered to be the easier of the two restorations. DB993560 will need a greater amount of attention to the rusted and dented bodywork. Both wagons will require brake system overhaul, however to start with the team got stuck into some basic bodywork scraping.

Thanks for reading, join us again next week for the next episode of Palvan restoration; all the best, Dave

21/01/24 – Another Tank Completed !

Hello and welcome to another update from the team at Quorn Wagon & Wagon. Work has continued on the Palvan B781908, and we put the finishing touches to tank 3777.

It is not often that everyone in the team can volunteer at the same time; however this weekend with ten of us at Quorn, we took the opportunity to grab a team pic.

From the left, Jake, Ross, Charlie, Nick, Oliver, Dan, Mark, Tom, Barry and myself. Richard and Thomas were unfortunately unable to join us.

Over the last few weeks we have been planning, measuring and procuring new aluminium Esso logo plates for tank 3777. We have had these professionally cut, drilled and rolled to the correct curvature for the tank.

At Rothley on Saturday myself and Ross double checked them for fit on both sides of 3777. The Esso logo templates were also prepared. stitched together and checked for size on the plates.

The plates were de-greased then sprayed both sides with Etch-Primer, which was left to dry then over coated with White Enamel.

Meanwhile back at Quorn the rest of the team got stuck into changing the defective south end buffers on brake van B954268. The buffers were removed, the headstocks cleaned, painted and new packing blocks prepared and painted.

The replacement buffers from our stock were then fitted.

The two buffers on the south end of Palvan B781908 were also found to be defective with rotating heads; these were duly removed and replacements fitted from stock.

The painted plates for tank 3777 had dried nicely dry overnight at Rothley; so Sunday morning Ross and myself got to work chalking the back of the template, marking the plate centre line and attaching the template to the first plate.

The oval border and Esso logo were traced, then the template moved to the second plate and the process repeated.

First the Esso logos were applied, Ross doing one plate whilst I did the other.

The blue oval plate outline was then applied.

Back at Quorn the wind was starting to pick-up, so some extra securing straps were fitted to the tarpaulin covering the Palvan, and the site was tidied, making sure things were secured; the defective buffers making great tarpaulin cover weights.

Whilst the red and blue paint on the plates was drying Ross and myself took a rare trip on the train up to Loughborough; the rest of the tank train was seen at Swithland.

As the light was fading, but before the wind picked up too much, we were able to fit the finished Esso plates onto tank 3777. M10 bolts were fitted with sealing washers to each side of the plate before being secured to the wagon with locking nuts.

This completes the restoration work on 3777. We are very much looking forward to seeing it coupled into the tank train very soon.

Thanks for reading, join us again next week for the GCR’s Winter Steam Gala.

14/01/24 – Time to dry out

Hello everyone and welcome to this week’s update. We’ve focused on the Palvan this week, with the main push to get the roof boards on. Firstly, thank you for all your comments on the Palvan. We are aware of their mainline reputation and as such, the van will have a load and we are planning a wheelset swap as the profile on the current wheelsets would fail a fitness to run exam.

Nick went early to Harlow Brothers in Long Whatton to collect the four sheets of 10ft by 5ft plywood we use for the roof. Originally this would have been one big sheet of plywood, but somehow we struggle to find a source for those so make do with joining sheets together.

While Thomas Oliver and I cut the boards to the right sizes, Nick and the rest of the gang changed another buffer on the north end of the Palvan. The other buffer was found to be very soft, to the point of compressing when buffering up to the tool van.

With the sheets cut, we started to get them onto the roof, starting with the north end. The first sheet took quite some lining up, and we had to accept a squiffy side over hang to get the sheet square with the end of the van. Thankfully we can deal with this before the roof sheet is fitted.

The first sheet was bolted down, and a joining strip fixed to the loose end to aid in fitting the 2nd sheet. Dan and Tom painted the first sheet in an aluminium roof paint we’ve had kicking around for ages. The second sheet was fitted in short order and was bolted down in the failing daylight.

The last 2 sheets were bolted down on Sunday morning, and got a coat of paint. The last sheet needed some trimming due to the issues we’d had getting the first sheet lined up.

We then unfurled a lorry curtain and set Tom and Dan to removing the straps from the curtain. This was while I worked on trimming the board edges to remove the worst of the stepping between each board.

Once the strapping was removed, we cut a 20ft section from the curtain and got it onto the roof. There wasn’t time to fix it down, so we’ve used 3 ratchet straps to hold the roof sheet down while we get to fixing it.

Last job of the day was a tidy job, which involved 2 trips to the skip with Danny. Next week should be more of the same with either the roof sheet being fixed down, or a start made on stripping the side sheets out for replacement.

7/1/24 – Happy New Year back at Quorn

We start 2024 back at Quorn Wagon Repair Sidings, getting stuck into work on Palvan B781908.

You may remember a couple of weeks ago that the roof from the Palvan was completely disintegrated by the strong winds, leaving most of the rusted screws still in the wagon.

With Nick, Ross, Mark, Tom, Oliver, Dan and myself on-site the Palvan was soon cleared of the last items of rubbish, a filing cabinet and the very sodden remains of some old paperwork. Danny helping out taking the rubbish to the skip.

Myself and Ross got to work removing all the old rusted screws and unbolting the roof end hoops.

Nick, Oliver and Dan removed the north west corner Oleo type buffer that had lost pressure and was stuck in. The bolt threads were cleaned and oiled before a replacement buffer from our stock was fitted in place. The south end of the wagon was fitted with a screw type coupling rather than the (correct for a Diagram 1/211 wagon) instanter coupling. Oliver helped Nick replace this with a correct instanter type coupling.

Dan helped Tom cleaning up the roof end hoops, then painting them in red-oxide primer. These were then stored away safe for when they are needed for the new roof sheet fitting.

Any remains of tattered roof sheet were removed and the above door noggins were unbolted, although most of the bolts were badly wasted causing them to snap off rather than unscrew.

The internal secondary protective ply panelling side sheets were removed; these will not be re-fitted as they serve little purpose for our use of the wagon as it will not be used for carrying palletised goods. The sheets will be saved for possible re-use elsewhere. The clalk-boards & brackets were removed; and as the rotten side sheets will be replaced, Ross was using the hammer and punch method of seized bolt removal.

Measurements were taken of the wagon in preparation for ordering the replacement roof sheet wood. As we still haven’t found a source for a like for like replacement of the full size sheet of 17’11” x 8’8″ we will do as we have successfully done on other vans, and use four 10′ x 5′ sheets of 1/2” plywood cut to width and jointed together with the strips of offcut material.

All the top faces of the roof metalwork were scraped and cleaned of any rust, then given a coat of red-oxide paint.

All twelve of the large door hinges on the Palvan were partially seized up making opening and closing the doors very difficult. Nick and Ross used the oxy-propane to loosen up the hinges after which they were oiled.

Futher detailed measurements were taken for the replacement side panel sheets; including a count-up of the number of new bolts required. Six sheets of ply from our stock were assessed as suitable to use for these replacement sheets and put aside ready for cutting, painting and fitting.

We also decided that we should re-start the work on getting Test Car 2’s generator up and running again. Ross took a look at removing the injectors, one of which was decidedly wet and discoloured compared to the other two. We intend to send these away for testing, and refurbishment as necessary.

Our shed has also suffered from the recent poor weather; a window frame and glass pane had become very loose. This was dealt with by fitting a sheet of ply.

Thanks for reading, join us again next week when we aim to continue the progress with Palvan B781908.

We’ll leave you with another pic of our two recently restored tanks A6090 and 3777 that we hope to see running during the up-coming Winter Steam Gala, all the best, Dave

31/12/23 – Tanks for 2023, Here’s to 2024

Lets take a look back at the last 12 months. Despite some appalling weather during 2023 we have still completed quite a few restorations, the team has grown too. We had a well supported Open Weekend during which Test Car 2 made it’s first demonstration test train runs in preservation. The team also played a big part in the organising and re-enacting during the award winning Railways at Work Gala Event. Both events featuring the display and operation of many of our fleet of restored goods wagons.

During the GCRs 50th Anniversary Event, we were proud to see 34 of our restored wagons being used in the 9F hauled 50 wagon demonstration goods train.

We’ve had a few new arrivals during 2023; four tank wagons, 1802, 1919, 3777 & A6090; an A type container, and George (our 3rd Brush Electric Pony). We’ve also had one departure as well being the Warflat, 8127.

Restorations completed during 2023 were: Tank 3711, Plate Wagon E212315, Pipe Wagon B740654, Coal Hopper B425356, Electric Pony Tug Kiki, Tank A6090 and Tank 3777.

Other work has included making a start on the preparation for repaint of the GUV M94052, and clearing out Palvan B781908 ready to start restoration.

Repairs have been carried out on Test Car 2, Brake Van B954268, ShocVan B852838, Van B777171 and Edward the Hydrovane Compressor Trailer.

We opened up Test Car 2 to visitors on a number of occasions, including the Diesel Gala, our Open Weekend, the 50th Celebrations and for a Nottingham Trent University students day.

Ross and myself took a trip up to see the Barrow Hill Engine Shed Society and spent a very enjoyable evening talking to a group of 25 society members about our wagon restoration work at Quorn and also Test Car 2.
We released updated versions of both our Pocket Stockbook and also the Test Car 2 booklet.

Thank you Dave for compiling the end of year review! Onto the what’s happened this week then, and unsuprisingly it was more work on 3777. The Tank Train has been running betwixtmas, which was a welcome sight!

On Tuesday I popped to Rothley to carry on signwriting, this time applying the number to the tank four times. I also marked out and masked the Commuted Charge symbol and the Yellow star for Nick to apply white undercoat to. Nick also fitted the vacuum release chord.

The ‘Fast Traffic’ stars were applied on Wednesday, along with the first coat of yellow on the CC and Yellow star.

On Thursday Dave came down to signwrite the ‘Esso Petroleum Company Limited’ wording on the East Side of the barrell. I had set myself a side project of making a portable speaker box to play music through for which I collected the speakers and identified a box for.

On Saturday Dan, Dave and I finished off the solebar signwriting and the Commuted Charge Symbols. The was one slight hitch with the vacuum release chord start, so this got painted out to be re-applied. Nick, Mark and Charlie went to Quorn to tidy up the Mess coach, ready for us to reutrn to it.

The tank was pulled outside on Sunday so we could wash off the dust generated by the DMU Group, after which it went back inside the shed. Dave re-applied the vacuum relase star, just a touch to the left of where it was. Dave and I finished off by applying yet another coat of black gloss to the upward facing parts of the solebar to remove marks of where we’d all been leaning to do the signwriting.

Afterwards, the three of us headed to Quorn, put the remaining stuff away from Rothley, and then pumped the tyres up on the Volvo.

That leaves the only thing to sort out for 3777 to be the Esso plates which I have a plan for, but you shall have to wait to see what I do. That wraps up this update, and indeed this year. Thanks for all your support over the year, and hope you have a good evening. See you next year!

24/12/23 – Merry Christmas

Welcome to this weeks update from the team at Quorn Wagon & Wagon.
Wishing everyone a very Merry Christmas.

On the run up to Christmas the team has been busy again with work on the two tank wagons, but we’ve also had to tidy up some damage caused by the high winds this week.

On Tuesday we progressed work on A6090. Whilst Ross and myself chalked and painted the west side Esso logos, Richard took the plunge and had a go at some signwriting too, making a superb job of the Tare and Wheelbase text on the east solebar and also the Tare on the west side. Nick attended to the vacuum hose and dummy end seals on 3777 and painted a few more of the hard to reach areas of the underframe.

Ross then applied the south tank-end number whilst I did the west side number and undercoated for the commuted charge symbol square and star.

I finished the day with the north tank-end number.

On Thursday Tom, Nick and Mark continued with the underframe painting on tank 3777.

Tom also took a look at the axleboxes on A6090, extracting any emulsified oil before replenishing with fresh oil.

During a visit to Quorn later in the morning the team were met with the aftermath of the strong winds. Palvan 781908 which we had cleared out in November ready to start restoration, was looking somewhat battered, the roof missing completely and disintegrated by the winds.

Saturday saw Nick, Ross, Richard and myself at Rothley with the signwriting brushes out again. Ross began with the large tank-side stars on the west side of 3777 whilst Richard applied the Wheelbase text to the west side of A6090.

I busied myself with the Esso Petroleum address text under the number on the west side of A6090.

A chalk line was used to mark the tank barrel centre-line on 3777; this was used to position the Esso Petroleum Company Limited large text template. Ross then traced the text to produce the chalk template on the tank barrel ready for painting.

Richard applied the corner numbers on A6090, whilst Nick applied another coat of yellow to the commuted charge symbol squares and stars.

I chalked out the templates for the Charles Roberts builders plate and the registration plate on the west side of A6090, then applied the paint.

Ross continued on 3777 making a start applying the tank-side lettering.

On Sunday Mark, Tom, Dan, Oliver , Ross, Nick and myself were on-site. Ross, Dan and myself continued with signwriting whilst the others went to Quorn to do some tidying up; also calling in at Swithland to check over and carry out Fitness to Run exams on the tank train.

Ross finished off the west tank-side lettering to 3777.

Dan also working on 3777, applied the east side Tare, Wheelbase & Load text followed by the west side Wheelbase text.

I applied the east side Builders and Registration plates to A6090.

Mark also went round with the black paint tiding up any last bits and I dealt with the final bit of signwriting on A6090, the commuted charge symbols.

Apart from a vacuum pipe leakage test and fitness to run exam, the restoration A6090 is now complete; the tank now very much smarter than it was when it arrived back in August. We’re looking forward to seeing this marshalled into the tank train in the New Year.

Thanks for reading our update, all that remains is for the Quorn Wagon & Wagon team to wish all our followers a very Merry Christmas, all the very best, Nick, Ross, Dave, Richard, Barry, Mark, Tom, Dan & Oliver.